Schemas[edit]
The Schema Object allows the definition of input and output data types. These types can be objects, but also primitives and arrays.
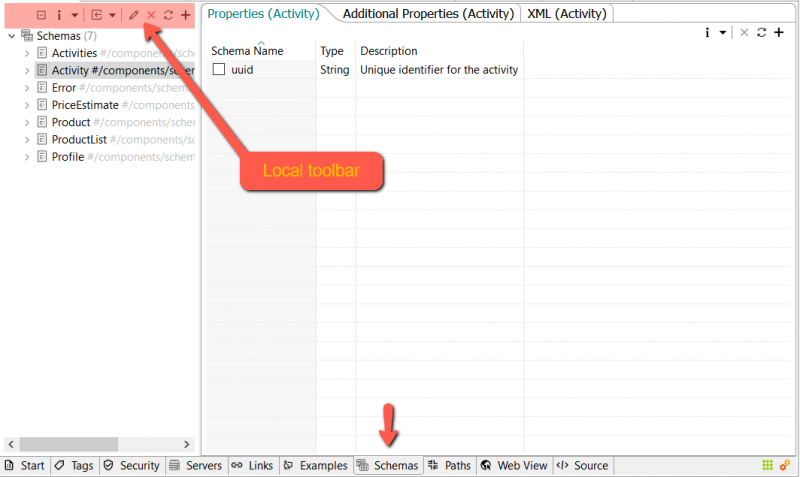
The schema view (tab) allows you to handle the schemas that reside in the components part of your OpenAPI file.
To manage your OpenAPI schemas, select the Schemas tab at the bottom of the editor.
Add New Schema[edit]
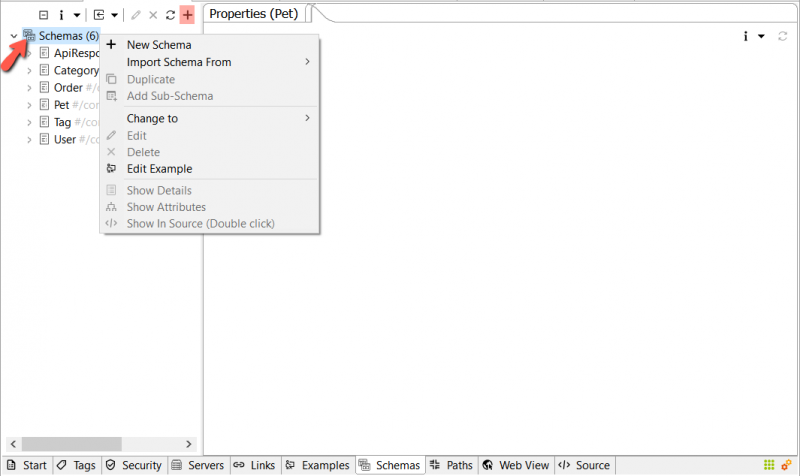
You can add a new schema by clicking the + (plus) button from the toolbar or right-clicking the node named Schemas in the Schemas view, then selecting New Schema from the popup menu.
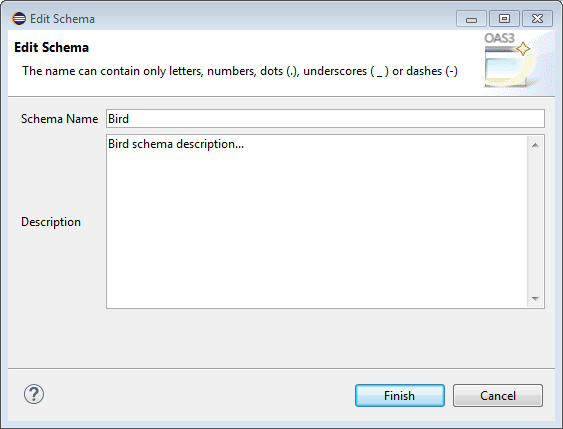
Then a wizard appears. Fill in the schema name, type, and optionally the description then click Finish.
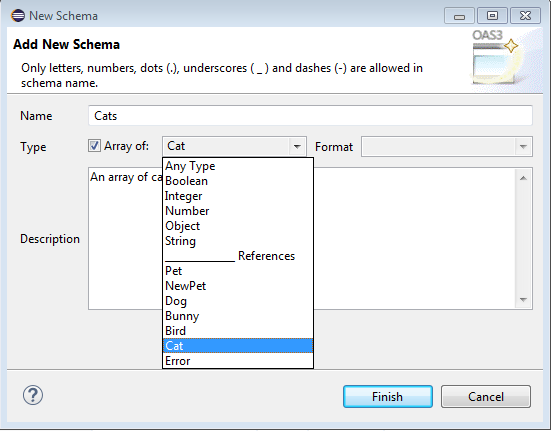
In that wizard, you also get the possibility to specify:
- Whether the being created schema is an array of schemas by (un)checking the checkbox named Array of
- Whether it's of primitive type (e.g., string or integer) or refers yet to an existing schema. Pick a type from the drop-down box right to the Array of button
- The type format from the Format dropdown. (enabled automatically when relevant)
Update Schema[edit]
You can view and edit schema properties (schema's themselves), additional properties, XML, and attributes in Schema Attributes & Propperties and Components Details views. If they're not opened, you can do so using the main toolbar at the top of of th window. Choose Windows -> Show View -> Other...' then Remain API Studio.

These views will react on schema selection. Please note that a schema property (as shown in the middle view above) is in turn a schema. So you can select a property and update it using Schema Attributes & Properties or/and Components Details as well.
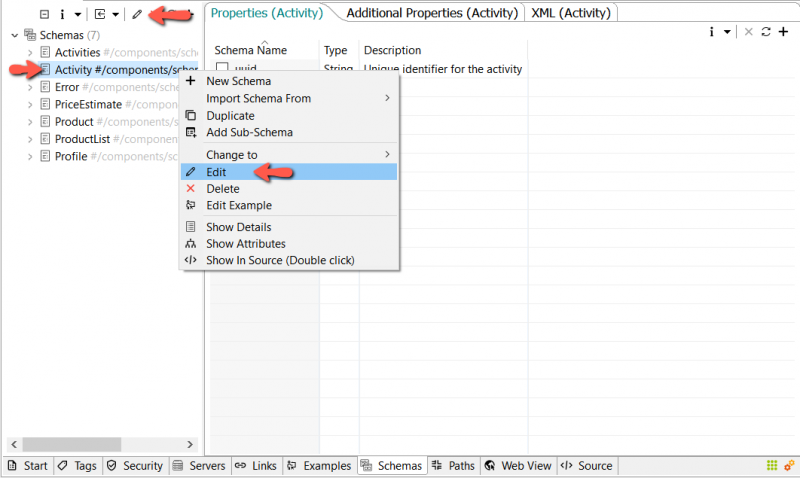
Alternatively, you can edit a schema name or description. Select a schema then either right-click it then select Edit from the popup menu. Or just click the edit icon from the local toolbar.
Delete Schema[edit]
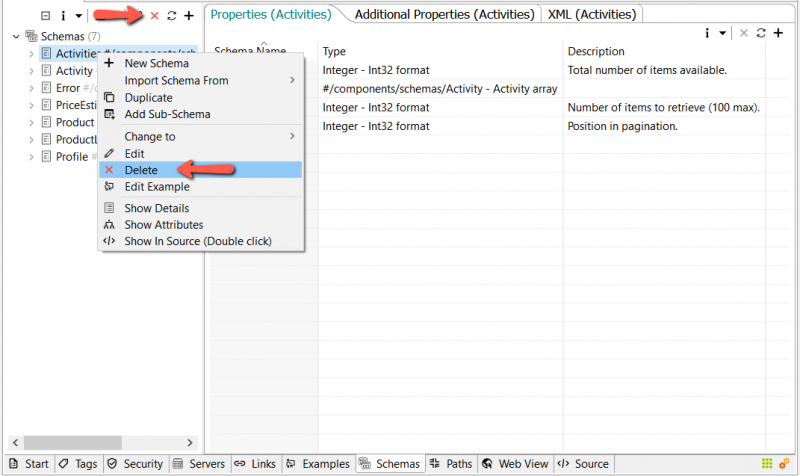
To delete a schema, select the schema to delete then click the delete icon (the red X) from the local toolbar or right-click the schema then select Delete from the popup menu.
Import Schema[edit]
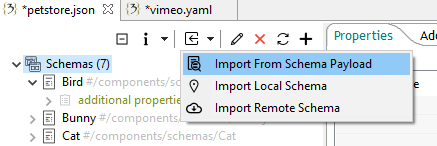
You can import schema into your openApi file by clicking the import (dorp-down) button from the local toolbar.
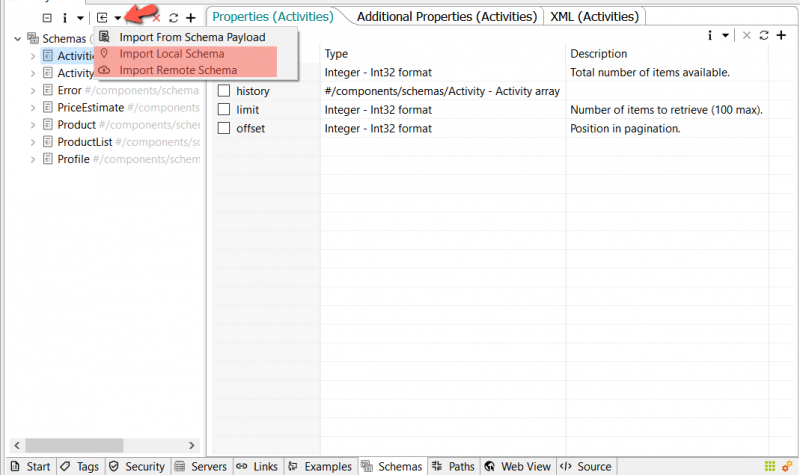
Schemas can be imported either from the local file-system or remotely by using a URL:
- To import schemas from the local file-system select Import Local Schema, then pick the schemas file from the file dialog you're prompted with.
- To import remote schemas, fill in the schemas location (e.g., http://example.com/api/some-api.json) then click the Read button or hit enter.
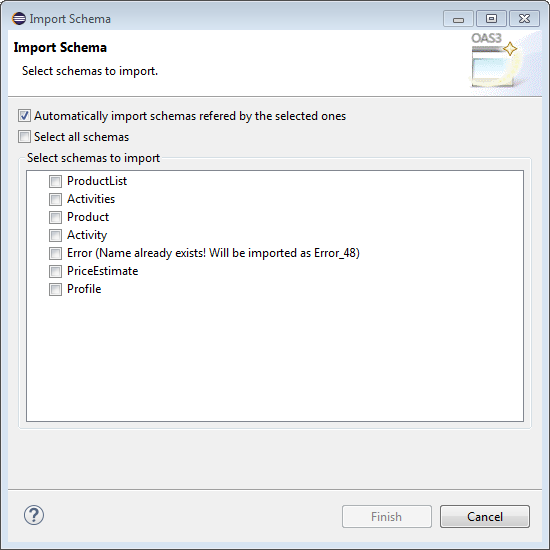
Then select the schemas you want to import then hit Finish.
Extract Schema From JSON Sample/Payload[edit]
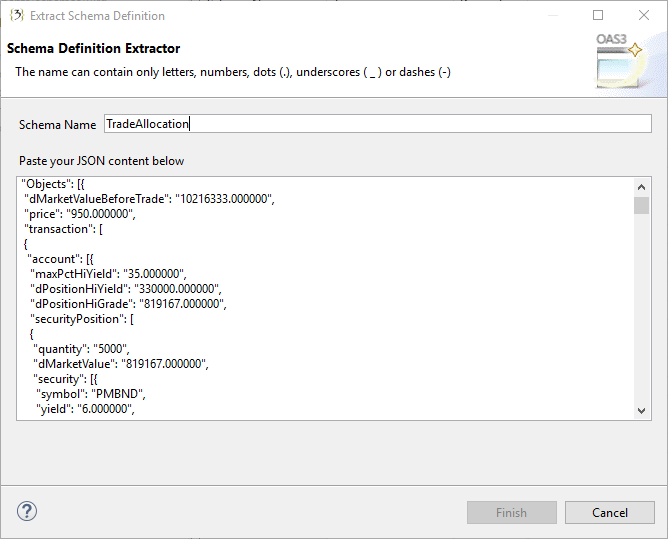
You can extract a schema definition from an existing JSON sample/payload.
Click the Import icon in the local Schemas toolbar or right-click any schema then select Import From Schema Payload
You're then prompted with a wizard, paste your valid JSON sample and fill in a name for the schema to extract. Then click Finish.
The newly extracted schema definition is visible in the Schemas view. It's added to the schemas under the components section in your API file.
Composite Schema[edit]
Add Sub-Schema[edit]
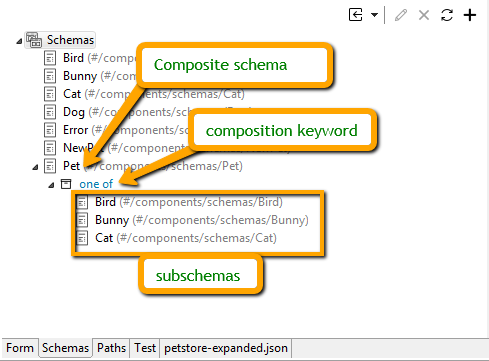
The OpenAPI Specification allows combining and extending model definitions, in effect offering model composition.
Example of a composite schema. oneOf in this example takes an array of object definitions. A response payload MAY be described to be exactly one and only one of them:
        ...

        components:

          schemas:

            Pet:

             ...

             oneOf:

               - $ref: '#/components/schemas/Bird'

               - $ref: '#/components/schemas/Bunny'

               - $ref: '#/components/schemas/Cat'

             ...
To combine schemas using specs' keywords anyOf, allOf, oneOf or not. That is, add a subschema to an existing schema (making it composite), right-click a schema then select Add Sub-Schema from the popup menu.
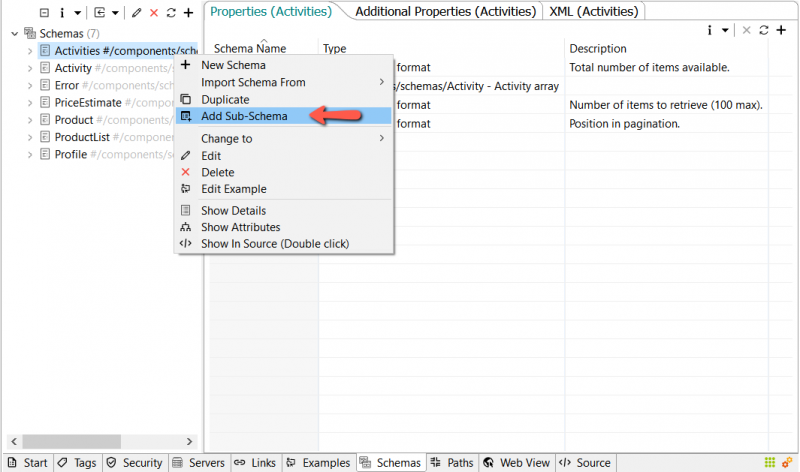
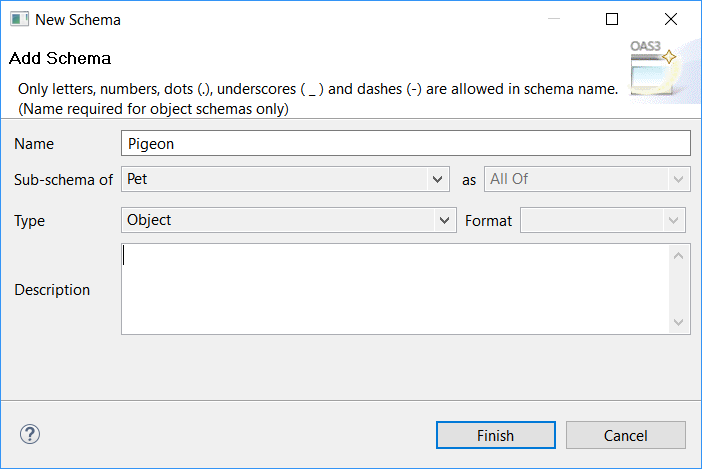
Then fill in the wizard you're prompted with. You don't have to fill in the name if you merely want to add an existing schema as subschema (That is, you picked an existing schema as type from the drop-down box beside the Type label).
Please note that if you fill in the name of the subschema you're about to add, then a new schema will always be created, added to the components/schemas section. then added as subschema. This comes handy if you wat to create a new schema then refer it from a composite one in one go.
Then hit Finish.
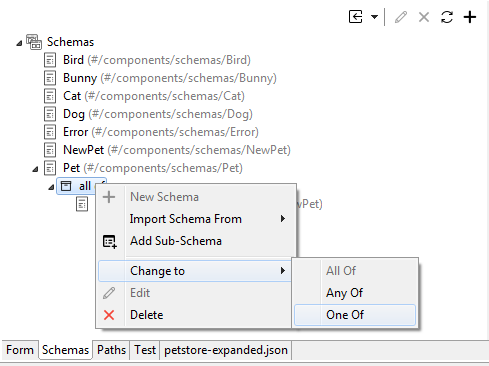
Change Sub-Schema (composite) Keyword[edit]
The relation between a composite schema and its subschemas is specified by these keywords anyOf, allOf, oneOf and not.
To interchange between relations specified by anyOf, allOf, oneOf. Click the composite keyword (as shown below) then select a new relation from the Change To submenu.
Schema Properties[edit]
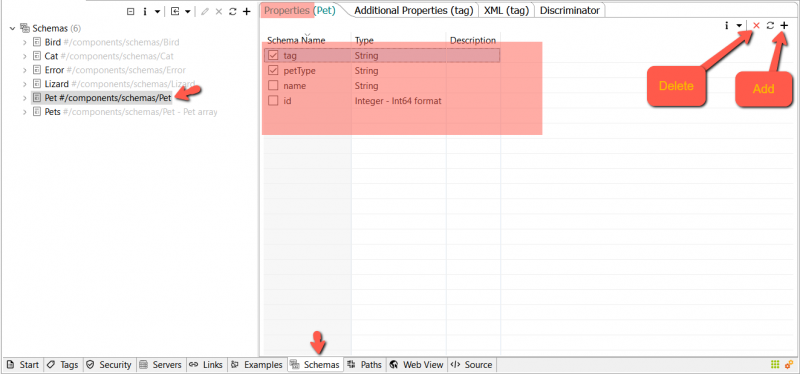
A schema property is a schema in its turn. To view schema properties, select that schema, then select the Properties tab. Use the local toolbar to add or delete a property.
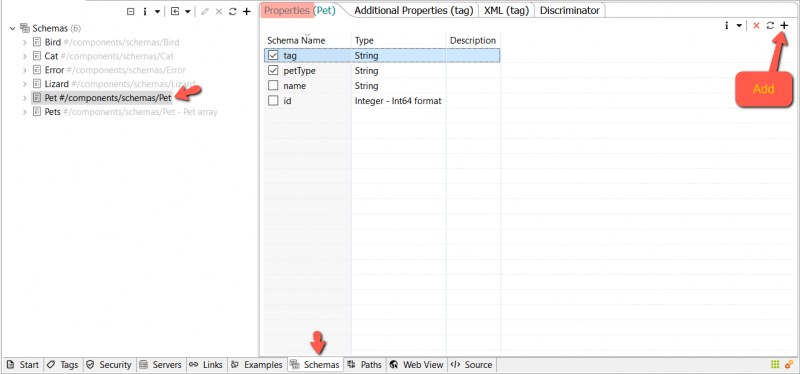
Add a Schema Property[edit]
To add a property click the + (addition) button from the local toolbar.
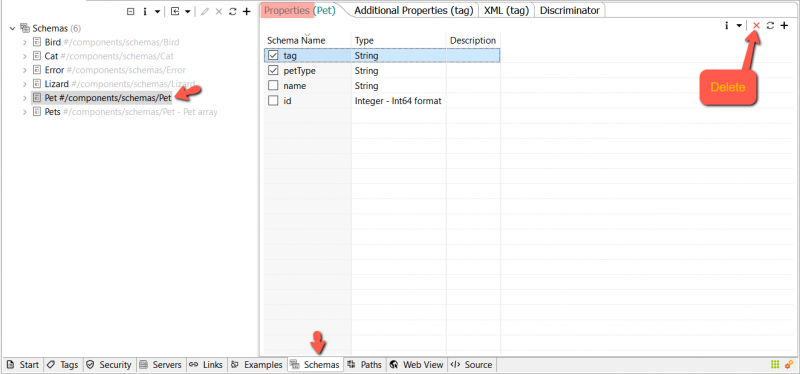
Delete a Schema Property[edit]
To delete a property select it first, then click the delete button X from the local toolbar.
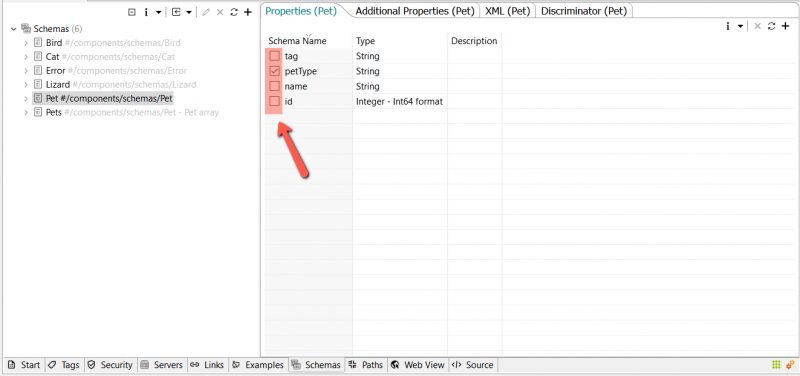
Set Schema Property As Required[edit]
Select the schema you want to edit, go to the Properties tab then check the check-box beside a property to make it a required one. Uncheck it to make unrequired which the default behavior.
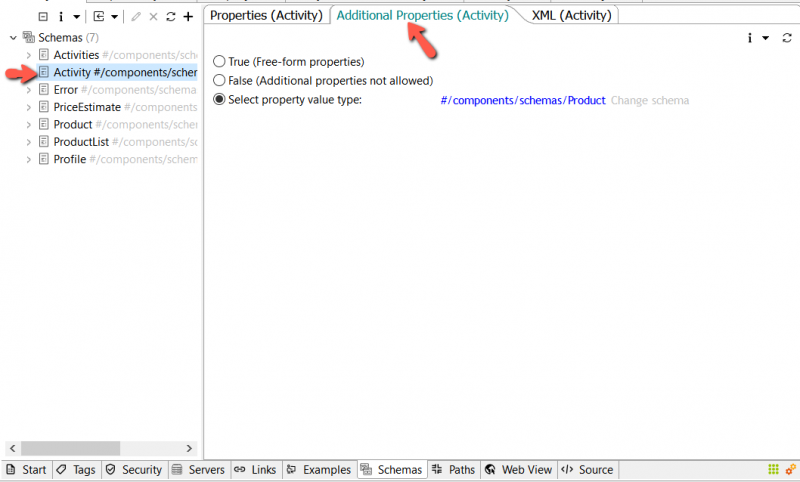
Additional Properties[edit]
The value of the additional properties can be boolean or object. Inline or referenced schema MUST be of a Schema Object and not a standard JSON Schema. Consistent with JSON Schema, additional properties defaults to true.
To view and add additional properties, select a schema, then click on the 'Additional Properties' tab.
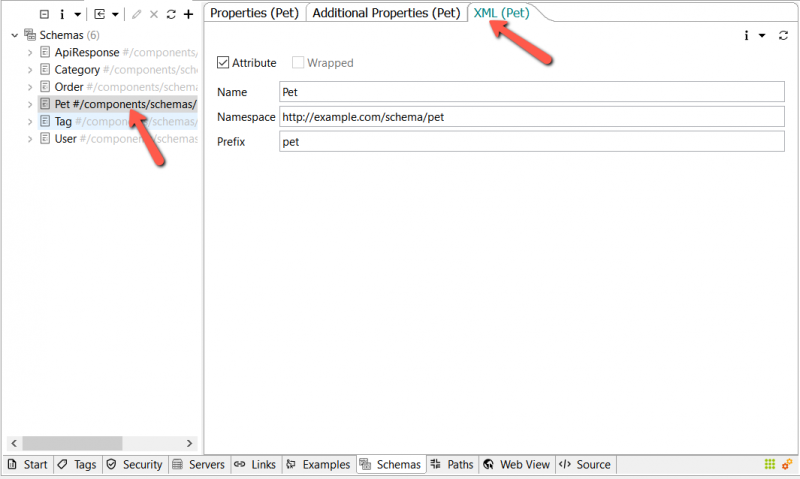
Schema XML[edit]
To edit a schema XML definition, click the schema then select the XML tab from the right tabs.
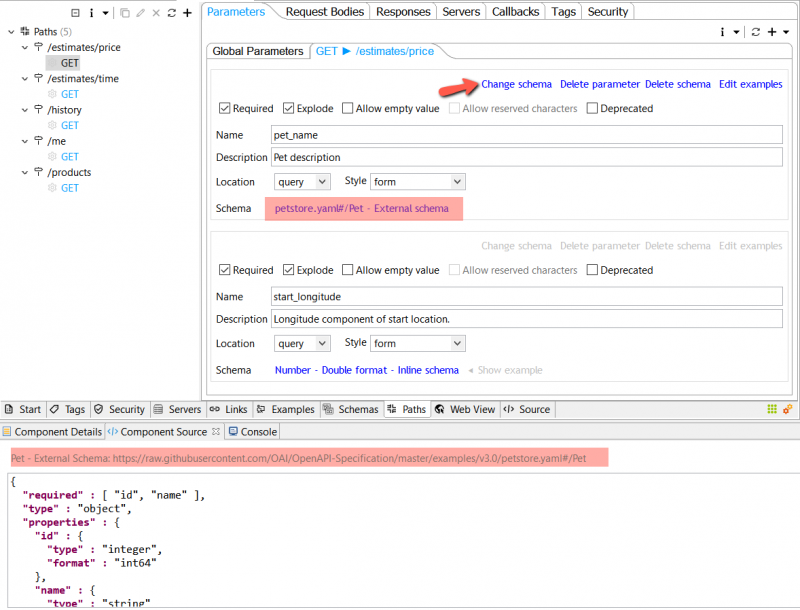
External Schema Reference[edit]
When you document an API, it is common to have some features which you use across several API resources. In that case, you can create a snippet for such elements in order to use them multiple times when you need it. With OpenAPI 3.0, you can reference a definition hosted on any location. It can be the same server, or another one – for example, GitHub, SwaggerHub, and so on.
Refering a Schema In The Same Document[edit]
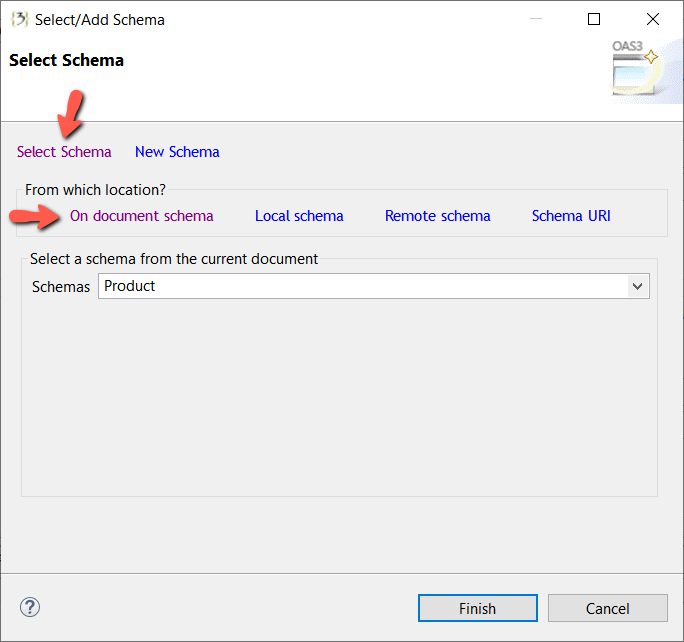
Click the Change schema or Add schema links in a parameter, request body, or response to trigger the selection wizard. Choose the Select Schema link from the wizard, then click On Document schema link. Pick a schema from the dropdown below then click Finish.
Refering a Schema In The Same File System[edit]
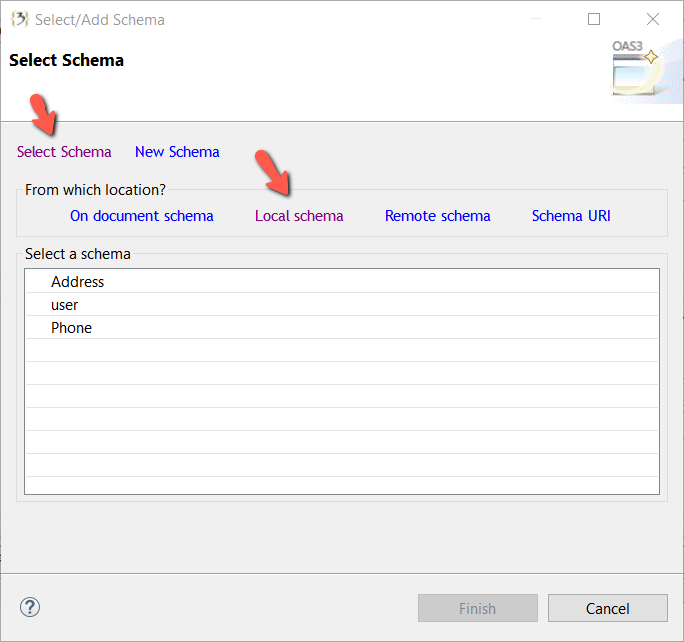
Click the Change schema or Add schema links in a parameter, request body, or response to trigger the selection wizard. Choose the Select Schema link from the wizard, then click Local schema link. A file dialog picker is triggered. Pick an OpenAPI document. Available schemas in that document will be shown. Pick one schema from the table below then click Finish.
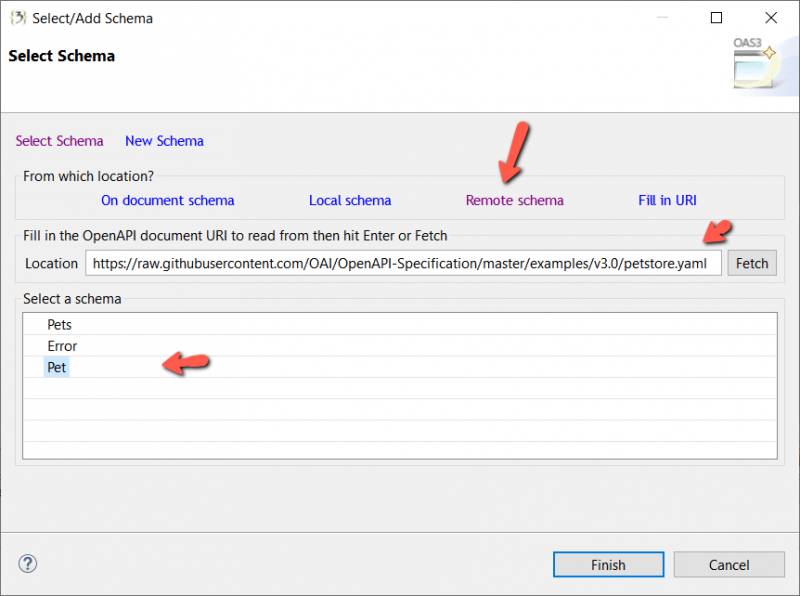
Refering a Remote Schema[edit]
Click the Change schema or Add schema links in a parameter, request body, or response to trigger the selection wizard. Choose the Select Schema link from the wizard, then click Remote schema link. Fill in the remote location URI then hit Enter or Fetch button. Available schemas in that remote location will be fetched and shown. Pick one schema from the table below then click Finish.
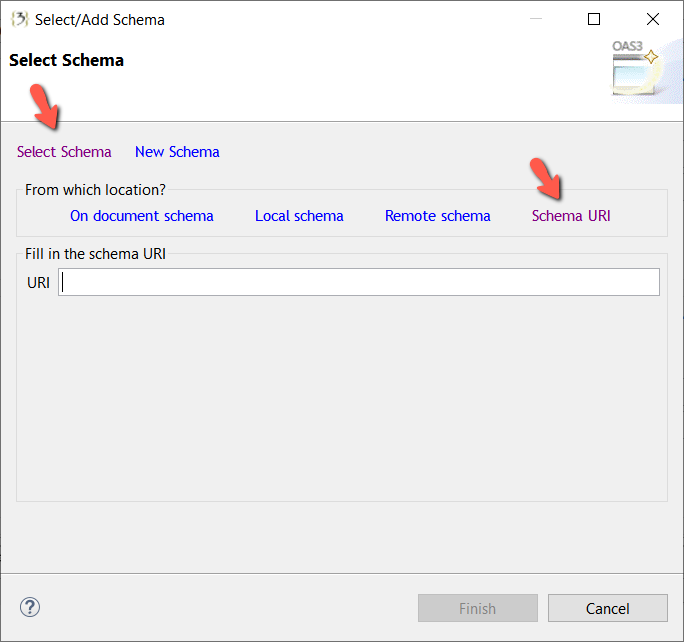
Filling In a Schema Reference Manually[edit]
To manually fill in a schema reference, click the Change schema or Add schema links in a parameter, request body, or response to trigger the selection wizard. Choose the Select Schema link from the wizard, then click Schema URI link. Fill in the schema URI then click Finish.
Schema Discriminator[edit]
When request bodies or response payloads may be one of a number of different schemas, a discriminator object can be used to aid in serialization, deserialization, and validation. A discriminator is a specific object in a schema that is used to inform the consumer of the specification of an alternative schema based on the value associated with it.
Add Discriminator Property Name[edit]
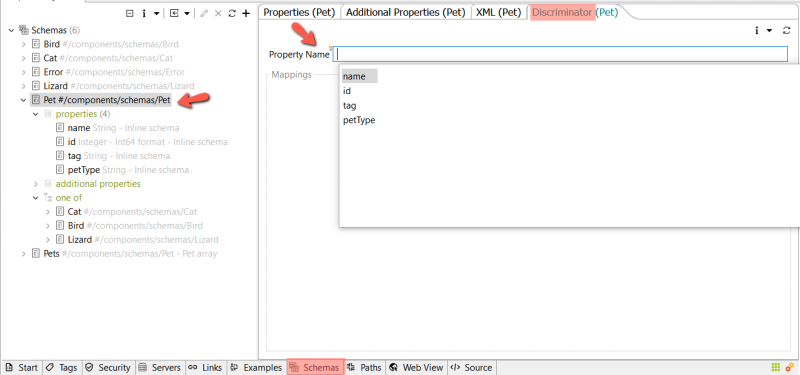
To add the discriminating property name, select the concerned schema, go to the Discriminator tab. Then fill in the property name.
Optionally, to get content assistance drop-down in the property name field, click inside it then hit Ctrl and Space at the same time. A drop down with available properties from the current schema will be shown to select from.
Note: A discriminator property should be a required one. So, don't forget to set it as required in the Properties tab by checking the check-box beside it.See here schema properties how-to
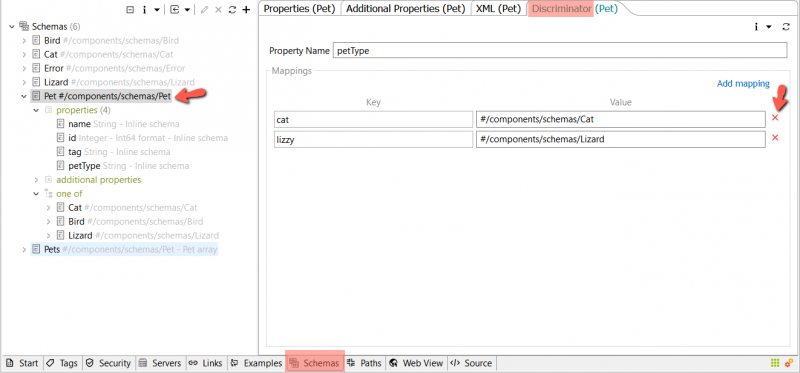
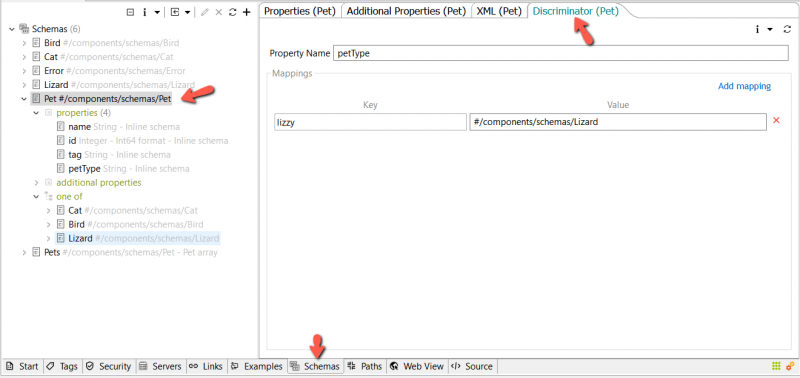
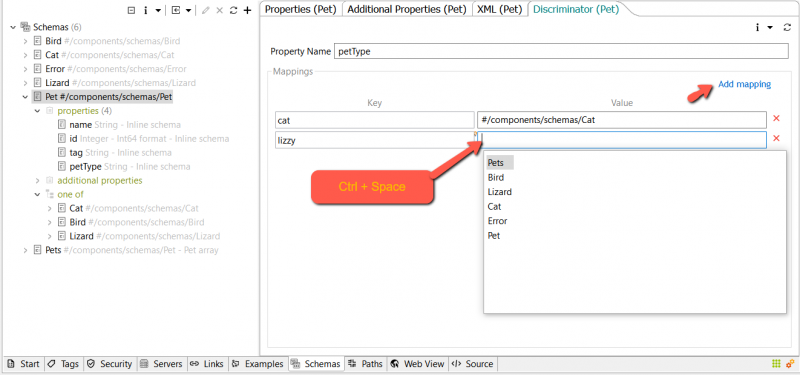
Add Discriminator Mapping[edit]
You can add a mapping to a schema discriminator by selecting the concerned schema. Then go to the Discriminator tab. Click the Add mapping link from the toolbar. Two input fields show up. The first is for the mapping name and the second is for the mapping value. Fill in the name and value.
Optionally, to get content assistance in the mapping value field, click inside it then hit Ctrl and Space at the same time. A drop down with available schemas in the current document will be shown. Select one then the full schema reference will automatically be built and filled in for you.
Delete Discriminator Mapping[edit]
To delete a mapping, click the delete button X beside the mapping you want to delete.