GR:Gravity/Event Management
Gravity Event Management
Event management lies at the hart of Gravity's user collaboration support, so much so that events and event handling are built right into the core fabric of Gravity's software DNA.
In its basic form Gravity event-management is similar to OSGI event-management, we can speak of event-handlers registering themselves, of topics the event-handlers can handle and of event-handler-services processing triggered events. We've even thrown in the concept of an Event Admin, a service that that will match a triggered event to an event-handler. So those of you familiar with OSGI event-management as dictated by the OSGi event and event admin specification will feel pretty comfortable with this guide on how to configure Gravity event-management :).
But not everyone is familiar with the OSGI event-management specification so a short explanation and some graphics should help the uninitiated to get up to speed on how Gravity handles its events.
We start-of with some theory and follow swiftly with a how-to.
It's all about Topics
The role event-management plays within Gravity is one that primarily helps you, as a Gravity user , be kept up-to-date on Gravity changes of interest to you. What is of interest is to you is defined by the event topics you subscribe to and, of which you would like to be told about in some manner.
Event topics are in essence a representation of a specific state change within Gravity. For example the topic 'gravity/login/loggedIn' represents the 'User has logged-in' state change for the Gravity Login service. Here it is the Gravity Login service (which handles the user log-in) that has the responsibility of creating an event with the topic 'gravity/login/loggedIn' and making sure the created event is fired into Gravity event-management.
Once you have set your eye on an interesting topic, you then have to decide how you would like the state change information presented to you. This is where event-handlers come into play.
Show me your hand(ler)
Event-handlers are topic savvy, they represent a mechanism that is capable of processing an event in way that is event-handler service intrinsic. Simply said, an event-handler will do something with an event in a way unique for the event-handler service.
Using the previously fired log-in event as an example, we can ask event-management to display a notification pop-up window when a log-in event occurs. To accomplish this the topic 'gravity/login/loggedIn' first has to be connected to the 'Notification EventHandler Service'.
Once connected the topic will be tracked by the aforementioned event-handler service. From this point on Gravity event-management will see to it that every time a log-in event occurs the 'Notification EventHandler Service' gets the opportunity to take care of this event.
So now when you log into Gravity you will also be notified of this fact by a pop-up window, which gracefully fades a way after a few seconds.
Event-handlers are capable of tracking any topic you can throw at it, but as already mentioned, logic dictates that an event-handler can only handle event information in a way it was built for.
Engaging in some event activity
First of we need to bring the 'Event Management' perspective to the foreground and if necessary the view 'All Topics' (which can be selected from main menu Gravity → Show View → Other – All Topics).
Selecting a topic
In the 'All Topics' view (right pane) click on Login Service to expand and reveal Login Service topics, in the 'Event Management' view click on Event Handlers to expand and reveal available topic event handlers, a view similar to the one below should be displayed;
Connecting a topic to an event-handler
To connect a topic to an event handler the topic needs to be dropped on the event-handler of choice, in the example below, the topic 'gravity/login/loggedIn' will be dragged and dropped on the Notification EventHandler service:
As a result of the drag and drop action the Notification EventHandler service will have the topic 'gravity/login/loggedIn' included in its Tracked topics list.
Unless configured otherwise the tracked topic will be processed by the Notification EventHandler service every time a 'log-in' event (represented by the topic 'gravity/login/loggedIn') is brought into existence. In our example a notification will be displayed as soon as a local log-in occurs. For a user log-in the Notification service's notification pop-up window will display the following:
Configuring a tracked topic
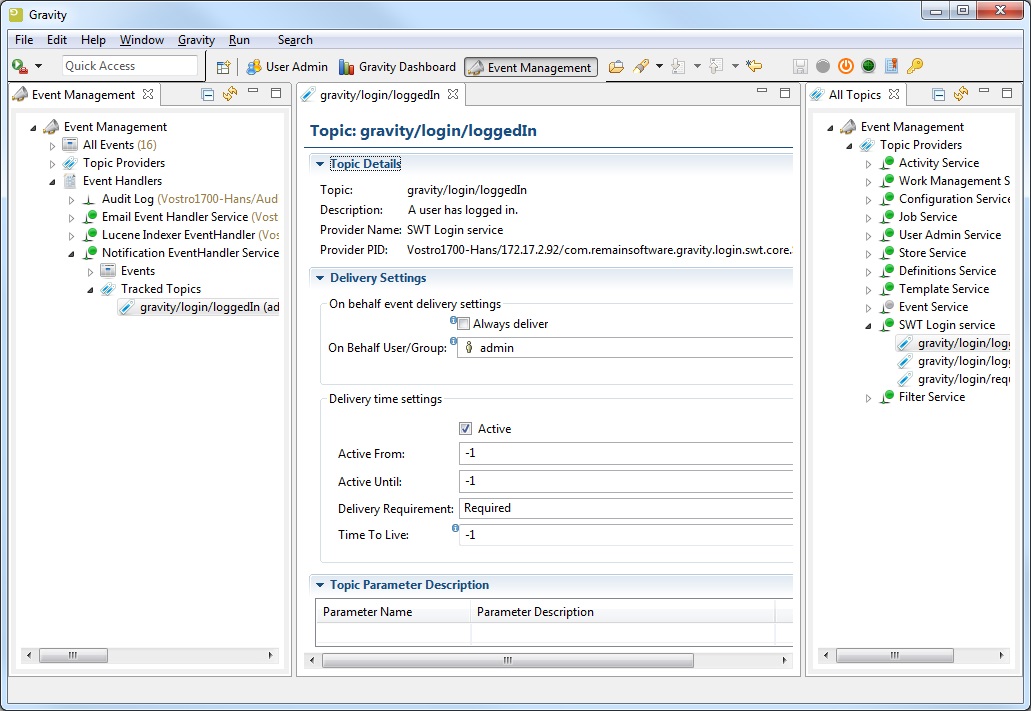
If you are not happy with the default processing characteristics of a tracked topic then you can alter the behavior of a tracked topic by editing and saving available tracked topic details. Default topic attributes always allow you to change the 'when' and 'how long' of a tracked topic.
To configure a tracked topic detail, 'double click' (1) on the tracked topic of interest (under Event Handler management) and click on the 'Details' section (2) You might need to adjust the existing view layout to sufficiently accommodate the new Topic Details' dialog, but if you do some view extending left and right Topic detail information should come in to picture.
The following attributes directly influence the way event-management treats gravity events. Gravity event-management will use these attributes to decide when to pass an event on to an event-handler:
- Active
- Active From
- Active Until
- Delivery Requirement
- Time to Live
The attribute 'Active' denotes the current state of the tracked topic. If the state is switched to in-active, de-flagged, then the topic related event will not be delivered to the event-handler service. De-activate a tracked topic only if you temporarily do not want to receive events of this kind. If you decide that you never want to receive these events then it is advised that the tracked topic be removed from the 'Tracked Topics' list (right mouse click on the tracked topic and select delete).
As long as the 'Active' attribute is flagged (true), a tracked topic event is passed on to an event-handler based on the values set in 'Active From', 'Active Until' and 'Time to Live'. If the values have a default value of -1 then an event will be delivered to a user, any time, any day for the period that the user is logged-in to Gravity.
Setting Active-From & Active-Until
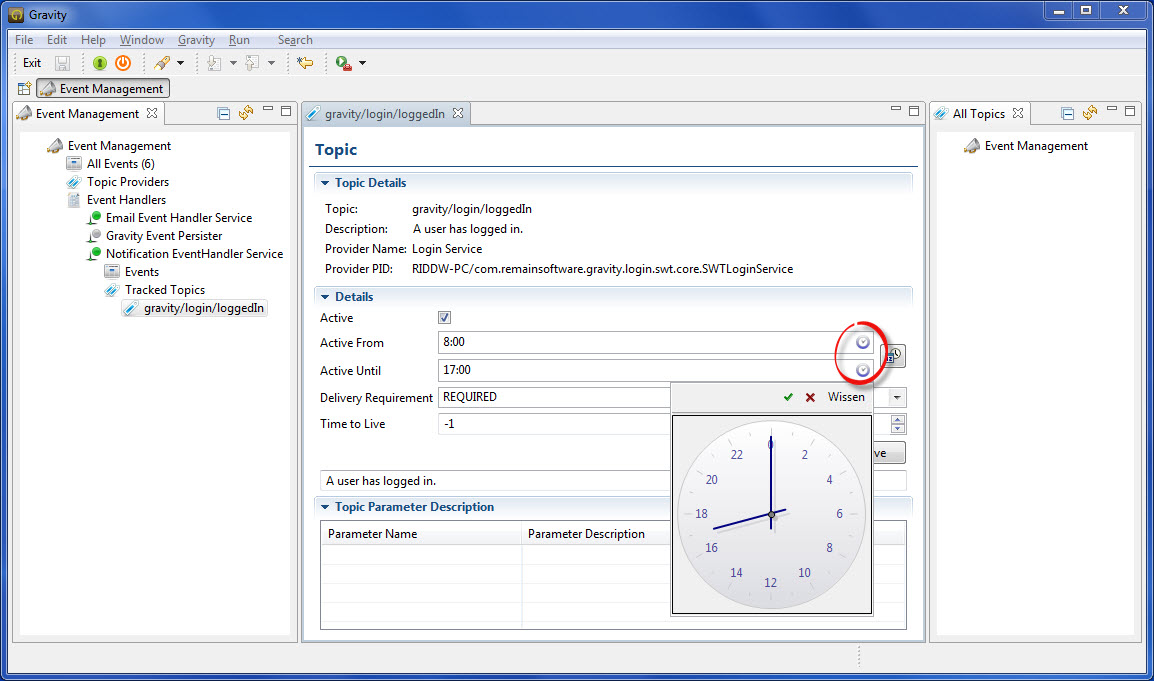
Both the Active-From and Active-Until fields can be entered directly or can be graphically manipulated by clicking on the icon located at the end of the field. Initially the fields are day-time bound and only a time period between 0 and 24 hours can be set as illustrated below. Here an event delivery time setting has been chosen starting at 8 am and ending at 5 pm. For both fields the setting was done by clicking the time related icon (encircled in red) and moving the clock arms to the desired time.
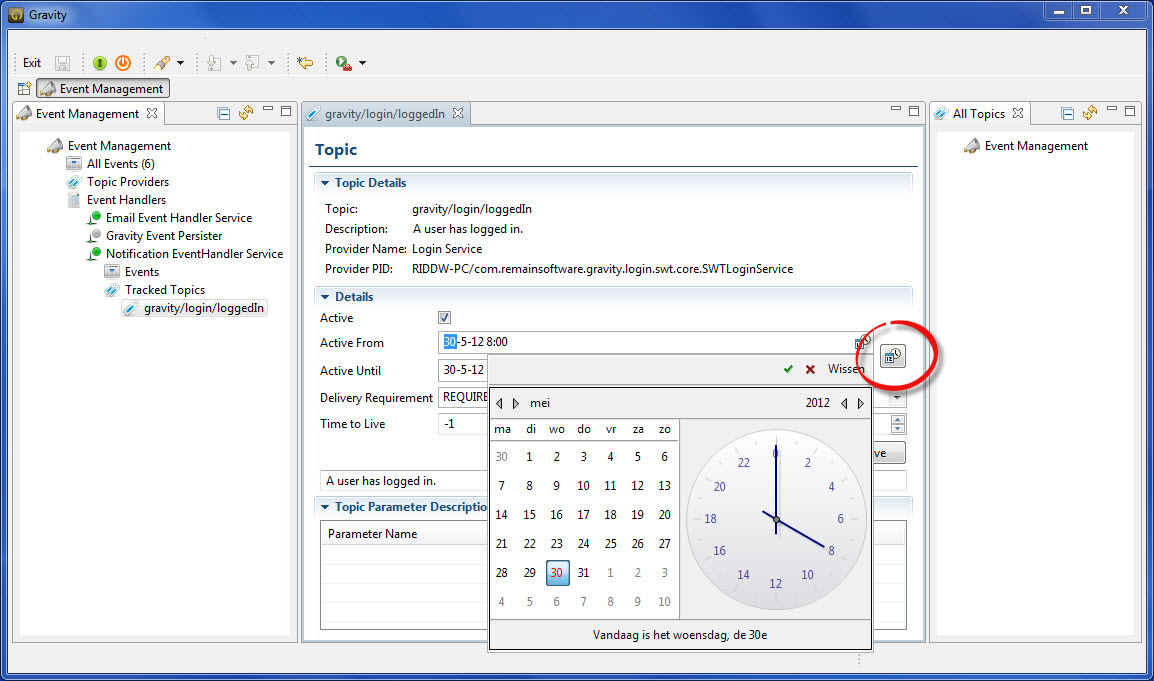
The Active-From and Active-Until fields support a number of time and date notations that help you set the required time and or date constraints. As we have seen the default time based values have the net result that an event will be delivered in a daily 24 hour setting. If this does not cover your requirements then you can switch to a date or date & time setting by toggling the larger icon beside the Active-From/Until field.
Toggling the icon changes the smaller in-field icon and sets the field to be sensitive to the chosen time-date type. There are 3 selectable time-date types: time only, date only and time & date.
Be aware that if a value has been set in one time-date type then toggling to another type will automatically transform that value to become compatible with the newly chosen time-date type.
Setting Delivery Requirement
If you don't mind missing an event every now and then, then you can change the attribute Delivery Requirement from the default value 'Required' to the value 'Optional'. You would set this option only in the situation where it is not relevant that you receive all events emanating from an event service. With this option Gravity event-management will set an event to ´Unhandled´ if an event cannot be delivered because the event-handler service is in-active or because the user is not logged-in.
Setting Time to Live
Event expiration, how long an event stays in the system, is determined by the 'Time to live' attribute. When an event expires it is removed from active event-management by being marked as 'Unhandled'. The default value of -1 denotes that an event will never expire, meaning that Gravity event-management will try to deliver an event to an event-handler for as long it takes (of course as soon as an event is delivered it no longer partakes in event delivery).
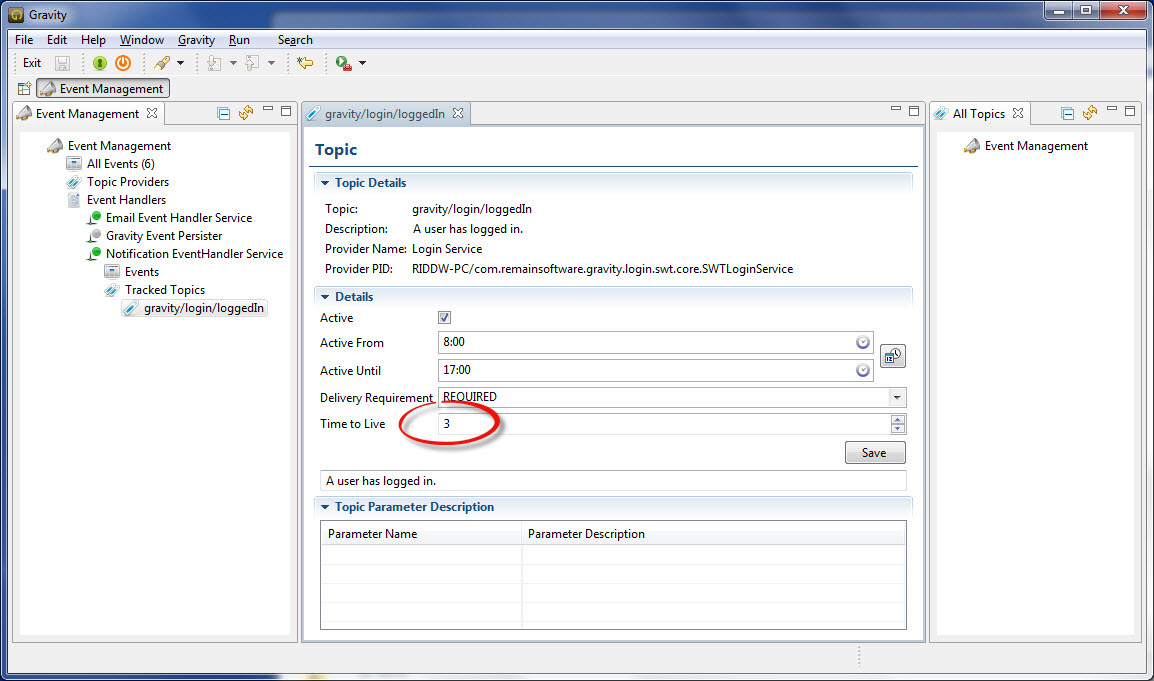
In the example below the user has opted for a Time to Live of 3 days indicating that the user has no desire to be notified about a log-in event that occurred more than 3 days ago.
Setting Topic Parameter Description
Topic parameters are key value pairs that can be passed on to the event-handler service. An event-handler service can retrieve and use the parameters as context for a delivered event.
Viewing the state of events
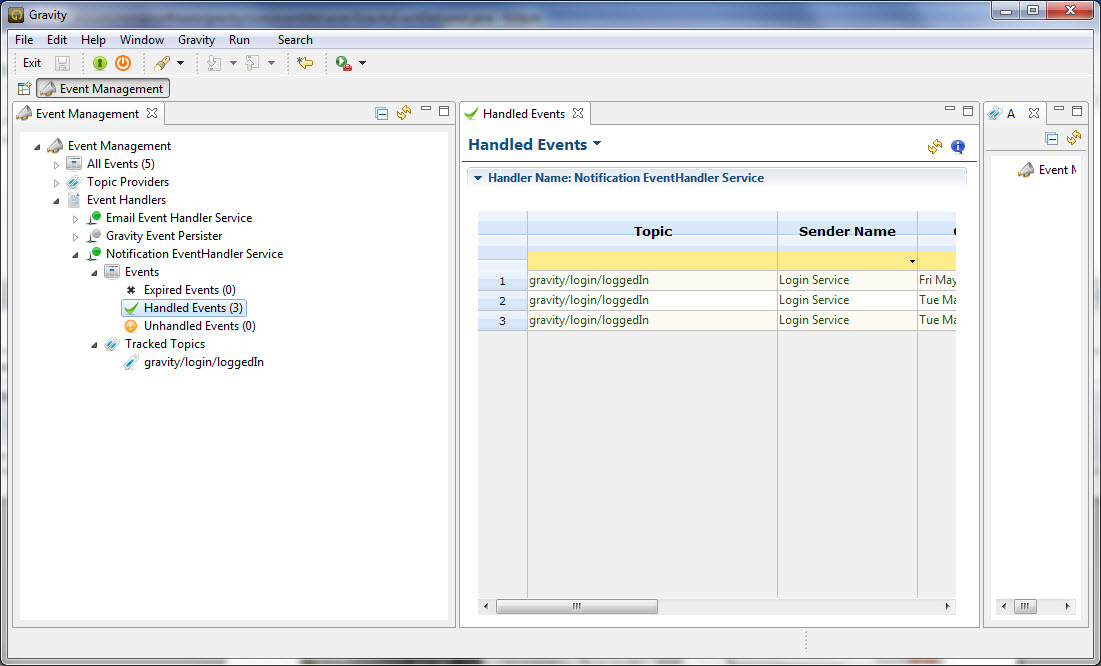
To see which events have been processed or still have to be processed, expand the 'Events' section just below event-handler service name. This will show the event-management event-handle types, of which each will display a total number of events processed or to be processed. For the example Notifcation EventHandler service the following totals are displayed:
In total the service has zero events that have expired, 3 events processed by way of a window pop-up and and zero events that could not be delivered (unhandled). Double clicking on an event type will display a detailed list of involved events.
