EWM:Labels
Labels
Introduction
Labels are short descriptive texts that can be attached to an Object, Member or Message. Labels can then be used to filter objects with that specific Label or provide specific actions that need to be performed on an Object with a specific Label.
For example, you can create a Label called "Unit Test" and attach this to a specific Object. This will give you the following capabilities:
- Filter all objects that are labeled "Unit Test"
- Run a specific action when the "Unit Test" objects are deployed.
- Start a specific compilation command when the objects are compiled.
Assign/Unassign a Label to a Solution or Object
A label can be assigned to a solution of a task, an object or detail in the components view or a detail in the details view. In this example, we are going to demonstrate how to label a solution but it works exactly the same way for an object or a detail as well.
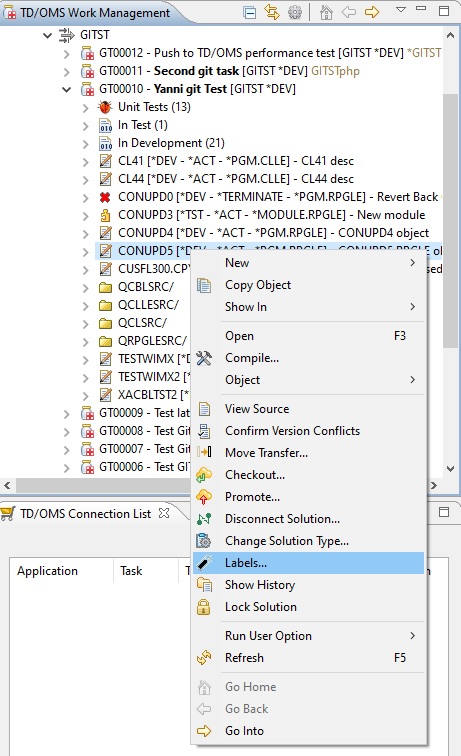
Right-click a solution and select "Labels..."
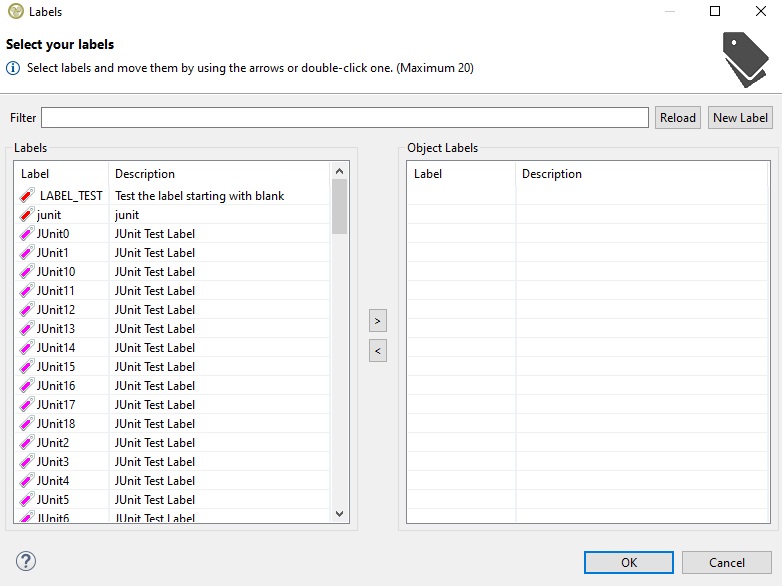
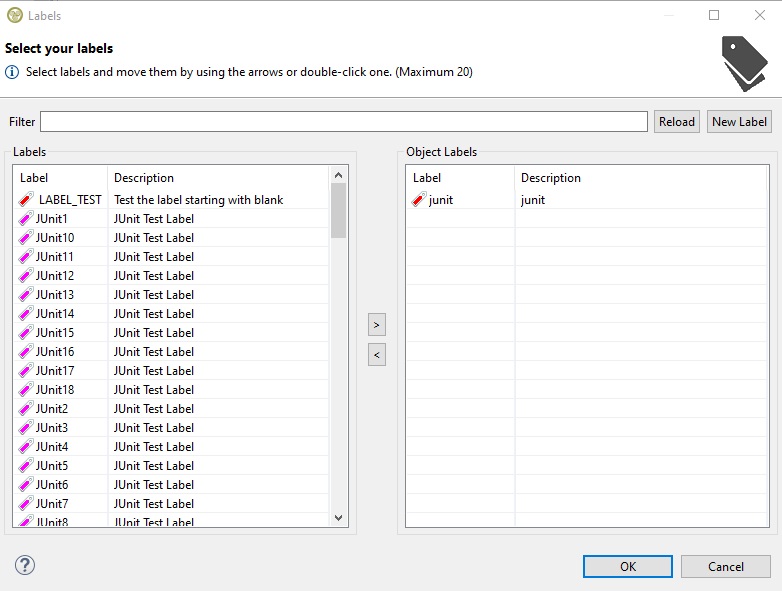
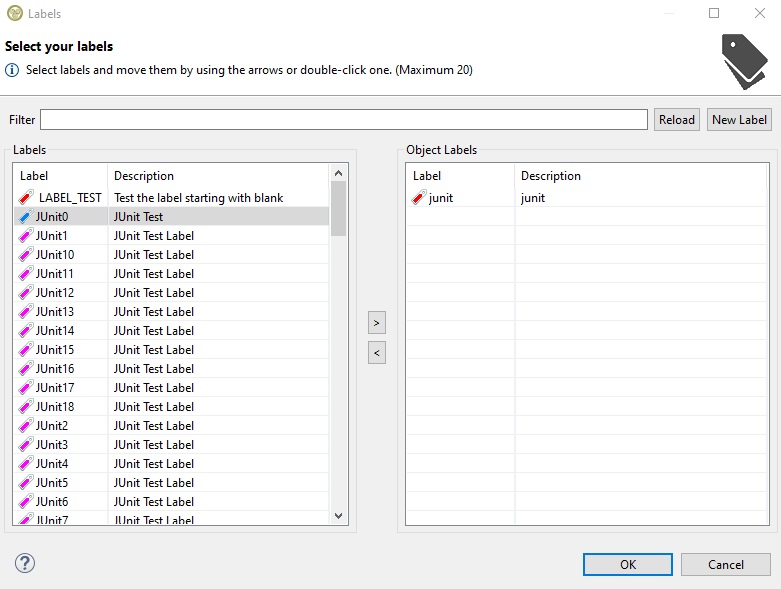
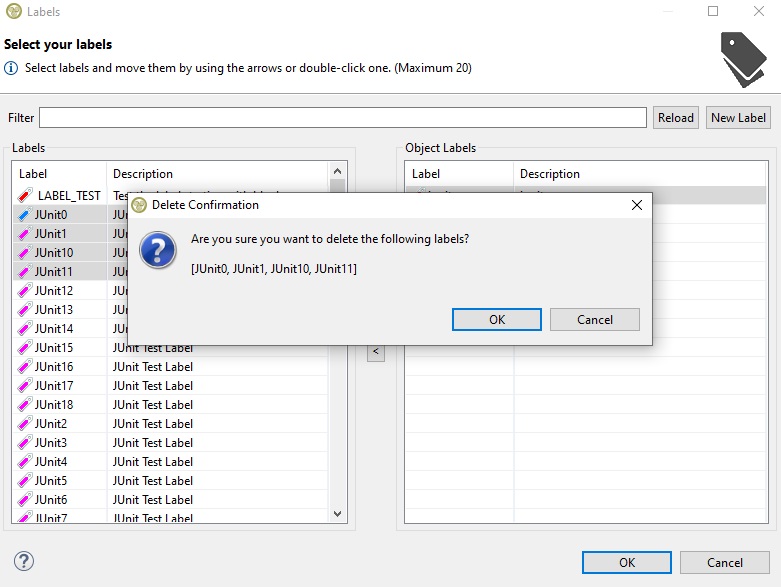
The labels dialog will open where you can select the labels for the solution. The left table shows all the available labels for that application and the right table shows the already assigned labels for that solution. It is possible to find the labels you want quickly by typing their name or description in the "Filter" box (the filtering will occur only on the left table). By pressing the reload button it will reload all the labels from the database. A label will appear only on one table and never on both.
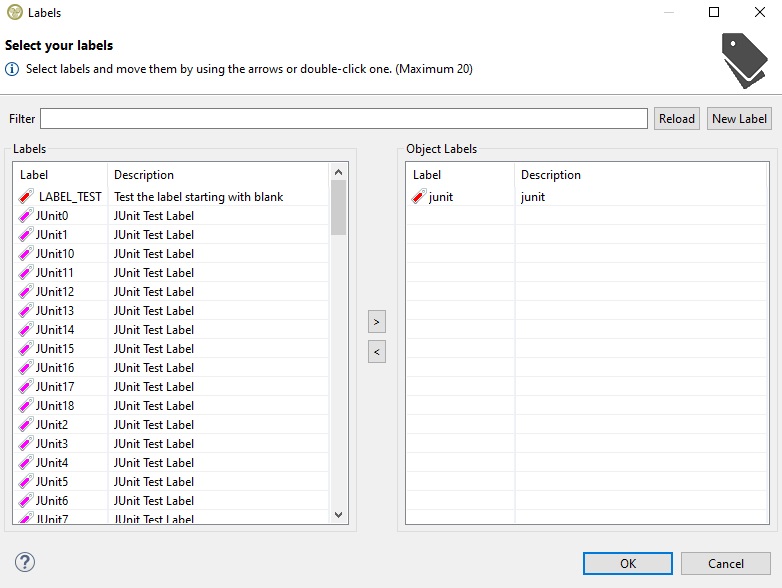
In order to assign labels, select one or many (by holding the CTRL button) and then clicking on the arrow button that points to the right table in order to assign them. The same way labels can be unassigned by selecting them and pressing the arrow that points to the left. A solution or an object can have a maximum of 20 labels assigned to it. Keep in mind that the solution is not actually affected yet until you press finish on the dialog.
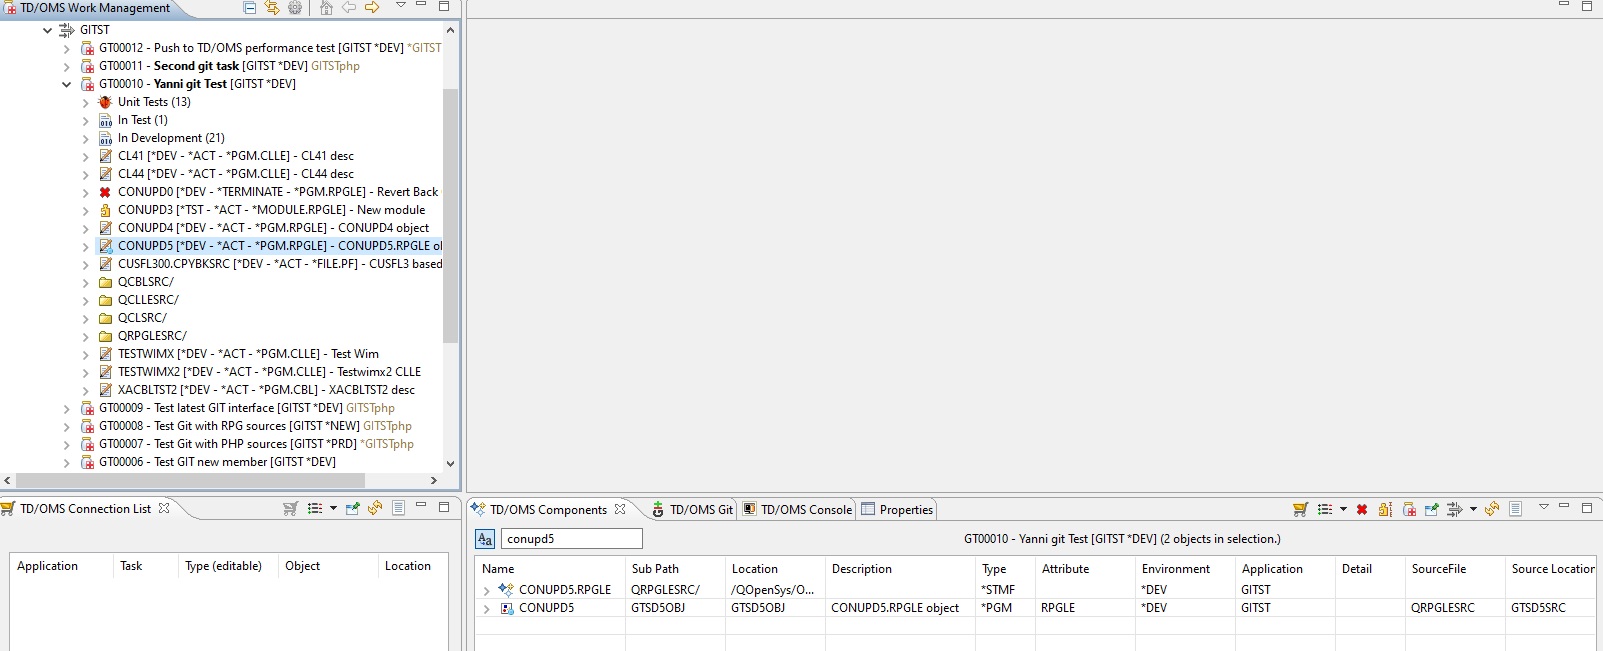
When you press finish the solution will only have labels that were on the right table. A labeled solution or object will be marked with a small blue circle on the bottom right of its icon in the work management view and in the components view (the refresh will be done automatically).
Labels and Object Templates
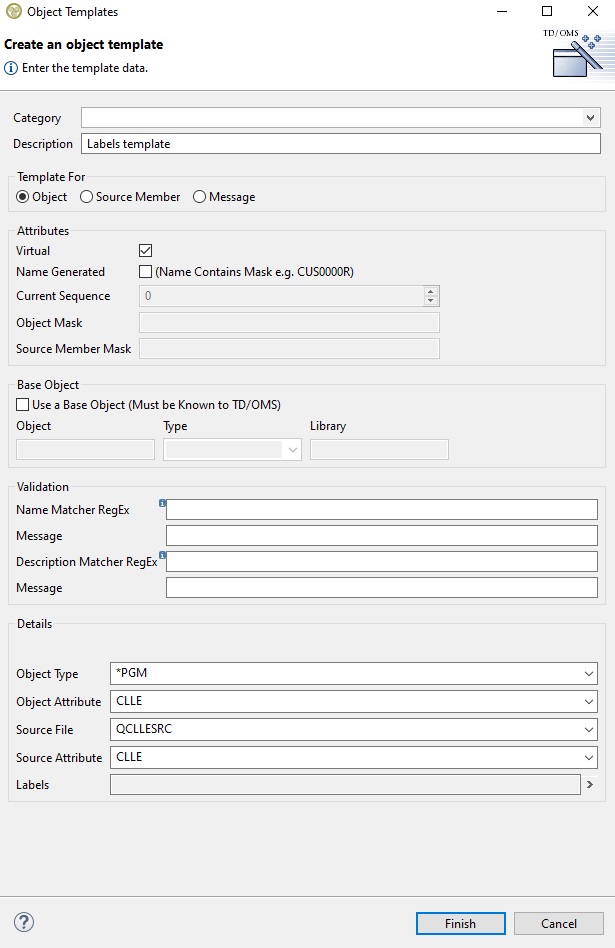
Objects can also be automatically labeled upon creation from an object template. In order to define labels in a template, you open the wizard where the templates are available (right-click a task and select 'New Object...'). There click on the configuration icon on the top right and select add to create a new template.
The last field on the bottom is the labels field. Click on the arrow on its right to select your labels.
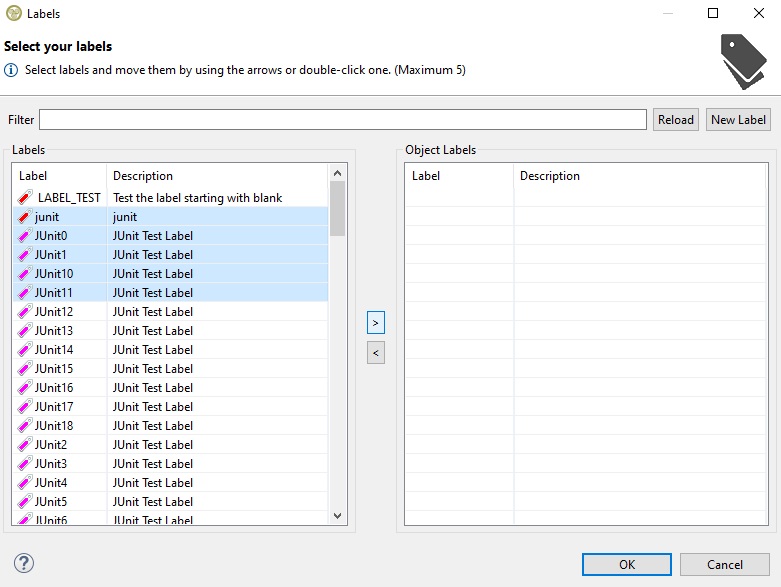
A template can have a maximum of 5 labels. By pressing the reload button it will reload all the labels from the database.
Press the arrow that points to the right table to assign them to the template.
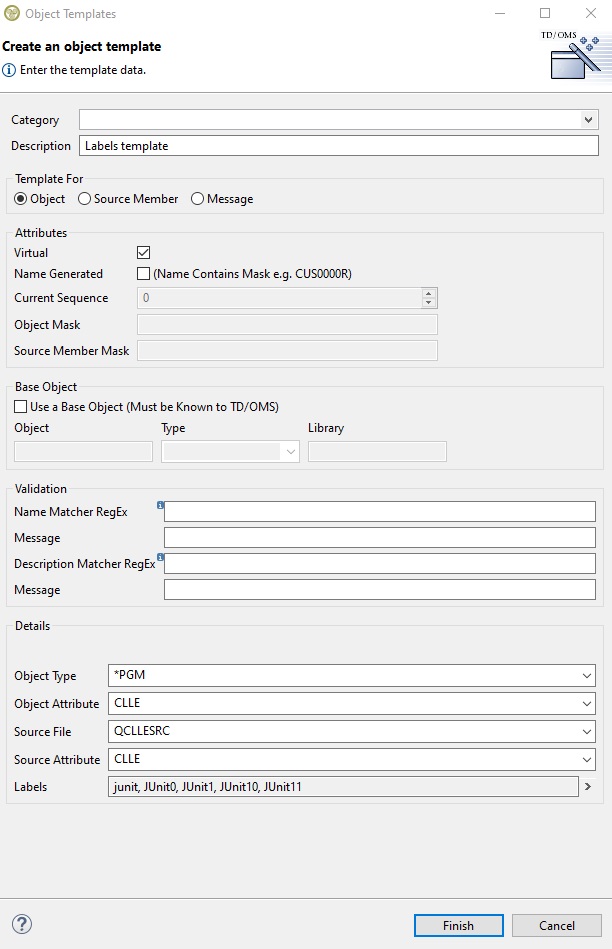
The template will be saved only if the finish is pressed in this dialog.
When the template is created any object created from it will have these 5 labels assigned to it automatically.
A template can be changed in a similar way by right-clicking one and selecting change or clicking the configuration icon on the top right with the desired template preselected and choose "Change".
Create, Edit or Delete a Label
A label can be created from the same dialog that labels are assigned, either when assigning to a solution, an object or a template.
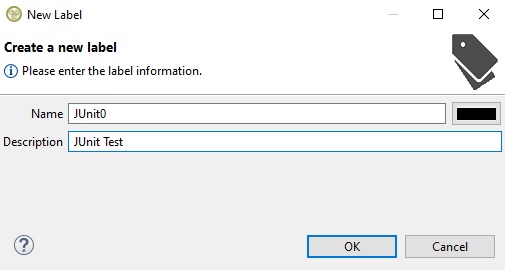
Press the "New Label" button on the top right of the dialog. A new dialog will open where you can type the name, the description and select the color of the label.
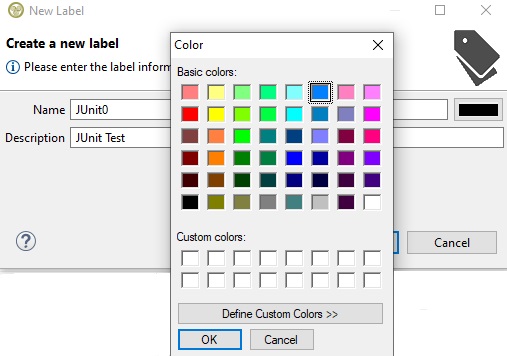
By clicking on the black bar you can select another color (default is black).
When the label is created it will be automatically selected.
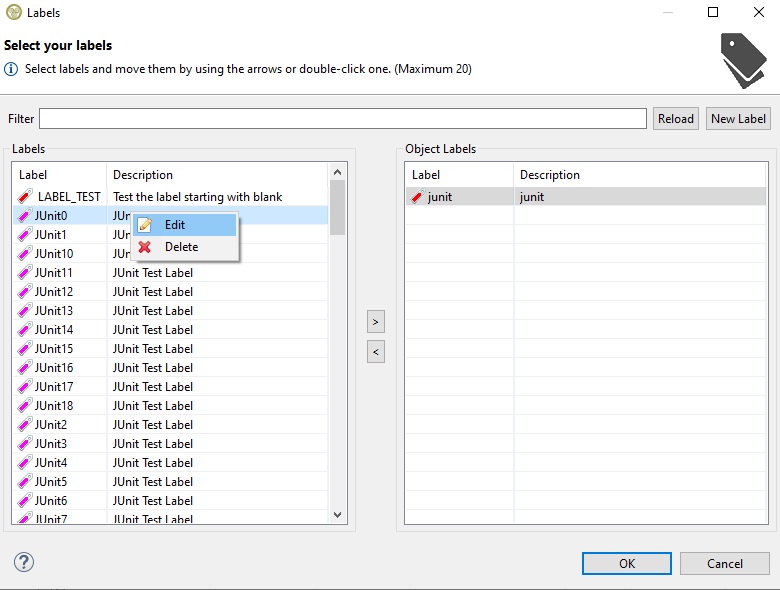
A label can be edited by right-clicking it and select change or delete. Many labels can be deleted at the same time but only one can be changed.
Please note that a label that is assigned to a solution, object or template can't be deleted.
More Information
For documentation on how to assign a label please refer to these 2 links:
Filter Objects based on Labels
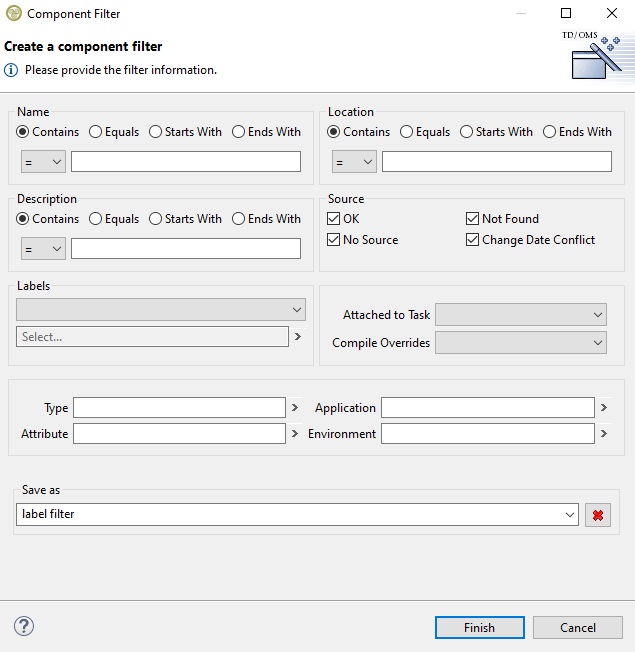
The filters in the components view can also be configured to search for objects with labels. Select a filter and you will see the labels section in the middle left of the dialog.
The first field helps us to find all labeled objects (if they have at least one label) or all unlabeled objects.
If we want to filter objects based on specific labels then the first field must be empty in order for the second field under it can become available. Click on the arrow on the right in order for the labels selection dialog to open allowing you to select the labels. By pressing the reload button it will reload all the labels from the database.
Afterward, the selected labels will appear on the labels field of the filter.
By saving the filter it will be applied automatically and a query will be executed. Note that each object returned has at least one label assigned to it from the labels assigned to the filter (and not every object has all the filter labels).
