FRI:Configuration
Configuration
Adding a Server
A server might use a simple model in order to be added but some systems require more server information that is only system-related (e.g. Gravity).
Adding a simple server reference
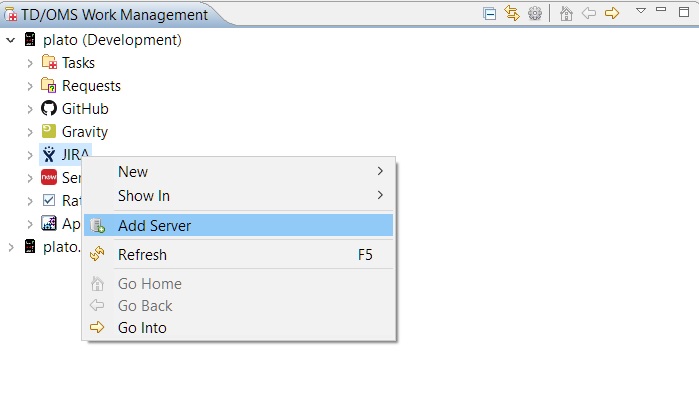
You can add a new server reference in TD/OMS by right-clicking the default system node in the tree and selecting "Add Server".
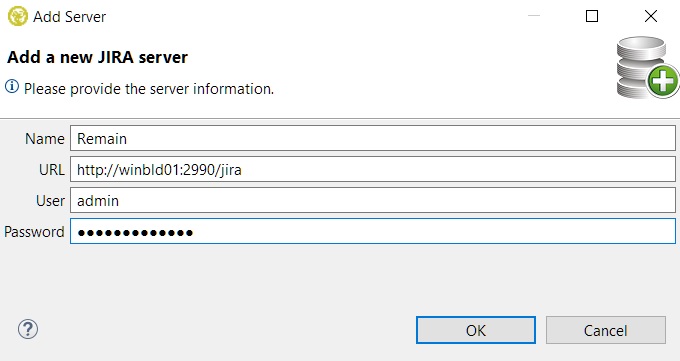
The following window will enable you to add the server.
- Name The name field is the name that the server node will have in the tree. It doesn't have to be the name of the server itself.
- URL The HTML URL of the server.
- User The name of the user. This is the name that you are using to login to your account in the system.
- Password The password of the user. This is the password that you are using to login to your account in the system.
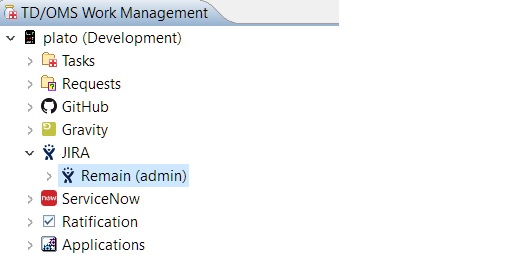
When you press OK to close the window you will see the new JIRA server appearing in the TD/OMS Work Management tree under the JIRA category node.
JIRA Notes
For the IBM RDi 9.6.x development environment, JIRA over HTTPS requires SSL authentication. In order for this to work in RDi 9.6.x the following parameters need to be added to the end of the RDi eclipse.ini file:
- -Dhttps.protocols=TLSv1.2
- -Djdk.tls.client.protocols=TLSv1.2
- -Dcom.ibm.jsse2.overrideDefaultTLS=true
The file is located at the root of the RDi installation directory, for example, the default location is: C:\Program Files\IBM\SDP\eclipse.ini.
GitHub Notes
1) A GitHub server is represented by a repository hence the URL is the repository URL which can be either its HTML URL or its GIT URL (the one that ends with .git).
2) You don't have to own a repository in order to add it and view its items. All you have to know is its URL and have an account in GitHub but keep in mind that you won't be able to link/disconnect any items to it unless the repository owner granted you access.
Bitbucket Notes
There are two kinds of Bitbucket repositories, namely, Bitbucket Cloud and Bitbucket Server. They are similar products, both of which provide Git repository management abilities. The distinction here lies in implementing the integration. For this purpose, you need two different connectors.
Add a cloud repository
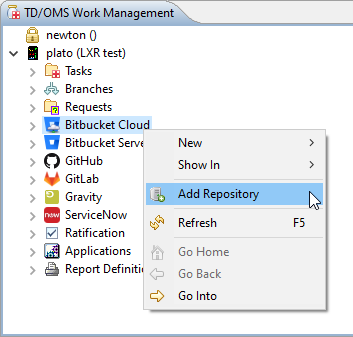
You can add a cloud repository by right-clicking the Bitbucket Cloud node in the tree and selecting Add Repository.
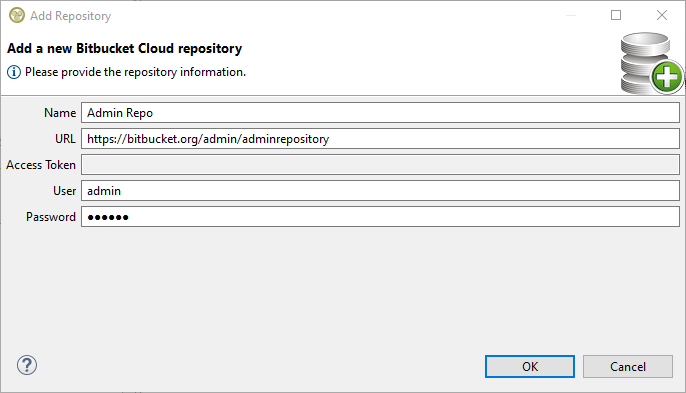
The following window will enable you to add the repository.
- Name: The name field is the name that the repository node will have in the tree. It doesn't have to be the name of the repository itself.
- URL: The HTML URL of the repository. The repository clone URL is also acceptable: https://admin@bitbucket.org/admin/saidrepository.git
- User: The name of the user. This is the personal name (nickname) of your bitbucket account, you cannot use your email address here.
- Password: For BitBucket cloud you need to supply an app password, in this situation the default user password cannot be used. An app password can be created from your personal settings -> app password (https://bitbucket.org/account/settings/app-passwords), make sure you set sufficient permissions for the app password, at least read pull-requests and issues. Note that we only support app passwords, we do not support the bitbucket API tokens for Ouath2.
Add a server repository
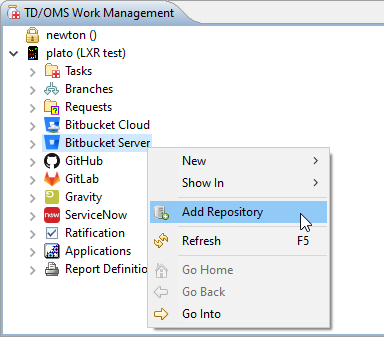
You can add a server repository by right-clicking the Bitbucket Server node in the tree and selecting Add Repository.
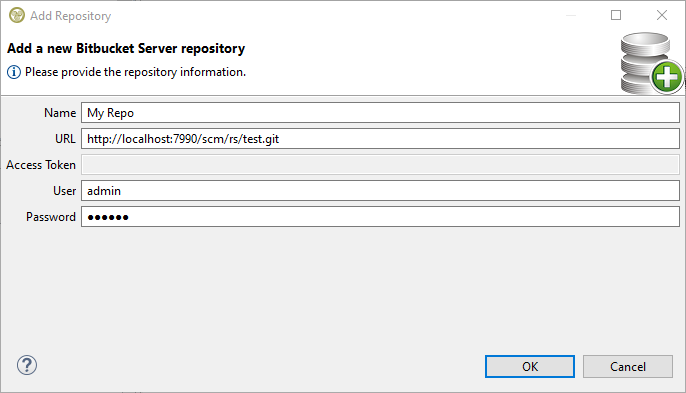
The following window will enable you to add the repository.
URL is the server repository clone URL: http://localhost:7990/scm/rs/test.git
Azure DevOps Notes
1) An Azure DevOps server is represented by its project hence the URL must be in the organization/project format e.g. https://dev.azure.com/myOrganization/myProject. If you want to query for work items in many projects or for another project that is possible with the 'Team Project' filter condition when creating a search filter.
2) If you are using an older version of Azure DevOps that uses the old Azure host that is allowed as well e.g. https://myOrganization.visualstudio.com/myProject. It is possible to change your host from the old to the new one through the organization's settings in Azure.
3) An Azure DevOps repository URL is not allowed because a project can have more than one repositories. If you want to query for pull requests of a repository that belongs to a server then you select 'Pull Requests' when creating a new search filter.
4) A password is not used for REST API calls in Azure DevOps so an access token is mandatory.
SonarQube Notes
1) A SonarQube server is represented by a web application location. The location is the server name and port on which the SonarQube server is installed, for example http://sqserver:9000.
2) The account info required to access the SonarQube server web site is a SonarQube user with password. Note that the user determines which SonarQube projects are visible for selection in the TD/OMS SonarQube interface.
Service Desk Plus Notes
1) A password is not used for REST API calls in Service Desk Plus so an access token is mandatory.
Connect Wise Notes
1) The server URL must also include its version at the end e.g. https://staging.connectwisedev.com/v2021_3
2) A password is not used for REST API calls in Connect Wise. What is used is an access token comprised of three parts:
- The company ID
- Your public API key
- Your private API key
and it must be provided in this format: companyID+publicKey:privateKey
A public and a private key can be generated by clicking your portrait on the top right of the screen in Connect Wise to expand your user's menu and then selecting My Account. Then by selecting the API Keys tab you can see your already generated tokens or press the + icon to create a new one. Another way to generate one is from the left side bar by selecting System, then Members, select the user that you want to generate keys for and then click the API Keys tab.
Adding a custom server reference
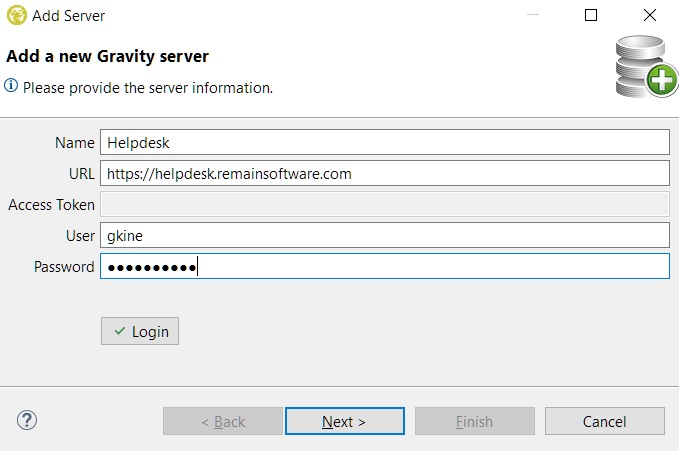
A Gravity server requires more information in order to be added. A wizard with two pages will open where the first page requires the following:
- Name The name of the server.
- URL The URL of the server.
- Access Token Gravity/Web/User_Admin The access token of the user if you do not want to expose your user profile and password (if the user has one). In this case, the user name and password are not applicable.
- User The name of the user (not available if an access token is used).
- Password The password of the user (not available if an access token is used). In most servers, the access token can be used as a password as well.
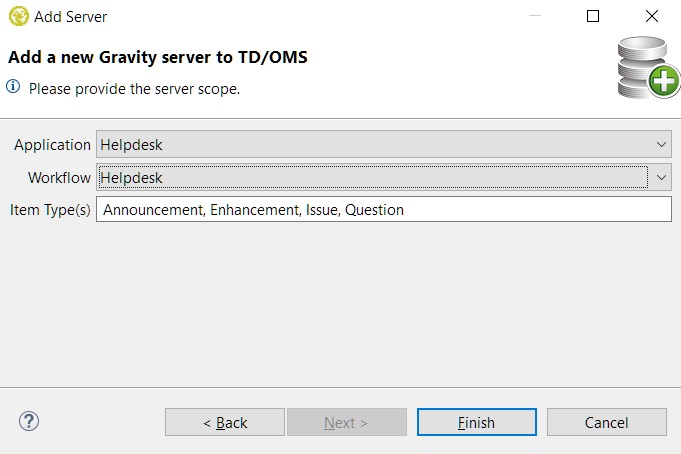
The second page requires the following:
- Application The applications available for the server.
- Workflow The workflows available for the server.
- Item Types The item types available for the server based on the selected application and workflow. Hold CTRL when selecting with the mouse to select multiple items.
Logging in to a Server
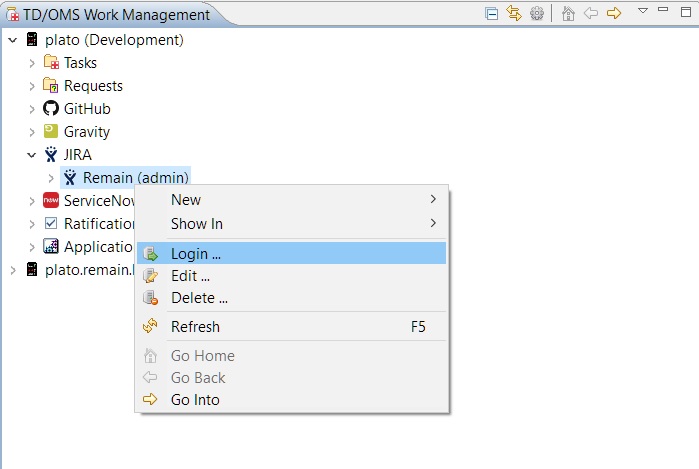
In order to login to a server you have to right click on it and select the 'Login ...' option.
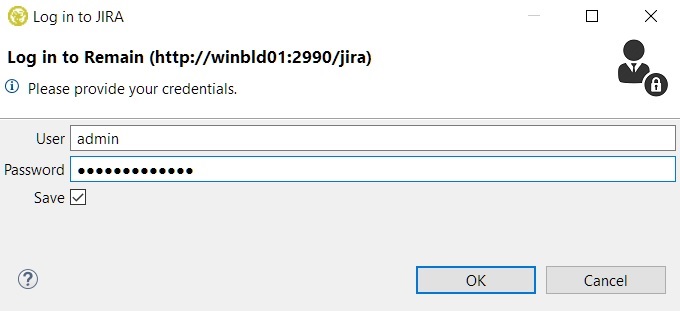
Then the login window appears:
Here you can login with your user name and password. If access tokens are allowed then an extra field will be present for it. If you check the Save checkbox than the next time you try to login the fields that were used to login the last time will be automatically filled in.
Editing a Server
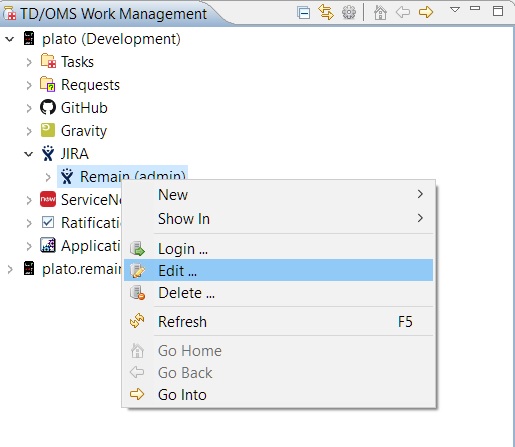
In order to edit an already existing server configuration right click it and select "Edit ...".
The dialog with the server information will open for editing (same dialog that was used when the server was added).
Deleting a Server
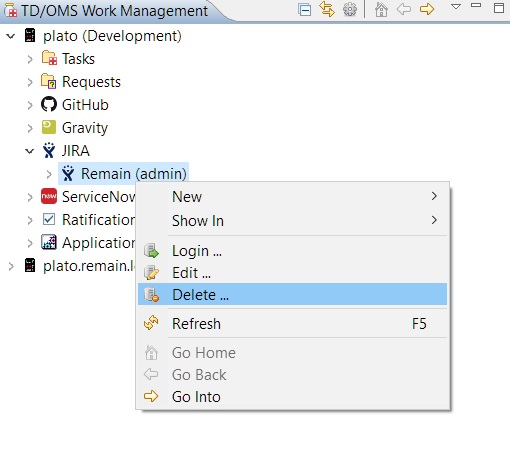
In order to delete an already existing server configuration right click it and select "Delete ...".
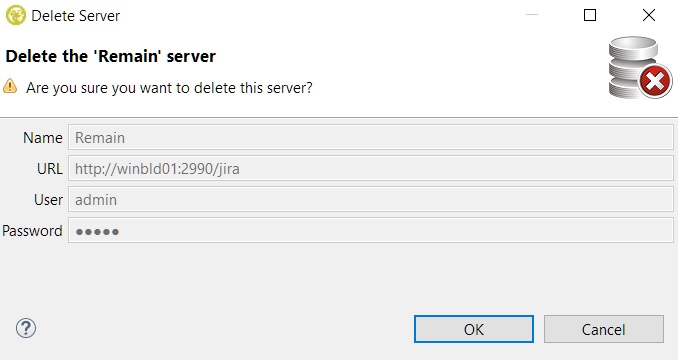
A confirmation dialog will open with all the fields grayed.
