GIT:Committing changes
Committing changes
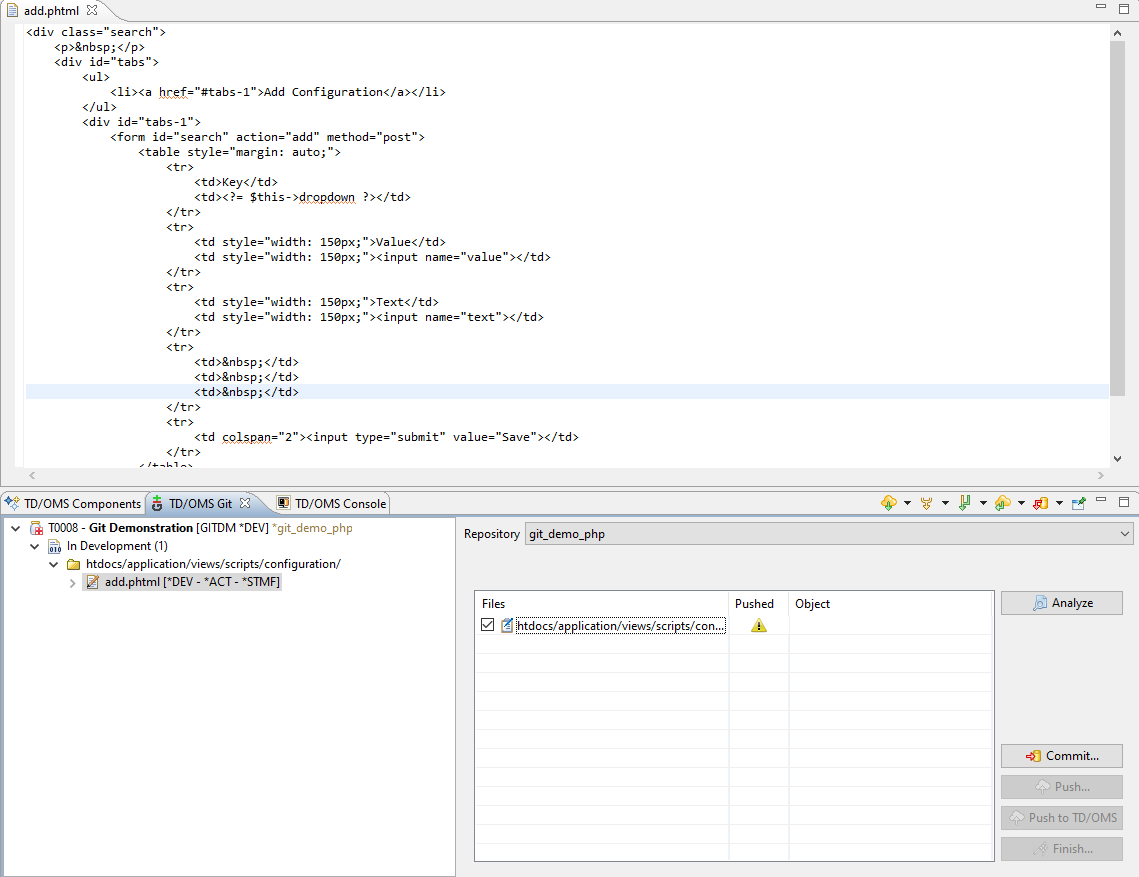
From now on you can start working and any changed files will be shown in the view. For ease of use all the available actions by right clicking a task and all usual content that appears if a task is expanded is also in this view just like in work management. This way all work for a task can be done entirely in the TD/OMS Git view without switching to the work management. In this example we have opened a file from the task and changed it. In order to check if files are pushed and if they have an object in the database (native repositories only) the analyze button must be pressed.
The table shows the files changed and it has three columns.
- The Files column displays the names of the changed files. Here you can select which files you want to push to TD/OMS. Each file also has an icon. If its a new file it will have the new file
 icon, if its an existing file that has been edited then it will have the modified file
  icon and if its a deleted file it will have the deleted file
  icon.
icon.
- The Pushed column displays if the files have already been pushed to TD/OMS. Any file that is already pushed to TD/OMS will have a green check
 icon on this column and if not there will be no icon there. If the file has not been locally committed to the task branch in Git first (like in this case) then a warning
  icon will appear (no analyze is needed for this check).
- The Object column displays the name of the object that the file represents in TD/OMS but this applies only on a repository that has native IBMi objects so in this case its empty. The guide on how to work with a native repository is here.
Note: The table will always display all the files changed since the creation of the task. The purpose of this is to be able to see all the changes that the task is going to make since you started working on it thus all the icons displayed on the files column are calculated compared to the branch that your task has branched off (usually the master branch). For example if a new file has been created and pushed to Git and to TD/OMS, it will still be displayed as a new file because the master branch doesn't have it yet (unless the master has merged with your task branch).
Local Commit
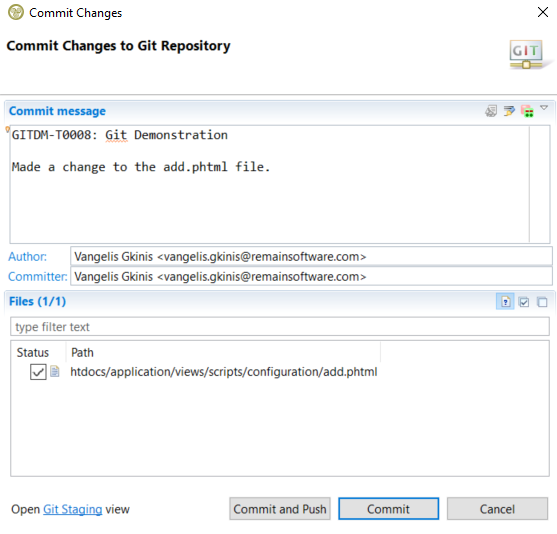
In order to solve the warning we need to commit the files locally to Git so a "Commit" is required first. By choosing "Commit" the default commit dialog of Git appears. Here you can type a commit message and select which files you want to commit and then press commit.
Recomendation: It is strongly recommended that all files are locally committed to the task branch in Git first before pushing to TD/OMS. The reason is that TD/OMS works in union with Git so both must be synchronized in order to better detect changed files and any pushing to TD/OMS without a local commit to Git first might result in displaying wrong information on the pushed column in the TD/OMS Git view concerning when a file is pushed or not (TD/OMS will be in front of Git in changes while the valid workflow is that Git should be ahead before being at the same state). Regardless, we allow pushing to TD/OMS without a local commit first in the case where many commits need to be made without having to do an extra local commit on each one of them.
Remote Push
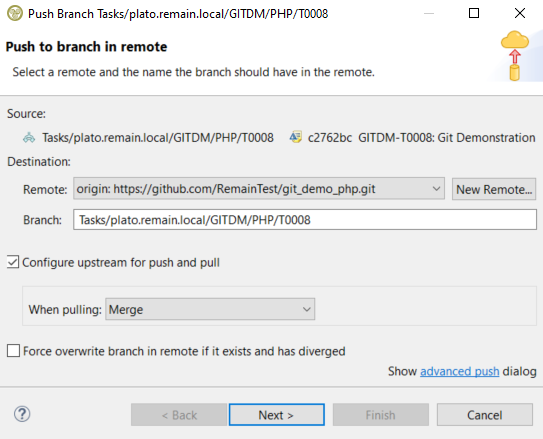
An optional step is to push the same changes to the remote branch of your current task branch in Git. By pressing the push button a dialog will open that will allow you push to the remote branch of the task (if there is no remote branch it will create one). This is an optional step so if you don't want to create a remote branch for your task and push the changes also there then ignore this section and proceed with the next step.
If you tried to push before locally commiting then a warning dialog will open prompting you to do that first because it is only logical to commit locally first and then remotely.
The push dialog displays the source branch which is the branch where its going to take the changes for pushing (our local branch in this case). In the destination section it displays the remote which is the target repository and the branch is the remote branch that will try to push the changes to. If that branch doesn't exist on the remote side it will create it with that name. The "Configure upstream for push and pull" checkbox allows you to choose the strategy that changes will be fetched and incorporated to your branch when you pull from the remote branch and the opposite when you push. There are four options (merge and three different ways to rebase) with the default being the merge. More on the differences between merge and rebase can be found here.
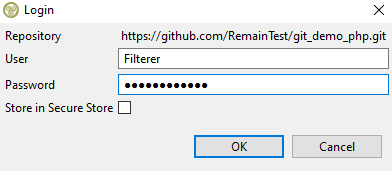
After pressing next the GitHub credentials will be required (or wherever the repository resides).
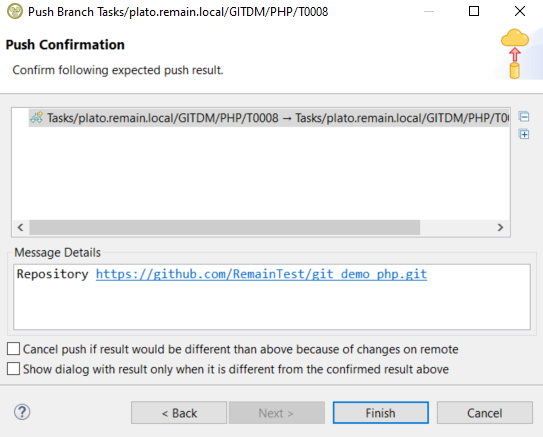
Then the confirmation dialog appears.
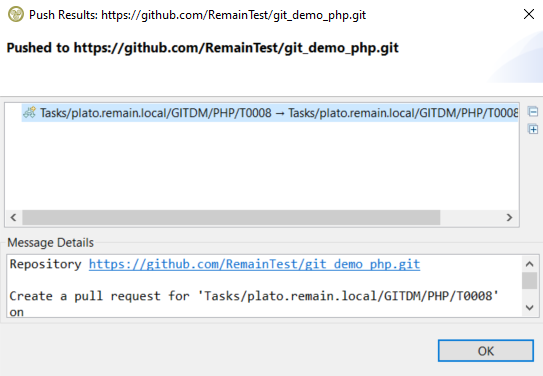
Lastly this dialog appers with the results after the push.
