GR:Gravity/Install/Client/Standalone
Installation of the Standalone Client
The Standalone client comes in two flavors. The Administration Client is used to configure and work with Gravity, The Work Management client is used to work with Gravity.
Installing the Standalone Client
Download one of the Gravity Standalone Client from our download area by first logging on to our website and then by clicking on this link [1]. Pick the correct installer for your Operating System. If you want to administer Gravity then download one of the Admin clients otherwise download one of the Work Management clients.
Once downloaded, run the installer and follow the instructions of the installer.
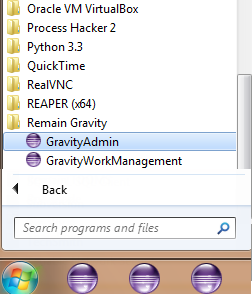
Once installed, Gravity is available from your programs menu in the Windows Task bar;
[1] (https://remainsoftware.com/extranet/software-downloads/gravity-releases)
Running the Client for the First Time
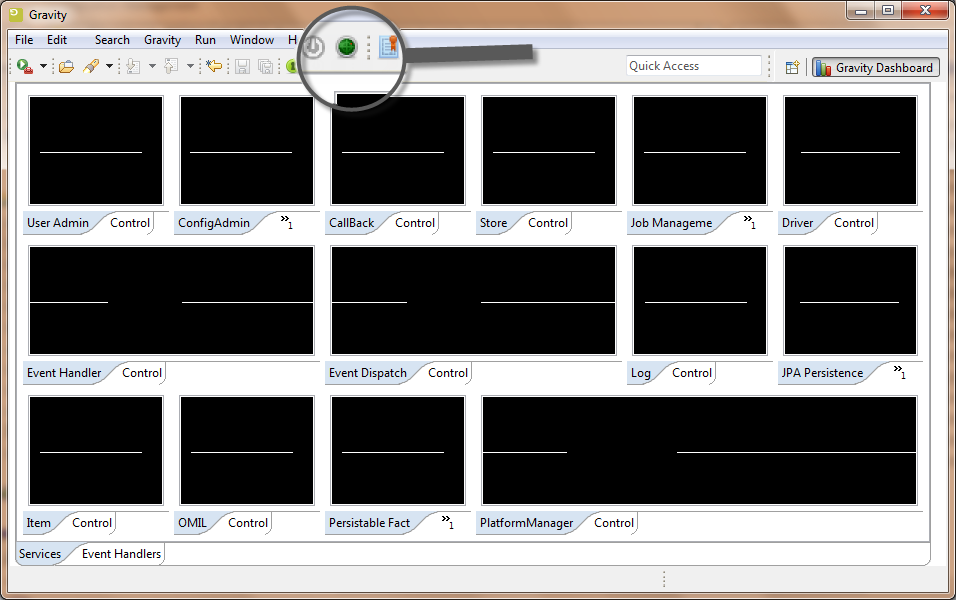
When the client starts up for the first time, it will show the Gravity Dashboard. On the toolbar, there is a little radar shaped icon that will enable you to discover a Gravity server. Since we have already installed a Gravity server, we can discover that.
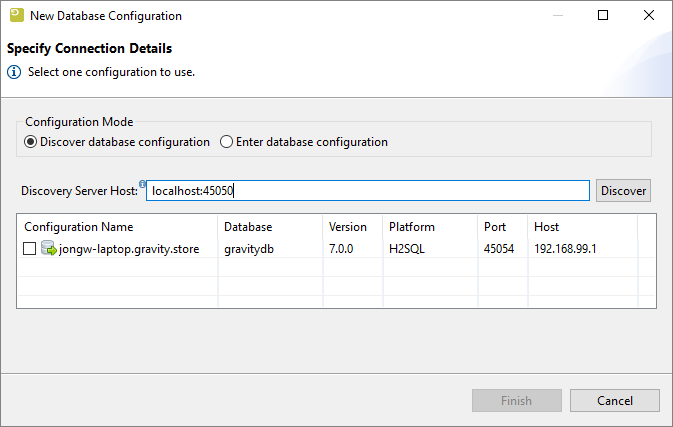
Press the Discovery icon and in the dialog that appears, type the name of the server as indicated in the image below. If your server is running on your localhost type "localhost" otherwise type the IP address or the hostname of your Gravity server. Optionally add :45050 and press the Discover button. The list will be populated with an entry. Check the entry in the table and press "Finish".
The server configuration will be retrieved and the client will restart if required. You may be required to press the login button ![]() before the login window appears. If this is the first time you access the server or if you did not change the admin password you can log in with:
before the login window appears. If this is the first time you access the server or if you did not change the admin password you can log in with:
user:     admin
password: admin
Try to also discover our public helpdesk at helpdesk.remainsoftware.com
Running multiple clients
If you need to maintain multiple versions of the Gravity client then this is possible by renaming the installation directory of an already installed client and configuring a new subpath (data location) for the client. After Renaming the installation you need to redirect the client’s data and configuration directories (logs, store and publlc). By setting the application property -Dgravity.home.subpath=?gravity_admin_501? you define which directory is to be used to store the client’s runtime configuration and data. This directory is always created under the .\remain\gravity directory in your home directory. The ‘-Dgravity.home.subpath=’ is put in the GravityAdmin.ini file (or eclipse.ini for clients installed into an eclipse installation), located in the client’s root installation directory. For example in C:\Program Files\Remain\gravity_admin_client-5.0.1_copy\GravityAdmin.ini, the last line added refers to the new configuration and data directory:
-startup
plugins/org.eclipse.equinox.launcher_1.3.201.v20161025-1711.jar
--launcher.library
plugins/org.eclipse.equinox.launcher.win32.win32.x86_64_1.1.401.v20161122-1740
--launcher.appendVmargs
-vmargs
-Dgravity.log.print.level=info
-Dgravity.log4j.print.level=info
-Dgravity.app=rcpadmin
-Dgravity.log.file.level=info
-Djava.net.preferIPv4Stack=true
-Dfile.encoding=UTF-8
-Xms512m
-Xmx1024m
-Xss2m
-XX:PermSize=128m
-XX:MaxPermSize=384m
-Xverify:none
-XX:+UseConcMarkSweepGC
-XX:+CMSClassUnloadingEnabled
-XX:+DisableExplicitGC
-Dgravity.home.subpath=gravity_admin_501
When the client is started the directory c:\users\?user?\.remain\gravity\gravity_admin_501 will have been created. Initially the configuration is empty so you will need to (re) discover a Gravity server to get the client going.


