GR:Gravity/Perspectives/Configuration2
Configuration Admin
This section describes the Configuration Admin part of Gravity. The Configuration Admin contains all nuts and bolts configuration required for your Gravity installation.
Configuration Admin Perspective
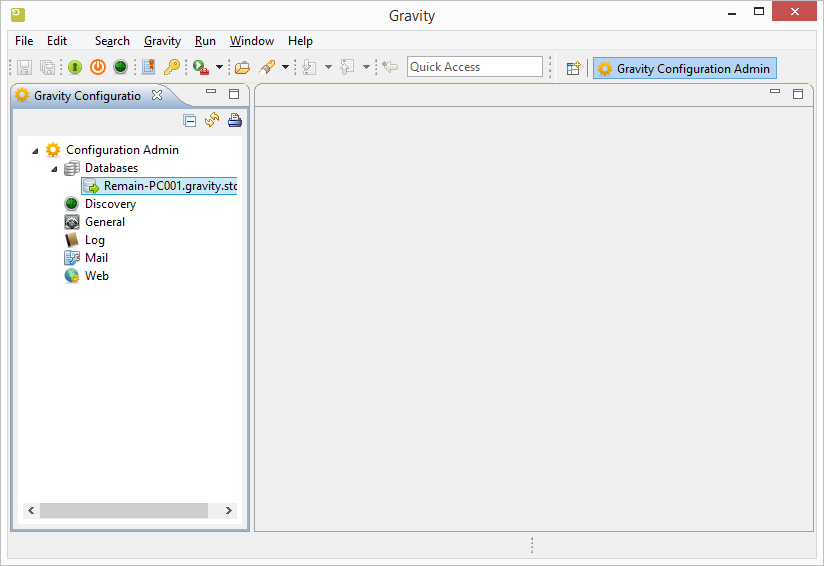
Gravity Configuration is administrated centrally from within Configuration Admin perspective.(Please note that the words configuration and settings are used here interchangeably to mean the same thing.)
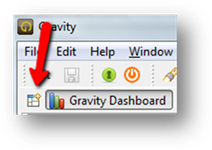
You can open the perspective by clicking on the Open Perspective shortcut on the Perspective bar.
Configuration Admin View
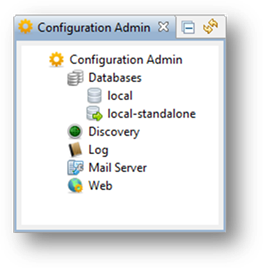
The configuration admin view shows all the configurable items in a tree like structure. You can either invoke a context menu on the
tree items by using mouse right-click or you can double-click on the item to open an additional configuration screen.
Databases
The Discover database configuration described earlier is the method to connect to the Gravity database. The database configuration details are managed within the Gravity server configuration. I exceptional cases it may be required to configure the database from within the admin client.
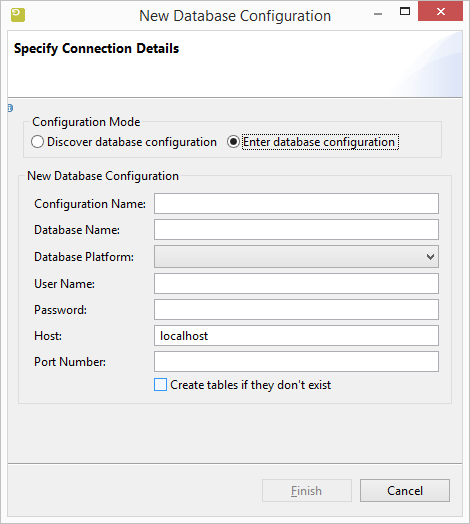
To add a new database configuration, press the Discovery icon then Enter database configuration:
A new dialog opens for you to fill in your new database settings. Click Finish once done.
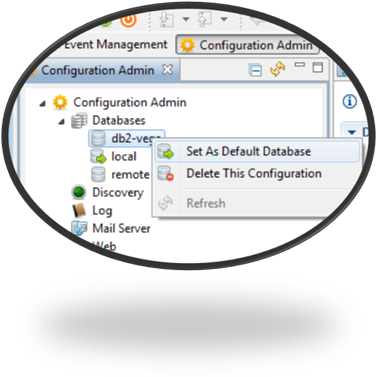
To set Gravity default database, right click on the configuration you want to use then choose Set As Default Database:
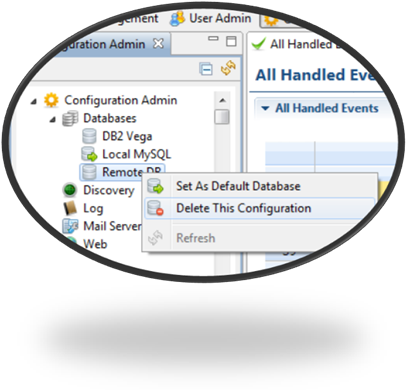
To delete a database configuration, right click on the configuration you want to delete then choose Delete This Configuration:
To view a database configuration, double click on its name. A new editor is opened.
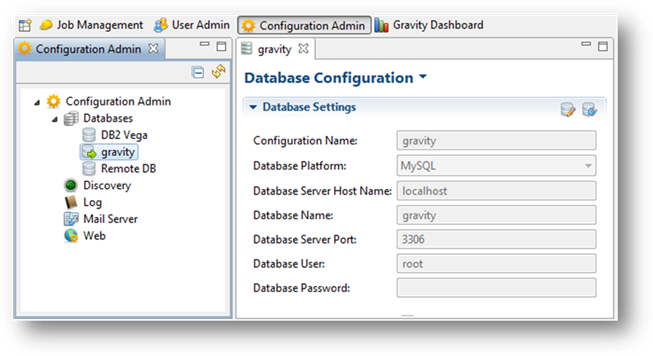
To edit this configuration, click on the edition icon: ![]() . All fields are, then, made editable. Save your new settings by clicking
. All fields are, then, made editable. Save your new settings by clicking ![]() (or CTRL + S).
(or CTRL + S).
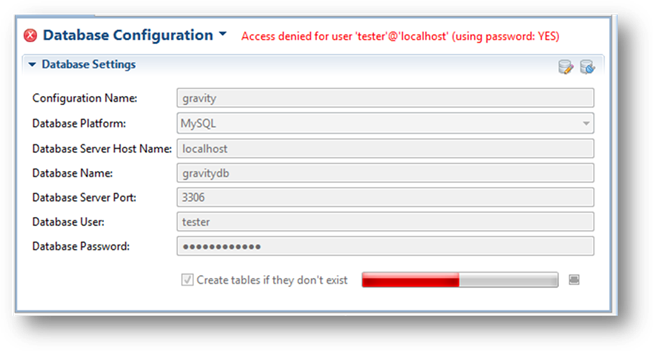
Within the same editor, you can test your database settings by clicking on the connection test icon:![]()
The connection test result is shown on the same editor:
Mail Server
One of Gravity abilities is to automatically send email notifications. To do so, Gravity needs some mail settings.
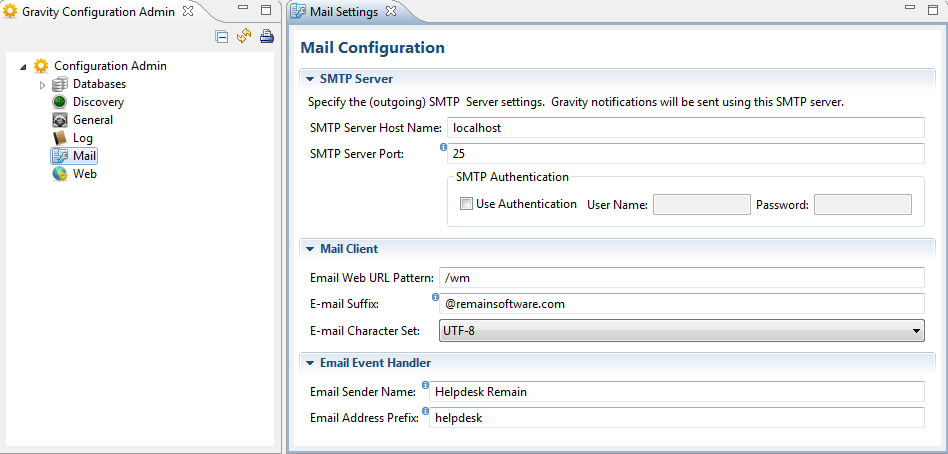
Double click Mail Server from the view to open the editor.
SMTP Server
Specify the outgoing SMTP server, port and authentications (if required by your SMTP server/provider).
Mail Client
- Web Url Pattern
- Defines the path to the Work Management module. Leave it to /wm
- Fill in the email suffix.
- A Gravity service sending emails will need to append this suffix to its name/identifier to build a sender header.
For instance, a Gravity service sending email notifications would have the following as sender address: gravity-event-handler@remainsoftware.com using @remainsoftware.com as email suffix.
- A Gravity service sending emails will need to append this suffix to its name/identifier to build a sender header.
- e-mail character set
- Select a set to use as the character set to use for mails. The default is UTF-8
- Email Sender Name
- Defines the human readable part of the e-mail: "Helpdesk Remain <helpdesk@remainsoftware.com>". The email sender name will be replaced by the user first and last name when the trigger for sending the email is user driven (eg adding a comment).
- Email prefix.
- A Gravity service sending emails will need to prefix its name to build a sender header.
For instance, a Gravity service sending email notifications would have the following as sender address: gravity-event-handler@remainsoftware.com using @remainsoftware as email suffix. If you don't want to receive mails back on this address, consider to use "no-reply".
- A Gravity service sending emails will need to prefix its name to build a sender header.
Web
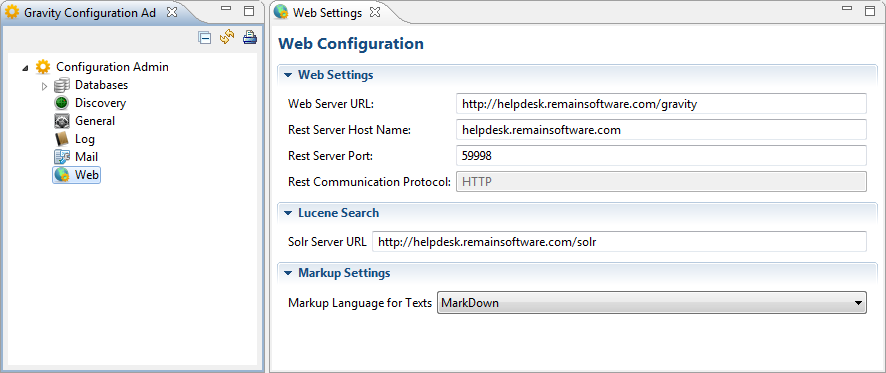
To configure the Gravity web server side, double-click on "Web" from the configuration Admin view.
An editor is opened
Web Server
- Fill in the web server URL. That is the domain name that one can reach Gravity on from the web. This address will be used by Gravity as base to generate reachable links.
For instance, one may follow a link from within an email sent by a service to access Gravity online. - Gravity can handle Rest communications. To enable Gravity restfulness:
- Fill in the Rest server host. This is the host on which a Gravity instance is running and where Rest calls will be directed to. Gravity services use this addrss as base and append their sub-urls to do Rest calls.
- Fill in the Rest server port. That is the port a Gravity instance is expecting Rest calls in.
Lucene Search
Apache Lucene and Apache Solr are used to index the Gravity documents and attachments so that they can be searched quickly.
- Fill in the name of the Lucene Indexing Server
Markup Settings
You can use markup to format descriptions and comments. From this drop-down you can select the required syntax. The currently supported languages are:
Discovery
Technical Details About Gravity Discovery
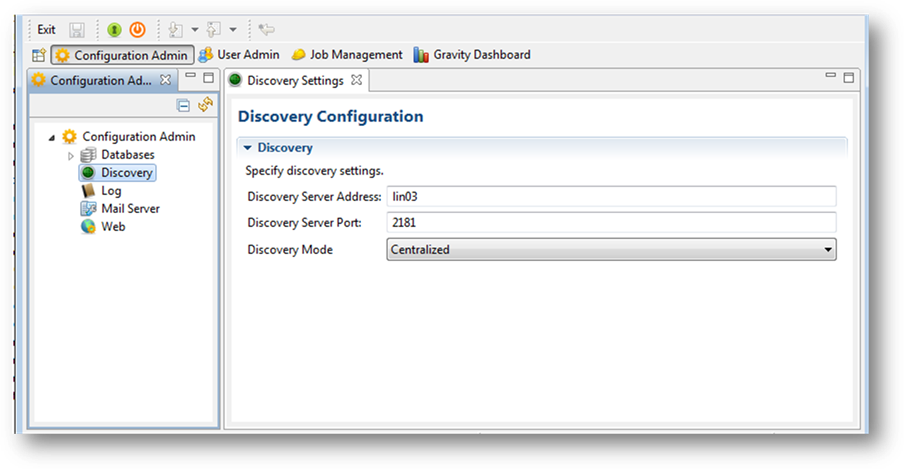
To configure Gravity discovery, double-click on "Discovery" from the configuration Admin view.
- An editor is opened
- Fill in discovery mode:
- Centralized: One and only one discovery server will be running on which all Gravity services will rely. All Gravity instances pointing to this central point are able to see each other's services automatically.
- Centralized: One and only one discovery server will be running on which all Gravity services will rely. All Gravity instances pointing to this central point are able to see each other's services automatically.
- Fill in the host address Gravity discovery server is running at.
- Fill in the host port.
- Fill in discovery mode:
Log
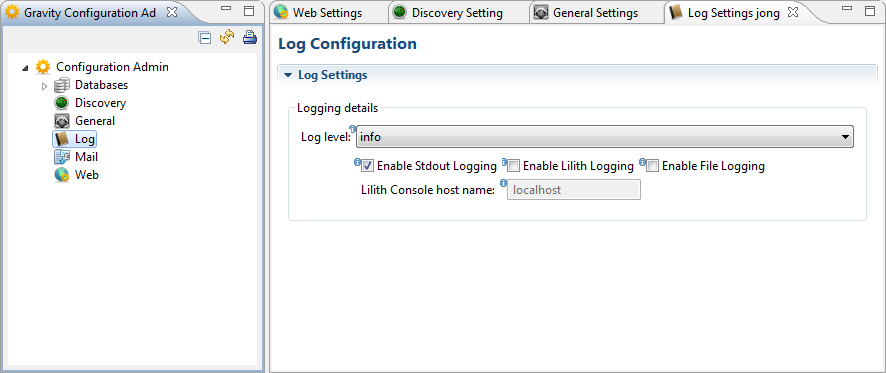
This section configures Gravity logs. Please don't change any of these unless asked so by our helpdesk.
