HOWTO:Branching
Branching HOWTO
What is Branching
With the Branching function, you are able to create a separate flow inside your application where you can do development that is completely isolated from the other development efforts in the same application.
- Branches can be created on the fly.
- Branches can be long- or short-lived.
- Multiple developers can work on the same branch
- You can have a branch per task or a branch for multiple tasks
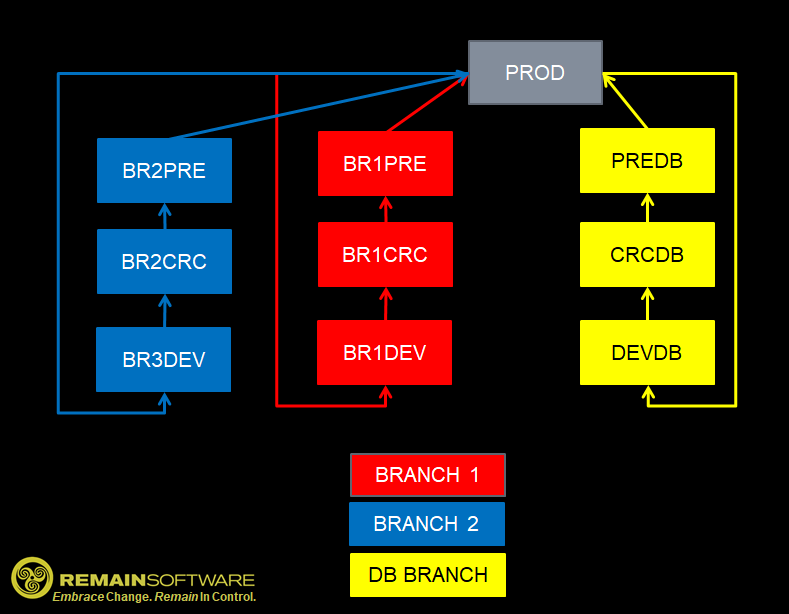
This diagram shows an example application definition with three active branches with four environments.
The yellow branch in this picture is the database branch. It is a long-lived branch and it is used only to do database changes in isolation. If you want to change a file, you can attach all related objects to a task, quickly make the change and then promote the change back into production.
Then there are two feature branches (a new feature is a new function or bug fix, it's modern lingo).
The two branches are red and blue in this picture. In reality, branches don't have colors. What you notice is that each environment (*DEV, *CERTIFICATION and *PRE-PRODUCTION) have cryptic names. These are the actual library names which can only be 10 positions in the IBM i.
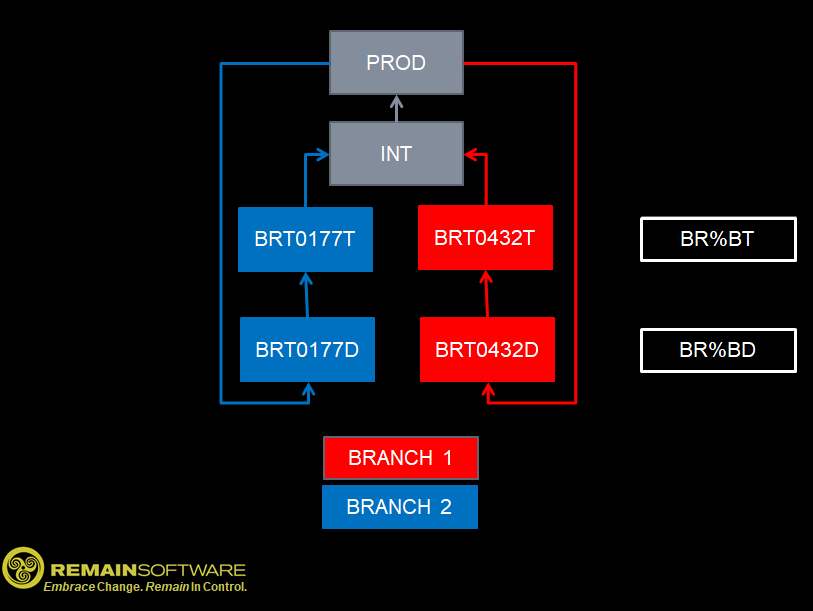
The diagram below shows a different branching strategy with currently two active branches.
Then two feature branches have a separated development and test environment but merge together in the integration environment.
You can also see the template name that has been used to generate unique library names: BR%BD for the development libraries and BR%BT for the test libraries, resulting in the library names you see in the example.
Library and Directory Name Template
In the environment maintenance function, you are able to create a TEMPLATE sub-environment with a compilation LIBL, directories and libraries to receive objects and sources. In addition to the normal library rules, you are also able to specify a template in case you are defining a template library list for branch creation.
The following special values may be used to compile a library name during the creation of a branch:
- %B
- The Branch code is used to compile the name of the library during the creation of the branch. Keep the Branch number to a reasonable width (e.g. 5 or 6) in order to be able to use additional decorations in the name.
- %U
- The first 3 positions of the current user name are used to compile the name of the library during the creation of the branch.
- %S
- A sequence number is used to compile the name of the library during creation of the branch. The sequence number is 6 long and will return to zero after 999999 branches have been created.
Examples for library generation
%S: 000016
%U: PATRICIA
%B: B01233

+---------------------------------+
¦ Base value      Generated value ¦
+---------------------------------+
¦  %U%SD          PAT000017D      ¦
¦  DM%BD          DMB01233D       ¦
¦  %B%S%U         B012336PAT      ¦
+---------------------------------+
%S: 312882
%U: PATRICIA
%B: B1233

+---------------------------------+
¦ Base value      Generated value ¦
+---------------------------------+
¦  %U%SD          PAT312883D      ¦
¦  DM%BD          DMT01233D       ¦
¦  %B%S%U         B123382PAT      ¦
+---------------------------------+
Branching Setup
To use Branching, you have to create special template library lists in the environment maintenance function. After the templates are created, developers are able to create branches from the GUI.
Create Branch
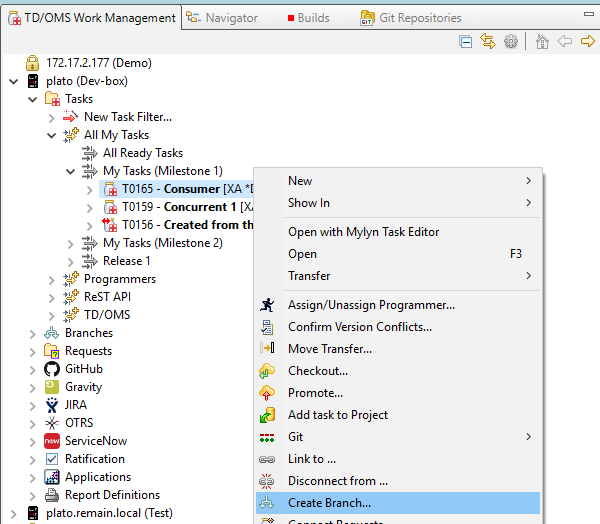
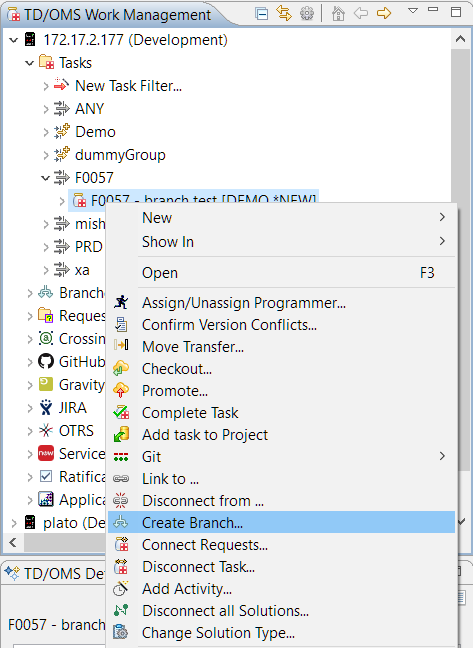
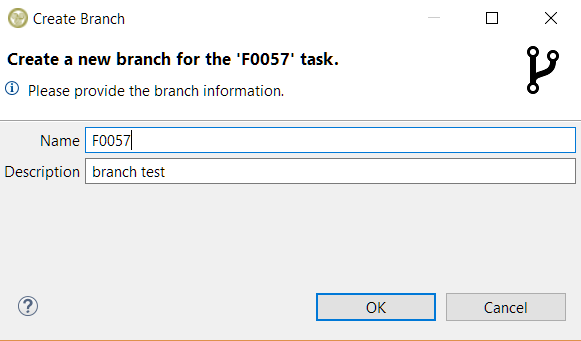
To create a branch, you must right-click on a task (or many) and select the "Create Branch" action.
This will open the respective dialog that allows you to choose the name and the description of the branch. For convenience, these values will be automatically filled for you from the task itself. If many tasks are selected then they will be filled in from the first task in your selection. Both fields are mandatory for a branch to be created.
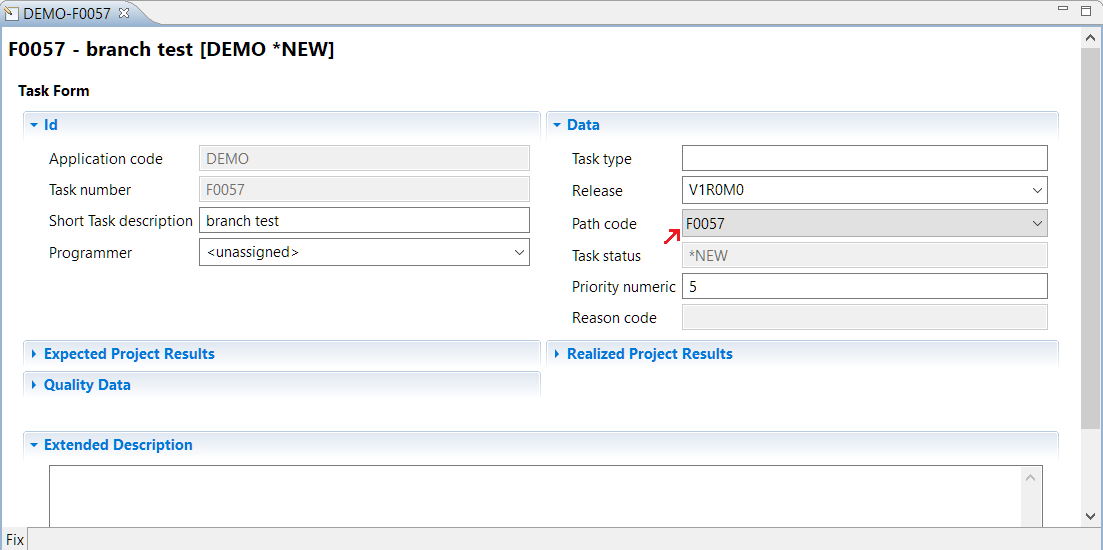
When OK is pressed then the newly created branch will also be assigned to the tasks that you selected to create it.
Delete Branch
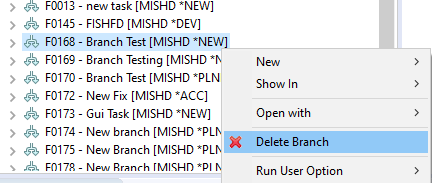
To delete a branch, right click on it and select the Delete Branch option. A branch can be deleted only if all the tasks that are assigned to it are completed meaning that it must have either *NEW or *CMP status.
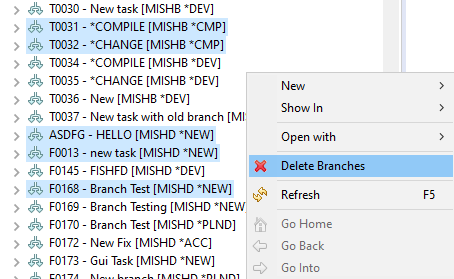
If many branches need to be deleted then they all need to have the *NEW or *CMP status or the option won't be available. They can also be from different applications but not from a different host.
Another option is to right click a single branch filter.
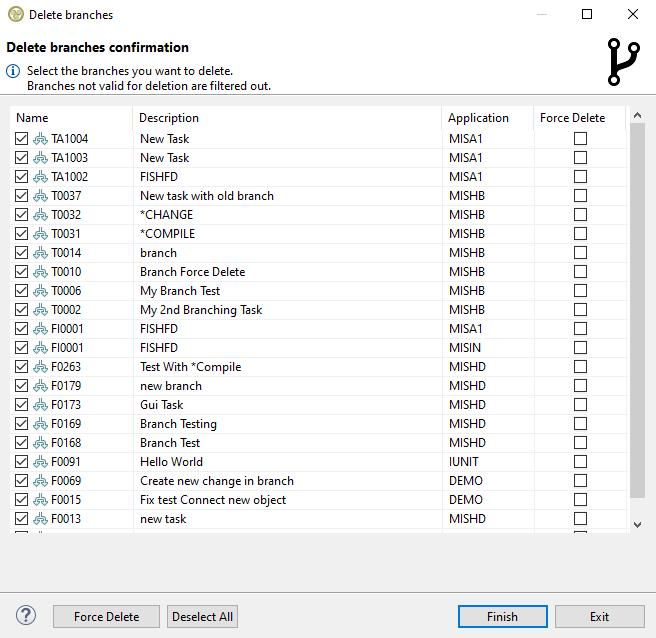
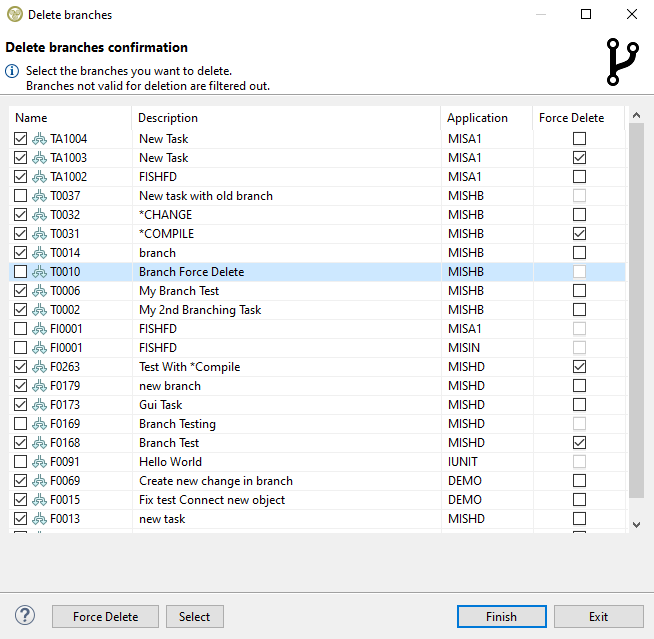
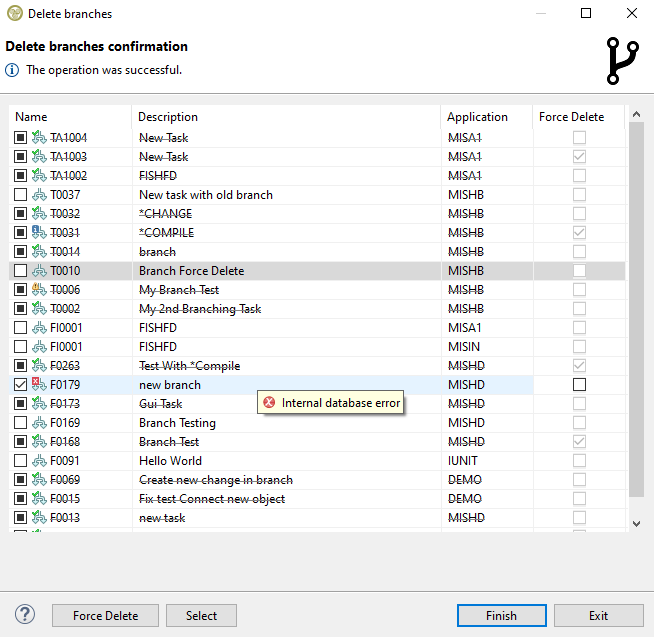
The delete branch wizard has a table with the branches and a checkbox for each one defining if it should be force deleted. Force delete is useful if a branch can't be deleted normally because its libraries or routes still contain objects. In case a branch filter was selected, any branches that don't have the *NEW or *CMP status will be automatically filtered out and won't show in the table. When the wizard opens all branches will be preselected for deletion.
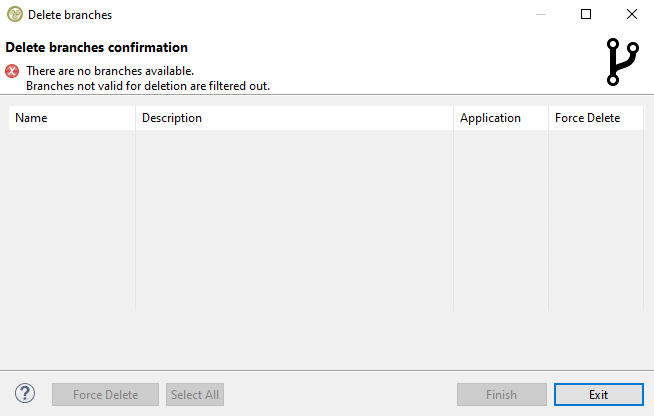
If a branch filter doesn't have a single branch with the *NEW or *CMP status then no branches are valid for deletion and the wizard will show the error with the table will being empty without any possible actions.
Wizard Content and Actions
The table itself has four resizable columns with the branch name, description, application and a checkbox to select if a branch must be force deleted. The table can be ordered by clicking on the columns to sort the branches based on their name, description or application. On the bottom left there are shortcut buttons that allow you to force delete (or don't force delete) all selected branches and a button to select/deselect all available branches or select only the ones that are selected on the table.
When you have made your choices press finish to start the process.
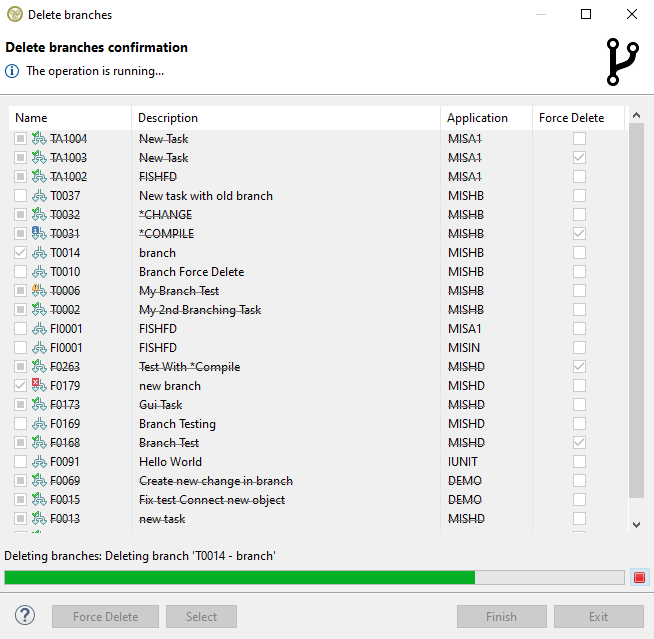
A progress bar will appear showing which branch is processed at the moment. As the progress continues the table will update the branches based on the returned status of each one: Deleted, Deleted with an informational or warning message, or Not Deleted with an error. If the branch is deleted it will have a strike-through line in the middle of its text and if there is no extra information to display then it will have a green check on the top left of its icon. If there is extra information to display it can be viewed when hovering over a branch row with an extra icon.
The operation can be cancelled by pressing the red box at the right of the progress bar and the table will show the status of the branches that have been processed already. Any deleted branches will be gray-checked and won't be available for selection anymore and they will be excluded from any actions in the wizard.
If all available branches on the table are deleted without any extra messages to show then the wizard will close automatically when the process is finished. Any affected objects that are visible in a tree in all open views will be refreshed and all affected open editors will be refreshed or closed accordingly.
HOWTO:Delete a Branch Automatically/en

