PRINT:PTFI:Product Installation and Update
Clean Installation
A clean installation has to be done before you can start working with TD/OMS on a machine/LPAR combination. The clean installer will perform the required actions, but you may need to perform these steps manually when you cannot run the Windows installer on your PC.
Automatic Steps
Execute the installer you have obtained from Remain. The installer will do the following:
- Create User Profile OMS (eg CRTUSRPRF USRPRF(OMS) PASSWORD(*NONE) USRCLS(*USER) INLMNU(OMS/OMSMAIN) TEXT('TD/OMS Owner') MAXSTGLRG(*NOMAX) JOBD(OMS/OMSJOBD) LANGID(ENU) CCSID(37) CHRIDCTL(*JOBCCSID))
- Create library OMSPTF (CRTLIB LIB(OMSPTF) TEXT('TD/OMS system upgrade library') ASP(1))
- FTP the savf to this library
- quote site namefmt 1
- quote time 1000 900
- binary
- prompt n
- cd /QSYS.LIB/OMSPTF.LIB
- put V160KEBASE.savf V160KEBASE.FILE
- Create the specified Target Library (eg CRTLIB LIB(OMS) TEXT('TD/OMS library') ASP(1))
- Change the library owner (eg CHGOWN OBJ('/QSYS.LIB/OMS.LIB') NEWOWN(OMS))
- Restore TD/OMS Programs and Files (eg RSTLIB SAVLIB(V160KEBASE) DEV(*SAVF) SAVF(OMSPTF/V160KEBASE) RSTLIB(OMS) RSTASP(1))
- Create additional user profile
- CRTUSRPRF USRPRF(OMSADM) PWDEXP(*YES) USRCLS(*USER) INLMNU(OMS/OMSMAIN) MAXSTGLRG(*NOMAX) JOBD(OMS/OMSJOBD) TEXT('TDOMS user') GRPPRF(OMS) OWNER(*GRPPRF) LANGID(ENU) CCSID(37) CHRIDCTL(*JOBCCSID)
- GRTOBJAUT OBJ(OMSADM) OBJTYPE(*USRPRF) USER(OMS) AUT(*USE)
- Update job descriptions initial library list with target library
- CHGJOBD JOBD(OMS/OMSINSTJBD) INLLIBL(QTEMP QGPL OMSINSTPTF OMS) INLASPGRP(*NONE)
- CHGJOBD JOBD(OMS/OMSJOBD) USER(OMS) INLLIBL(QTEMP QGPL OMS) INLASPGRP(*NONE) JOBQ(OMS/OMSJOBQ1)
- CHGJOBD JOBD(OMS/DMSJOBD) USER(OMS) INLLIBL(QTEMP QGPL OMS) INLASPGRP(*NONE)
- CHGJOBD JOBD(OMS/OMSJOBDPC) USER(OMS) INLLIBL(QTEMP QGPL OMS) INLASPGRP(*NONE) JOBQ(OMS/OMSJOBQ)
- CHGJOBD JOBD(OMS/OMSJOBDSC) USER(OMS) INLLIBL(QTEMP QGPL OMS) INLASPGRP(*NONE) JOBQ(OMS/OMSJOBQ1)
- Clean Up Installation Artifacts
Run the Installer
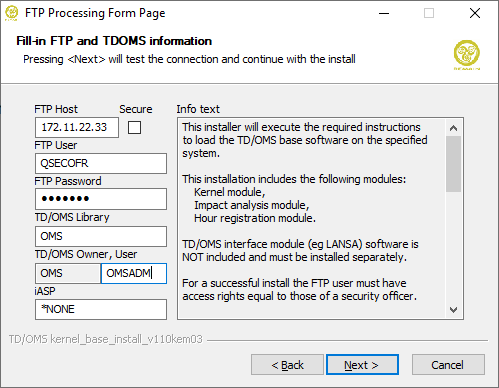
Download the base installer executable from the download section and execute it. The first panel will appear. Click the Next button to go to the second panel:
This installer will execute the required steps to load the TD/OMS base software on the specified system.
The description on the right side describes the manual steps to be done after the installation. This description can be opened in a text document at the end of the installation.
This installation includes the following modules:
- Kernel module,
- Impact analysis module,
- Hour registration module.
Other TD/OMS interface modules (eg LANSA) are NOT included and must be installed separately.
For a successful install the FTP user must have access rights equal to those of a security officer, *ALLOBJ to do the installation and *SECADM to create the user profiles.
Optionally fill in a name to create an additional user profile (eg OMSADM). This user can be used for several purposes (eg as the DB user for the GUI, for running the dispatcher service and for administrative activities). Enter the name of the Independant ASP (iASP) when 1 or more of the libraries that will be managed with TD/OMS reside on a iASP. The installer will define this name on all the relevant job descriptions. You will also need to specify the iASP name when you are configuring the TD/OMS subsystem at a later stage.
Press Next ..
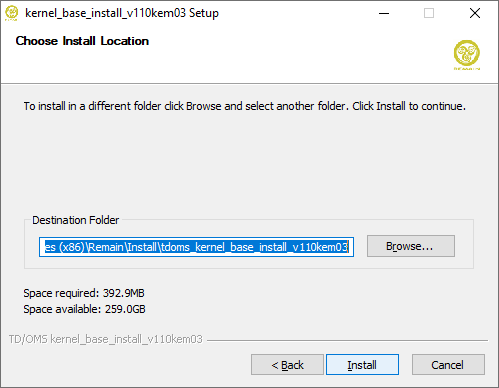
Press Install ..
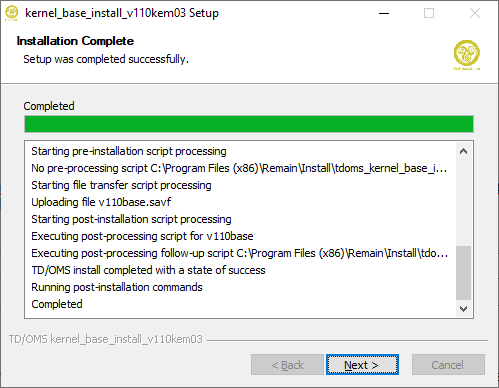
The Firewall software on your PC could pop-up a screen. Please click on Allow quickly as you may end up with an empty savefile if you don't. The installer will perform the required steps and should end with the text Completed.
Press Next ..
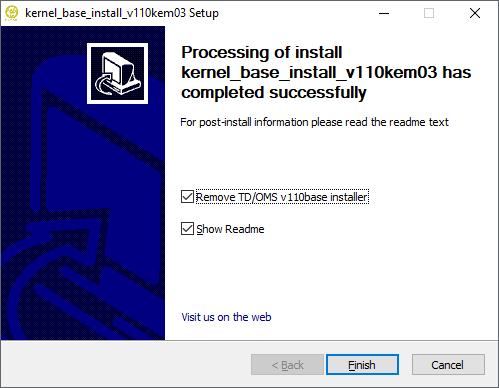
Leave the defaults as they are and press Finish to close the installer.
Next steps
After the software is installed continue with the next chapter Manual Steps.
Troubleshooting
Check the following when the software does not install:
- Is FTP enabled to your IBM i?
- Try using FTP from the command line and try to login with the same user profile. FTP is sometimes disabled for QSECOFR user profiles and sometimes FTP is disabled altogether.
- Is the user profile powerful enough?
- We need a QSECOFR or equivalent profile for the installation. A user with class *SECOFR is not enough, the profile also needs the same special authorities as QSECOFR.
Manual Steps
Important notice regarding user profile settings
- Current library
- The library defined as the current library should be a library that does NOT contain objects that are being managed with TD/OMS. The *CRTDFT value sets library QGPL as the current library and needs to be changed when QGPL objects are being managed with TD/OMS.
This information is relevant for TD/OMS users working with a CCSID other than 37. For the proper operation of TD/OMS the following user profile settings should be set correctly:
- Language identifier
- Change this into the appropriate value when the QLANGID system value does not match your language.
- Country or region identifier
- Change this into the appropriate value when the QCNTRYID system value does not match your country/region.
- Coded character set identifier
- Change this into the appropriate value when the QCCSID system value does not match your CCSID. You MUST fill in a CCSID when the QCCSID system value is defined as 65535 (no conversion) and your system administrator is not willing to change this. Some functions in TD/OMS will not work properly with the 65535 CCSID.
- Character identifier control
- Change this into *JOBCCSID when the QCHRIDCTL system value is different (*DEVD) and your system administrator is not willing to change this. The *JOBCCSID value ensures that the correct conversion is done for display files, printer files and panel groups.
Set-up of user and 5250 emulation when running installation on DBCS (e.g. Japanese) machine
When executing installation commands which affect the IFS we need a set-up which is capable to show case sensitive characters.
For a Japanese set-up it is required that the 5250 emulation configuration uses hostcodetable: 1399 Japanese
Also, the jobccsid must have a value which supports lower case characters: 5035 for Japanese
Commands involved:
- Setup Source Scanning (INZSRCSCAN)
- Configure Source Scanning (CFGSRCSCAN)
- Setup TCP/IP subsystem and servers (INZOMSSVR)
- Setup OMS Service (INZOMSSRV)
- Initialize TD/OMS parsers (INZOMSPAR)
Step 1: Add the TD/OMS library to the library list
Step 2: Apply the License Codes
You have received the license codes in files. There are two ways of entering the license codes:
Execute the DSPPINOMS command to ensure that the licenses are correctly applied.
Step 3: Specify TD/OMS system users
Go to the TD/OMS main menu by typing STROMS. Then execute option 1 (System Management), option 21 (TD/OMS Internal) and option 4 (TD/OMS system users)
Step 4: Change the CCSID
The CCSID of the TD/OMS files is set to 37 except for file OMFLT which should be set to CCSID 65535. TD/OMS will function correctly on a properly configured IBM i regardless of the CCSID being used by the users. Therefore, it is not needed to change the CCSID of the TD/OMS files. If you are not on CCSID 37 then you can change the CCSID of the files to your CCSID. Do so for all physical files except for OMFLT.
Changing into CCSID 65535 is not recommended. You can not change the CCSID of all files into 65535 as the TD/OMS description fields defined within the files use a special CCSID to support UNICODE and some files (eg OMAXR, OMAXT, OMREC, OMTAC) contain BLOB type fields. The description fields will be automatically converted to the job CCSID but this fails in the case you change the file CCSID to 65535. The TD/OMS client (GUI) may not work properly when CCSID 65535 is used for files as it was not designed to handle HEX values.
Step 5: Grant Object Authority for TD/OMS Objects
Go to the TD/OMS main menu by typing STROMS. Then execute option 1 (System Management), option 21 (TD/OMS Internal) and option 13 (Grant Object Authority for TD/OMS Objects)
Step 6: Setup the TD/OMS Subsystem
Go to the TD/OMS main menu by typing STROMS. Then execute option 4 (Distribution Management) and option 32 (Setup TD/OMS Subsystem and server jobs)
Step 7: Create the Trigger and Constraint work Library
The Trigger and Constraint work Library is the library that contains the trigger/constraint definitions during a transfer. Create the library with the following command:
CRTLIB LIB(OMSTRGCNST) TEXT('TD/OMS Trigger/Constraint Library. Do not delete')
Step 8: Create the Fallback Save Library
The Fallback Save Library is the library that contains the replaced objects and sources after a deployment. Create the library with the following command:
CRTLIB LIB(OMSFLBSAVE) TEXT('TD/OMS Fall Back Save Library. Do not delete')
Write down the name. You will need it when you create applications.
Step 9: Create the Source Archive Library
The Source Archive Library is the library that contains all previous source versions. Create the library with the following command:
CRTLIB LIB(OMSSRCARCH) TEXT('TD/OMS Source Archive Library. Do not delete')
Write down the name. You will need it when you create applications.
Step 10: Change the Job Descriptions
The supplied job descriptions need to be looked at. Please also make sure that all job descriptions mention the correct iASP name if you are working with a independant ASP (iASP).
OMSJOBD
Job Description OMSJOBD is used to submit transfer jobs (deployments). Make sure to set the correct initial library list with
 QTEMP
 QGPL
 OMS (or the name you used for the product library)
The TD/OMS deploy jobs can not run in parallel. Setup and use a job queue that releases the jobs one at a time. The TD/OMS subsystem generation process will create job queue OMSJOBQ1 in the TD/OMS library. It is advised to use this job queue. Please keep in mind that this requires the TD/OMS subsystem to be active when you perform a transfer.
OMSJOBDSC
Job Description OMSJOBDSC is used to run compiles that require single job execution. Make sure to set the correct initial library list with
 QTEMP
 QGPL
 OMS (or the name you used for the product library)
These TD/OMS compile jobs can not run in parallel. Setup and use a job queue that releases the jobs one at a time. The TD/OMS subsystem generation process will create job queue OMSJOBQ1 in the TD/OMS library. It is advised to use this job queue. Please keep in mind that this requires the TD/OMS subsystem to be active.
OMSJOBDPC
Job Description OMSJOBDPC is used to run compiles that can run in parallel. Make sure to set the correct initial library list with
 QTEMP
 QGPL
 OMS (or the name you used for the product library)
These TD/OMS compile jobs can run in parallel. Setup and use a job queue that releases multiple jobs at a time. The TD/OMS subsystem generation process will create job queue OMSJOBQ in the TD/OMS library. It is advised to use this job queue. Please keep in mind that this requires the TD/OMS subsystem to be active.
DMSJOBD
Job Description DMSJOBD is used on a remote machine to receive deployments. Make sure to set the user profile to the TD/OMS Owner profile and set the correct initial library list:
 QTEMP
 QGPL
 OMS (or the name you used for the product library)
The TD/OMS deploy jobs can not run in parallel. Setup and use a job queue that releases the jobs one at a time. The TD/OMS subsystem generation process will create job queue OMSJOBQ1 in the TD/OMS library. It is advised to use this job queue.
OMSTCPSVR
Job Description OMSTCPSVR is used by the TD/OMS subsystem. Make sure to set the user profile to the TD/OMS Owner profile and set the correct initial library list:
 QTEMP
 QGPL
 OMS (or the name you used for the product library)
RUNQMGR
Job Description RUNQMGR is used run the TD/OMS Deployment Queue. Make sure to set the user profile to the TD/OMS Owner profile and set the correct initial library list:
 QTEMP
 QGPL
 OMS (or the name you used for the product library)
RUNXSVR
Job Description RUNXSVR is used run the TD/OMS communication. Make sure to set the user profile to the TD/OMS Owner profile and set the correct initial library list:
 QTEMP
 QGPL
 OMS (or the name you used for the product library)
RUN*
Other job descriptions that start with RUN are used to manage various jobs in the TD/OMS Subsystem. Make sure to set the user profile to the TD/OMS Owner profile and set the correct initial library list:
 QTEMP
 QGPL
 OMS (or the name you used for the product library)
Step 11: Setup the Source Scanner
Click this link to setup the source scanner. This step is not required right away.
Step 12: Setup Sending and Receiving Systems
Click this link to find out how to setup the sending and receiving systems. This step is not required right away.
Step 13: Setup PTF Receiving System
TD/OMS can use TD/OMS to install its own upgrades and patches. If you want to do this then setup the PTF Installation system.
PTF Installation
Introduction
This manual will explain how you are able to install an TD/OMS PTF with TD/OMS. From now on, all TD/OMS PTF’s are shipped in a format which enables you to load the objects easily into the TD/OMS system.
Once the objects are on the system, you are able to distribute the PTF’s to all the IBM i systems in your network in the same way as you would do with other objects. If you do not have remote IBM i systems then you are still able to apply the PTF’s locally.
Before this is possible, you must setup an TD/OMS PTF application. This guide will explain the steps you must take to use the PTF mechanism.
Actions to perform
The following steps must be performed in order to use the PTF mechanism.
- Create a Job Description on all machines
- Create a TD/OMS application on the development machine
- Receive and Apply PTF's and Updates
This manual will guide you through all the required steps.
How it Works
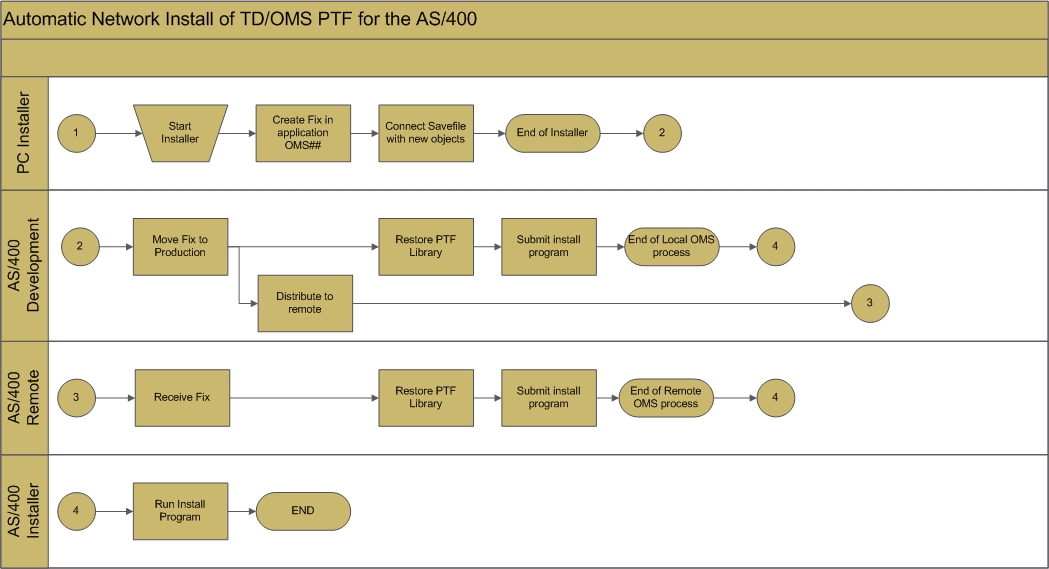
The TD/OMS PTF is supplied as a executable program for uploading the PTF to your (development) IBM i. This program will create a fix in the TD/OMS upgrade application (default: OMS##) with a savefile connected to it. This savefile contains the TD/OMS PTF objects.
The fix contains a description indicating the module this PTF is for. You must move this fix into the production environment and select the TD/OMS library list(s) relevant to the module of the PTF. TD/OMS modules are installed in the TD/OMS kernel library list(s) in most cases.
Several exception programs are executed when TD/OMS processes the savefile ;
1. Remove the old PTF library
2. Restore the new PTF library
3. Submit the installation program
This means that TD/OMS does not install the changed objects. TD/OMS is only used as a carrier to distribute all the objects to the remote locations. After the objects have arrived, TD/OMS submits another program which does the actual installation.
This installation job needs a special job description: OMSINSTJBD.
Create Job description OMSINSTJBD
You must create a job description with the name OMSINSTJBD on every location that is to process TD/OMS PTF's.
The job description OMSINSTJBD is used to install the TD/OMS PTF's
- User OMS must have *USE rights for both the job description and the user specified in the job description.
- Change the USER value from *RQD to a valid user profile on the IBM i.
- The user specified in the job description USER keyword must be a *ALLOBJ and *SECADM user.
- The user specified in the job description must also exist on all IBM i systems.
- This job description must exist on all IBM i systems where TD/OMS is installed.
- The INLLIBL keyword must be set to INLLIBL(QTEMP QGPL OMSINSTPTF TD/OMS-lib) where TD/OMS-lib is the name of your TD/OMS library.
- Specify HOLD(*YES) on the (local) IBM i systems, process the fix and then exit all TD/OMS functions and menu’s. Only then release the job which was submitted during the processing of the fix to make sure that no TD/OMS objects are locked during the installation.
- On remote systems you do not have to set the HOLD keyword to *YES but the install job is not allowed to run when other TD/OMS jobs are running.
Creating the PTF Application
The TD/OMS PTF installer uses a dedicated TD/OMS application to apply new versions local and remote. By using the TD/OMS deployment mechanism you save time upgrading the system across your enterprise.
IMPORTANT NOTICES
Please read these notices carefully.
Authority
The user which installs the TD/OMS objects on the remote locations is by default user OMS. Normally, user OMS does not have enough authority to replace objects in the TD/OMS library. This can be achieved by specifying a *SECOFR and *SECADM user in the job description used to submit the OMSINSTALL program. This userprofile must exist on the IBM i where the job description resides.
You are able to distribute this job description to your remote IBM i systems with the OMS## application by creating a fix, placing the object in the OMSPTF library and connect it to the fix. Distribute the job description to the kernel library lists only.
User OMS must have *USE rights for both the job description and the user specified in the job description.
TD/OMS is unable to create fixes and solutions
The most likely cause of this is that the TD/OMS PTF application (OMS##) is not configured correctly. You can use the INSAPPOMS command to set-up the application. Ensure that the user specified when running the installer has been authorised (as a level 3 user) to use the TD/OMS PTF application (STRUAM). For the manual approach: Fill the object file for the TD/OMS PTF application and environment *RCV. Then create fixes for each savefile in the library and connect the related savefile to the fix. If it still fails, report the problem to the TD/OMS helpdesk.
If you apply locally, the savefile is removed
If you apply the fix locally then the savefile is removed. It looks as if the savefile is stored in the target libraries but this is not the case. The exception NOTHING does not create the savefile in the target library. Because the object is "virtual", TD/OMS does not require it to be in the target environment.
This implies that once the savefile is applied locally it is no longer on the system. If the remote installation fails then you cannot distribute it again. This can be solved by applying the PTF library manually on this location.
You should first apply the fixes remotely. This can be achieved by creating a remote and a local library list.
Apply PTF’s manually
Appling PTF’s manually is still possible. Transfer (eg FTP) the savefiles to library OMSPTF. All the savefiles with the PTF objects are in this library. Use the RSTLIB command to restore the library from the savefile and run OMSINSTALL manually. Please note that the PTF library must be placed before the TD/OMS library in the library list. This means that the PTF library must have a lower sequence number in the library list. The best approach is to submit the OMSINSTALL command as running it interactively may cause the program to hang.
TD/OMS may not be in the system library list
It is not allowed to have the TD/OMS library in the system library list. The OMSINSTALL procedure will fail when this is the case because objects could be replaced when they are active. This can cause undesirable results.
Nobody may use the system
All objects must be unlocked before the OMSINSTALL program can run. Make sure the INSTALL exception does not run together with another TD/OMS job.
Creating the application
Log on as QSECOFR and go to the TD/OMS main menu. Enter the command INSAPPOMS and press F4.
The INSAPPOMS command will install the TD/OMS installation application needed to carry the TD/OMS PTF files across your network. If you do not have any remote machines then you are still able to use this PTF mechanism to update the development machine.
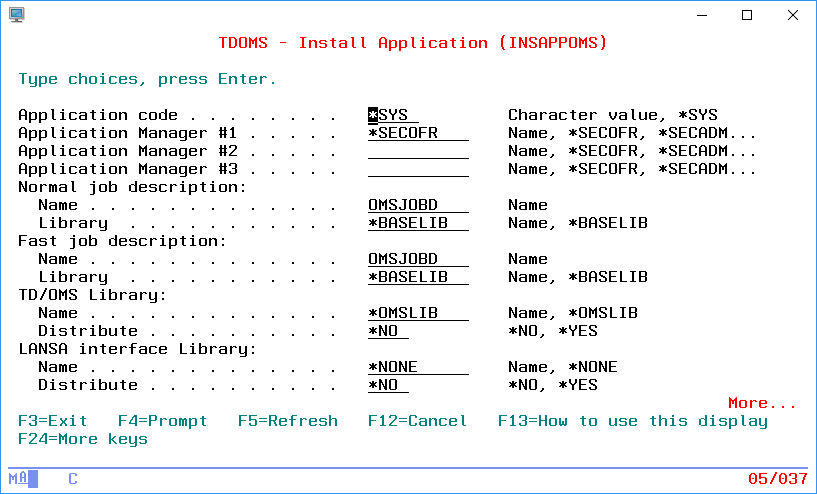
Enter the command INSAPPOMS and press F4 if you have not already done so. The following display will be shown.
Application
- Leave this to *SYS if you are content with OMS## as the application name and the hash-character is correctly displayed. If the hash character causes some problem due to your system CCSID, add another name. This value will replace the OMS## value with the new value making that value the new *SYS. The value is restored in data area OMS010.
Application mgr #1
- Leave this to *SECOFR
Application mgr #2
- Enter a user ID which is authorised to change and use this application. Leave the field blank if you do not want to authorize an additional user.
Application mgr #3
- Enter a user id which is authorised to change and use this application. Leave the field blank if you do not want to authorize an additional user.
Normal job description
- The normal job description must contain the name of a valid job description to be used by TD/OMS as the default job description if an object transfer is submitted to batch.
Fast job description
- The fast job description must contain the name of a valid job description to be used by TD/OMS if an object transfer is scheduled with the fast job description.
TD/OMS library
- Special value *OMSLIB will retrieve the current TD/OMS library.
- Enter the name of the your TD/OMS library, In most cases this is OMS or TDOMS. All TD/OMS libraries should have the same name across your network. If this is not the case then enter the library name used in most cases and contact the TD/OMS helpdesk.
- Enter a *YES in the Distribute field if the base library also exists on your other IBM i systems.
4GL libraries
- Enter the name of the TD/OMS 4GL interface library. Enter *YES in the Distribute field if this library also occurs on the other IBM i systems. The name of the 4GL libraries must be specified if your TD/OMS installation interfaces with the following 4GL systems: LANSA, CA/2E (Synon/2E) and CA/Plex (Obsydian).
Press Enter to create the TD/OMS upgrade application. Please take some time to investigate the definitions of the application. The definitions which are created are:
- Application definitions (command STRAD)
- Security definitions (command STRUAM)
- Environment -, library list -, distribution entry - and library definitions (command STREM)
- Remote locations (command STRRLM)
- Remote location overrides (command STRRLO)
- Exception functions (command STRXFM)
- Exception selections (command STRXSM)
You are now ready to receive PTF’s and updates from your TD/OMS supplier.
PTF's
Uploading with the Windows Installer
Please ensure that the TD/OMS upgrade application exists and the user (the FTP user) executing the program is authorized to use the application (STRUAM). Then start the installer.
The program does the following:
1. Create the OMSPTF library if it does not exist
2. Place the PTF savefile in the OMSPTF library.
This library contains all PTFs. Each PTF library is stored in its own savefile in the OMSPTF library.
- The program loads the savefile into the TD/OMS database
- It creates a task.
- It connects the savefile to the task.
Uploading with the Green Screen
If your development IBM i has access to the internet, you can download the updates from our servers. The updates are divided into three main segments:
- Releases (e.g. V151KEM01)
- Milestones (e.g. V160KEM01)
- Nightlies (e.g. V160KEM02)
The semantics of the version number are:
- VXXYKEMNN
- VXX is the version number
- Y is the release of milestone indicator. 0 = Milestione, > 0 = Release
- KE is the module code
- MNN is the release modification or milestone number
- Examples
- V151KEM01 - V15 Release 1 Modification 1
- V160KEM02 - V16 Milestone Milestone 2
Nightly updates give access to the latest developments, but you have to ensure that your clients are compatible and install the latest clients if required.
To start the update program, either use DSPPINOMS and use option F6 or use the CHKUPDOMS command.
From the screen that appears.
- Select the update that you want to install
- The program downloads the savefile into the TD/OMS database
- It creates a task.
- It connects the savefile to the task.
Applying PTF with TD/OMS upgrade application
If everything went normal then you should see a display like this (this is an example):
OMO004                         Fix Maintenance
OMO00401-1                     Work with Fixes
------------------------------------------------------------------------------

Application code .......: OMS##      OMS system application 5
Position to ............:

2=Change  4=Delete  5=Display  6=Print  9=Process  12=Work with Solutions ...

   Fix        Description                         Status  St-Date Programmer
   V65KEPM05  KE: TD Kernel 6.5 M05                *RCV  27/04/14 QSECOFR
   V65KEPM00  KE: TD Kernel 6.5 M00                *CMP  16/01/14 WIM

                                                                       More...
------------------------------------------------------------------------------
F3=Exit  F6=Add  F9=History  F10=View-2  F23=More Options  F24=More Keys
Use option 12 to go to the solutions. Now you are able to move (option 11) the solution from the *RCV environment to the *PROD environment. You may be asked to select the library list which belongs to the fix.
Most of the time you will be installing KE (KERNEL) fixes. You can match the KE code in the task to the KERNEL targets when you deploy to *PROD with option 11=Move.
Check the TD/OMS log (DSPLOGOMS) and make sure that all objects were restored to library OMSINSTPTF (errors as result of security issues can be ignored). Exit all TD/OMS functions and menu’s. Sign-off the session and sign-on again. Make sure that nobody else is using TD/OMS or is in the menus. Only then release the job that was submitted during the processing of the fix (the TD/OMS log and the job description OMSINSTJBD tell you where it was submitted to). Monitor the job to make sure that no TD/OMS objects are locked during the installation. When the installation job has finished you can check the information in the TD/OMS log (DSPLOGOMS) to verify that processing finished successfully. It is advised to scroll through the entire log. The installation process handles menu locks as non critical (as the sources are supplied as well) so you may want to look for in use messages. Use the DSPPINOMS command to verify that the expected version is installed.
Installation of PTF's in savefiles
Pre installation tasks
- Signon as QSECOFR
- Create the upgrade application if you do not have one. Authorise yourself for the application.
- Unzip the savefile and place it on your own PC desktop.
- On the IBM i, create a savefile with the same name in library OMSPTF, e.g. V65KEPM05.
- Transfer the savefile on your desktop into the savefile in library OMSPTF by using FTP or by using copy commands and using an IFS directory as an intermediary stage.
- All pending transfers must be completed before installation.
- Shut down all TD/OMS related subsystems (OMSTCPSVR)
- Backup you TD/OMS library
- Restart subsystem
If you want to use the TD/OMS upgrade application (OMS##) approach:
- Perform pre installation tasks
- Load the savefile as a temporary object in the *RCV environment of the OMS## application.
- Create a fix with the same name as the savefile (e.g. V65KEPM05)
- Connect the savefile to the fix
- First distribute to all remote machines and check the DSPLOGOMS (locally and on all remote machines)
- Implement on remote machines (release job) and check the DSPLOGOMS on remote machines
- Transfer to local machine and check the DSPLOGOMS
- Implement locally (release job) and check the DSPLOGOMS
- Restart subsystem on remote machines and on local machine
Installation Instructions to perform upgrade WITHOUT use of TD/OMS upgrade application (MANUAL)
- Perform Pre installation tasks
- Remove your TD/OMS library from the system library list
- Restore the library from the savefile in library OMSPTF to a library with the same name as the savefile.
- Place the TD/OMS library AFTER the restored library in the library list (e.g. 10 V65KEPM05 | 20 TDOMS)
- Submit (or execute) the following: OMSINSTALL FROL(upgradelibraryname) TOOL(youromslibrary)
- Check the DSPLOGOMS for the upgrade application when the job was submitted, otherwise check the joblog
- If problems are found in the log, try to resolve them else contact us.
- Change file OMFLT to CCSID 65535 if the file was part of the upgrade.
- Restart subsystem
GUI Installation
This section describes how to install the TD/OMS graphical user interface client. The client consists of Eclipse plugins that can be installed as a standalone client (RCP) or embedded in the RDi, RTC or Eclipse clients. It is advised to close the TD/OMS workmanagement perspective and any open TD/OMS view before performing an update of a embedded installation.
TD/OMS GUI installation
You can choose how to install the TD/OMS GUI. You can install the GUI in one of the following ways.
Install the TD/OMS Standalone Client
You can get the installer from our download section here. Select the Downloads button in the section of the TD/OMS version installed on your IBM i and open the folder of the relevant milestone. Look for the installer that starts with tdoms_rcp_setup_ or something similar. Once downloaded just click on the installer and follow the instructions below.
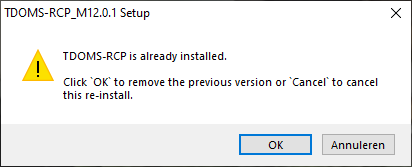
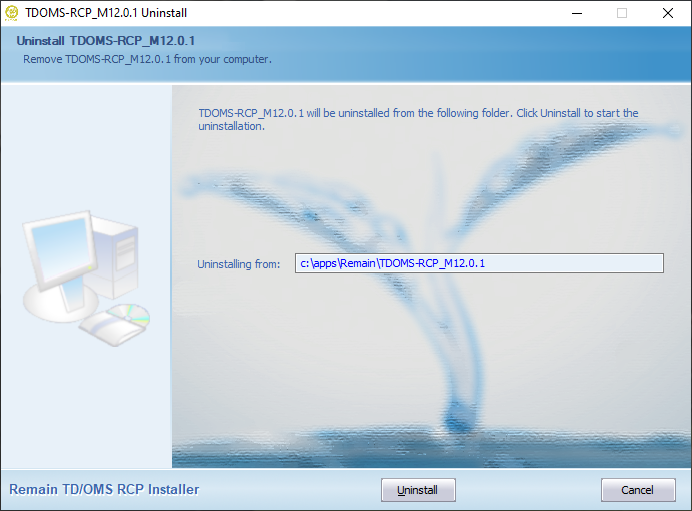
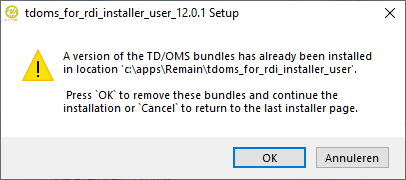
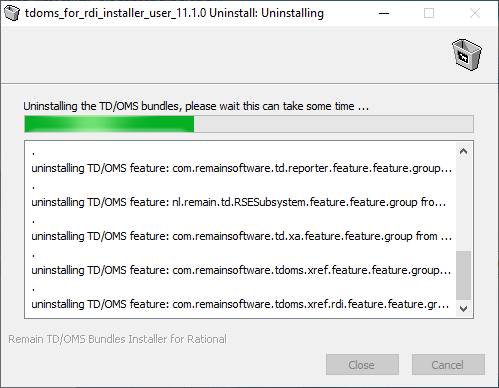
If you have a previous installation then this installation will be automatically removed from your computer before the new software is installed. Your data will not be lost but any plugins that you have installed manually must be installed again.
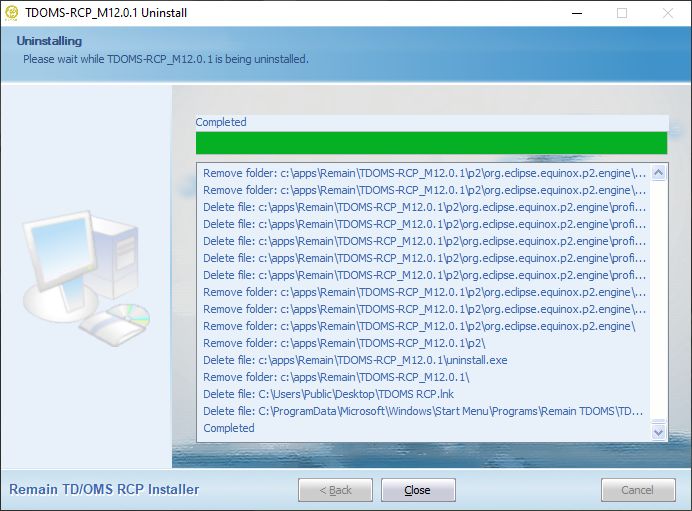
Uninstalling
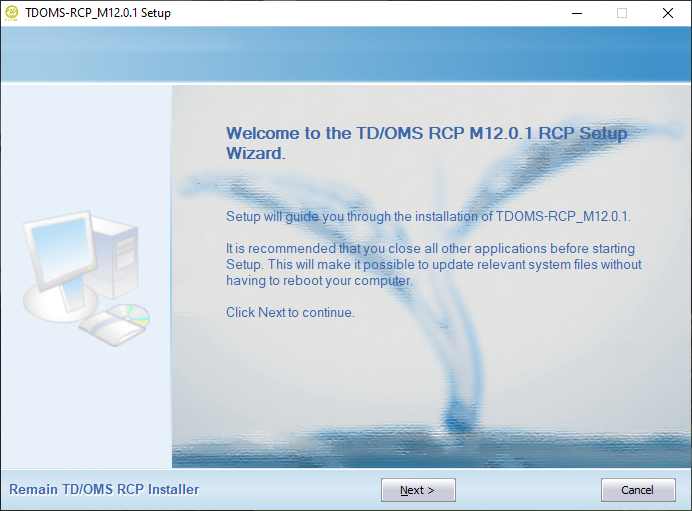
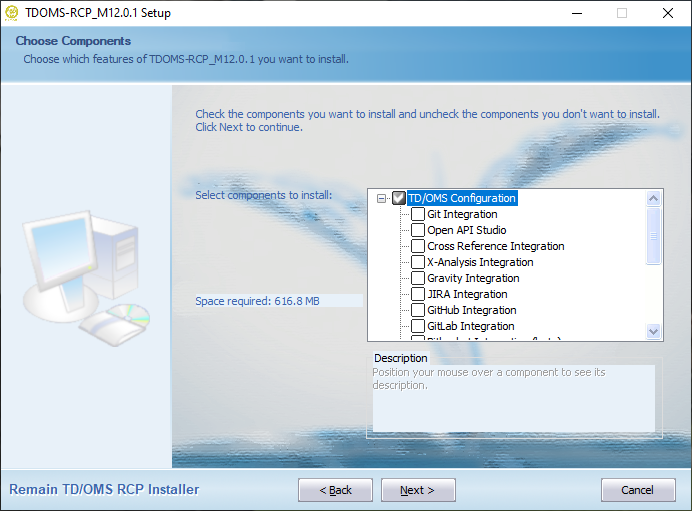
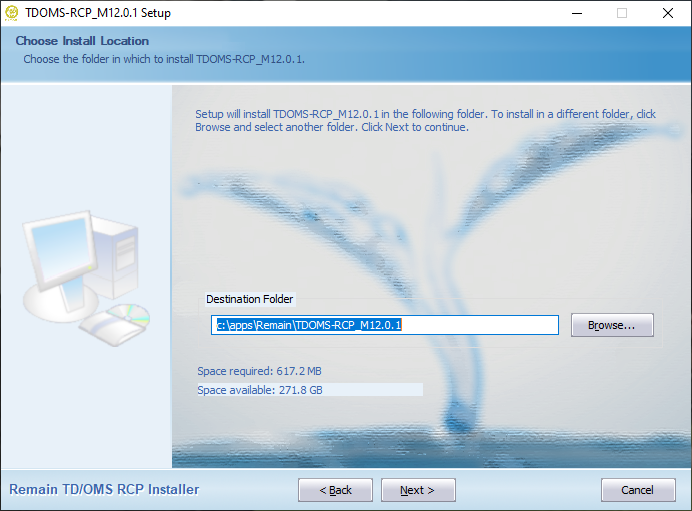
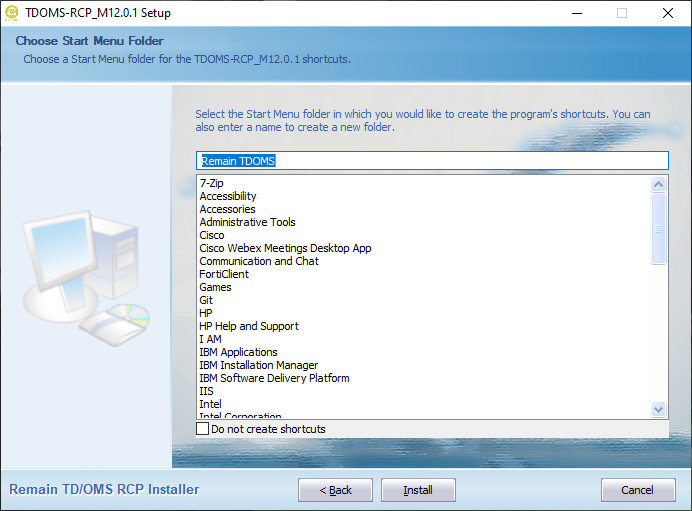
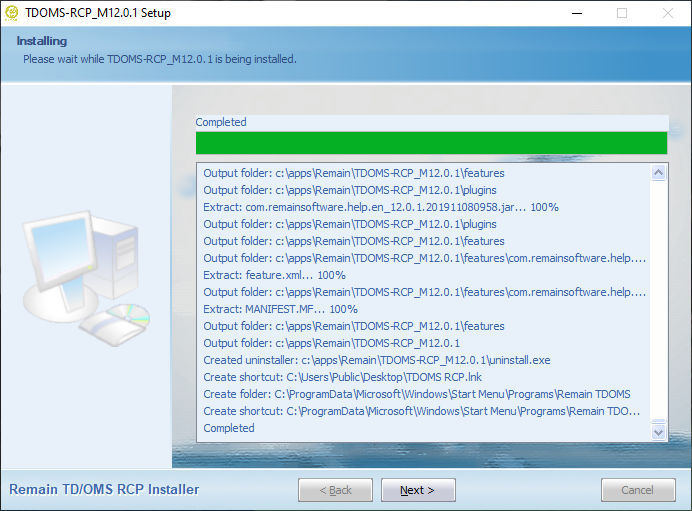
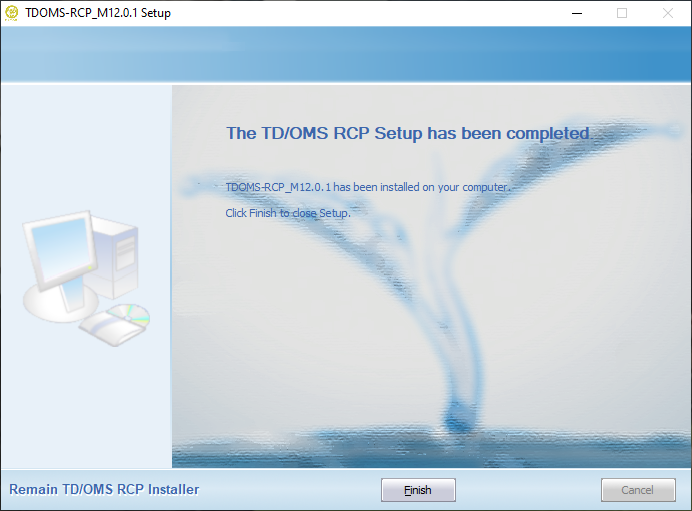
Installing
Install the TD/OMS Client inside RDi
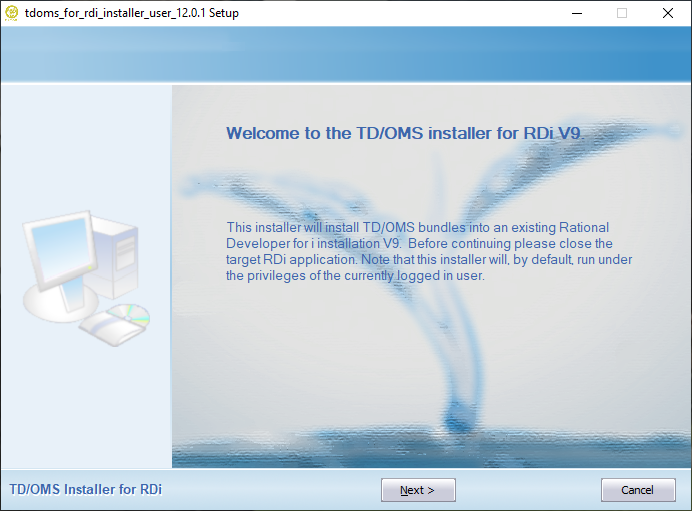
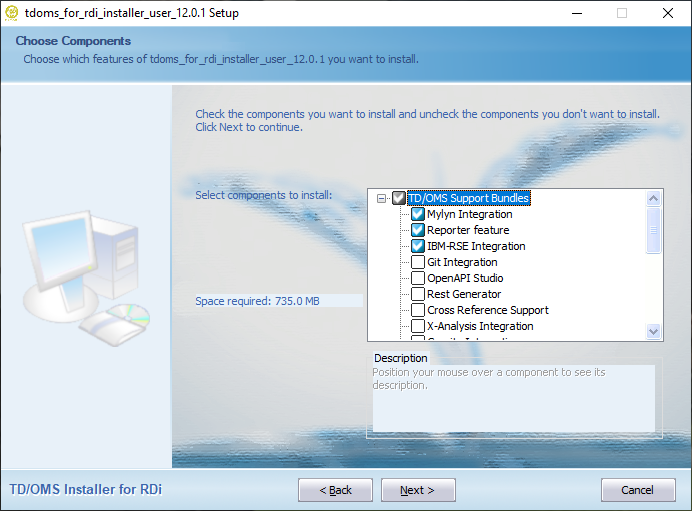
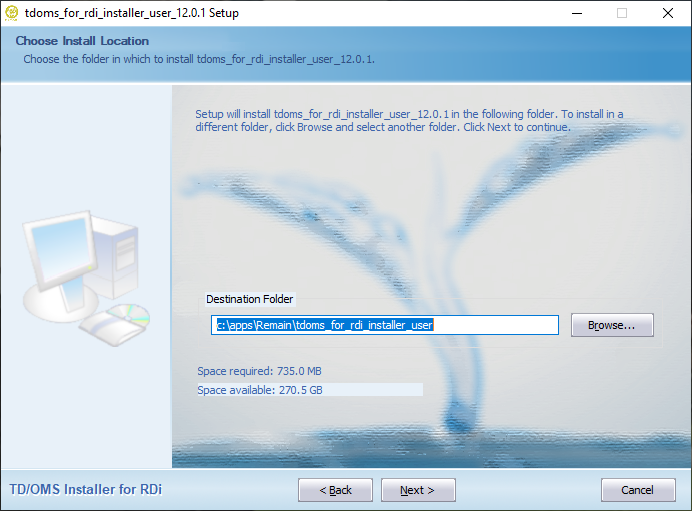
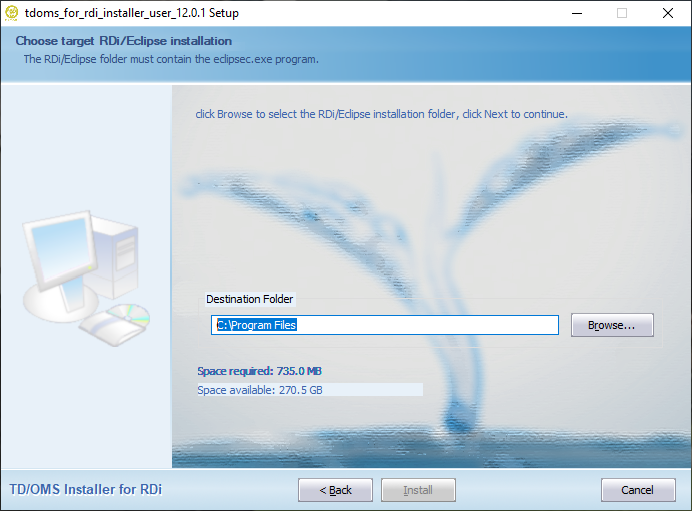
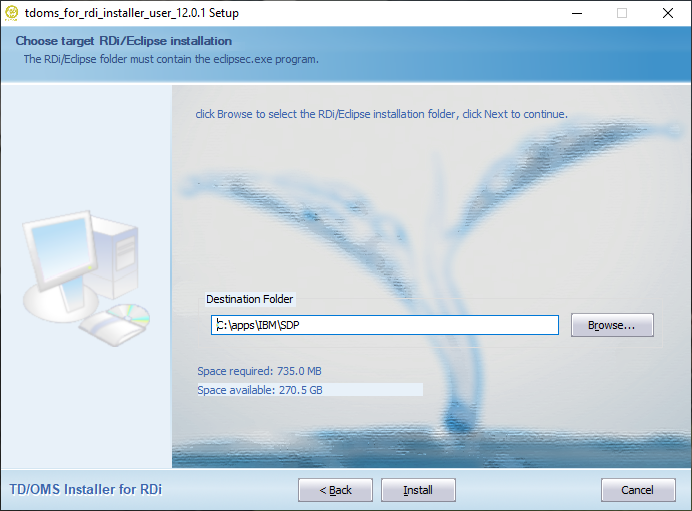
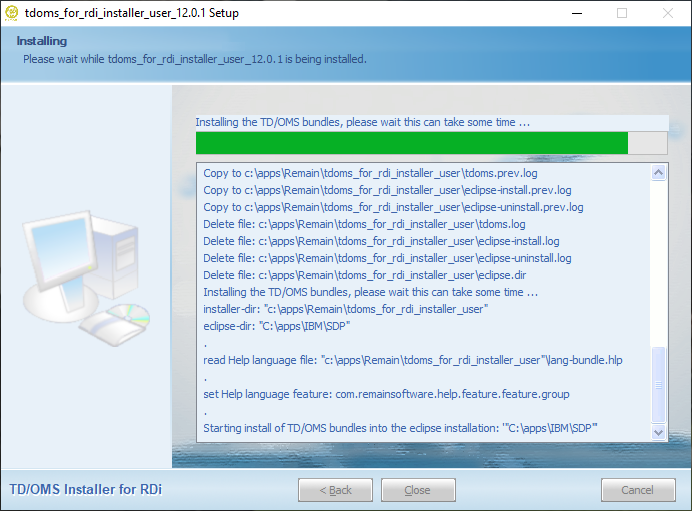
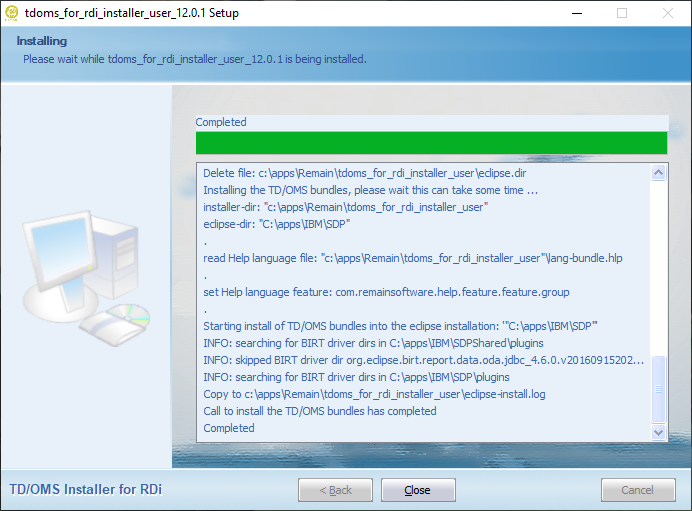
You can get the installer from our download section here. Select the Downloads button in the section of the TD/OMS version installed on your IBM i and open the folder of the relevant milestone. Look for the installer that starts with tdoms_for_rdi_installer_user_ or something similar. Once downloaded just click on the installer and follow the instructions below.
If you have a previous installation then this installation will be automatically removed from your computer before the new software is installed. Your data will not be lost but any plugins that you have installed manually must be installed again.
You can only install the client in ONE RDi installation.
If you have two or more installations of RDi you need to install the plugins using an update site. Please make sure that RDi is NOT running before you run the installer.
Installing the client in RDi
Install the Plugins in an Existing Eclipse Installation
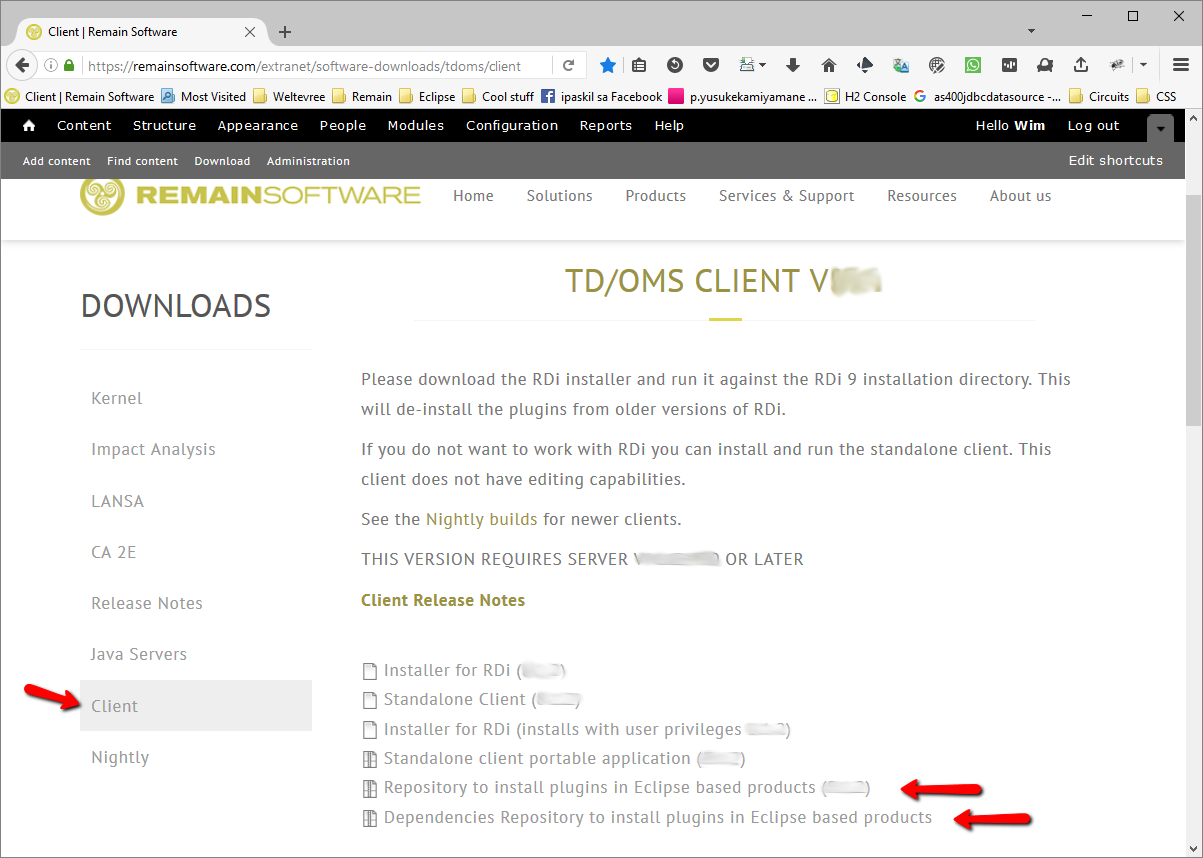
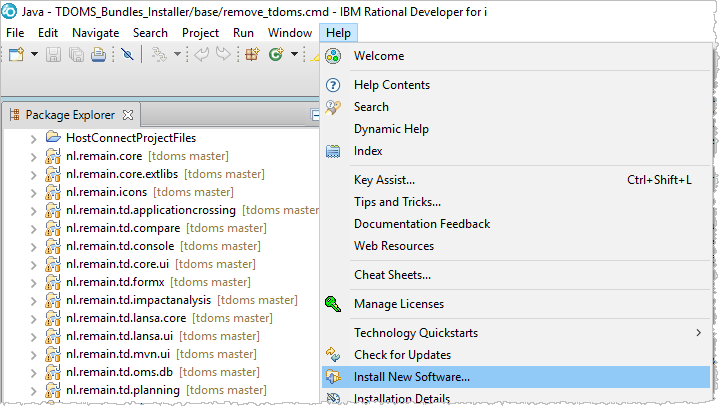
If you already have an existing Eclipse installation or if you want to install the plugins manually into RDi or any other Rational tool then download the plugins repository from the download site. Then start your Eclipse installation and select "Help/Install new Software ...". On the page that appears, create a new repository from an archive file and then select the options you want to install.
Downloading the Repositories
Download the following two repositories from the Remain download site:
- tdoms-plugins-repo-X.X.X-YYYYMMDD-xxxx.zip
- This file contains the TD/OMS plugins and this is where you install from.
- tdoms-dependencies-repo-X.X.X-YYYYMMDD-xxxx.zip
- This file contains additional dependencies needed by our plugins. For example, our reporting plugins require the BIRT framework which is typically not available in a standard Eclipse or RDi installation.
Adding the dependencies repository to Eclipse
Start Eclipse or RDi and choose Install New Software... from the the Help menu.
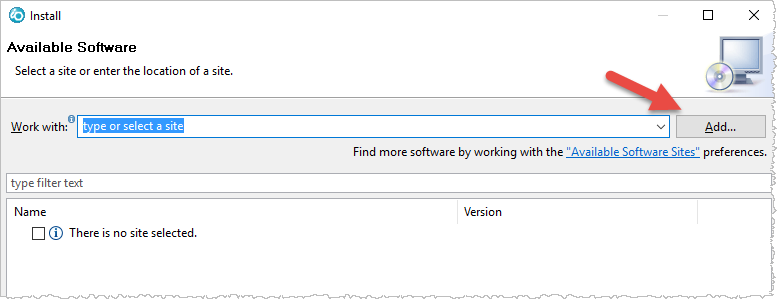
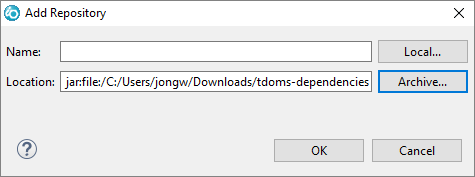
Then press the Add... button to add the first zipped repository.
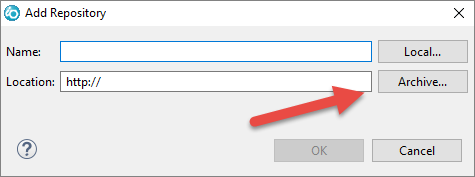
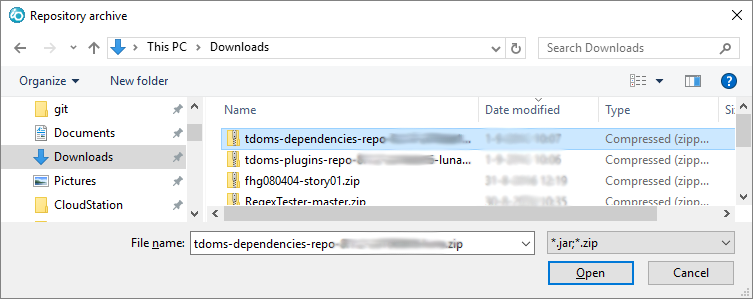
Press the Archive... button and navigate to the saved dependencies repository.
Select the downloaded dependencies zip file.
Press Ok.
Adding the plugins repository to Eclipse
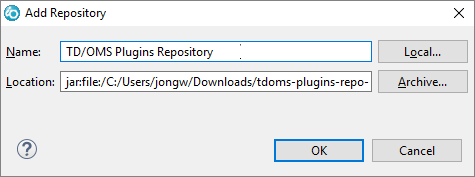
Then press the Add... button again to add the next zipped repository which contains our software.
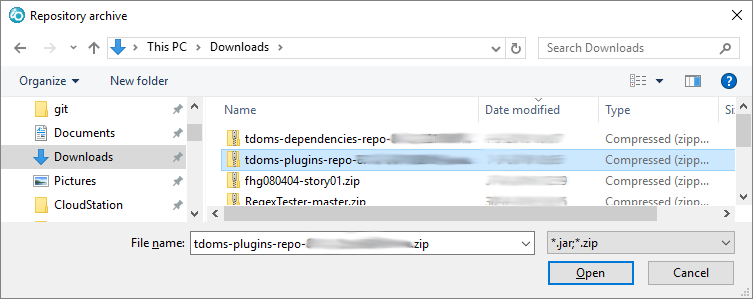
Press the Archive... button and navigate to the saved plugins repository.
Navigate to the file
Optionally enter a name and press Ok.
Installing Software
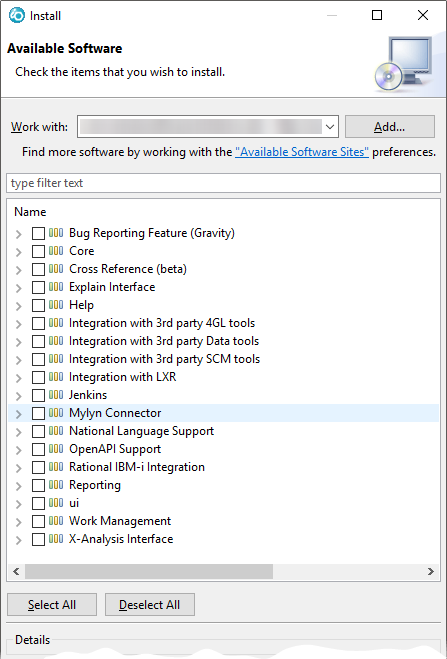
From the Available Software page, select the plugins repository from the dropdown box. The list will populate with the installable units. Select the required components from the list and press Next >.
- Bug Reporting Feature (Gravity)
- Enables you to report issues to our helpdesk. If you do not install this you can still file issues through the web interface at http://helpdesk.remainsoftware.com
- Core
- Contains the TD/OMS Core bundles. This may always be checked.
- Explain
- Contains the integration with PKS eXplain
- Help
- Expand this item to select the help in your favorite language.
- Integration with 4GL tools
- Expand this item to select the 4GL integration you want.
- Integration with 3rd Party data tools
- Expand this item to select the data tool integration you want.
- Integration with 3rd Party SCM tools
- Expand this item to select the SCM tool integration you want.
- Integration with Rest Generator
- Expand this item to select the level of REST Integration. Warning, do not install RestGen RSE into the RDi.
- Jenkins
- Expand this to install Jenkins support.
- Mylyn Connector
- Enables import of Request and Tasks into the Mylyn task list. The interface is used to integrate Java and other Eclipse based development with source repositories like git and Subversion.
- National Language Support
- Expand this to select the installation language (English is default)
- OpenAPI Support
- Select this to install the OpenAPI V3 (Swagger/OAS3) Editor support.
- Rational IBM i Integration
- Enables interfacing with RDi and RSE. This can only be installed inside RDi. TD/OMS integration with IBM's Remote System Explorer. Supports basic TD/OMS Work Management features as an RSE extension.
- Reporting
- TD/OMS Reporting function enables you to run canned reports and to create (ad-hoc) reports.
- UI (Modeled User Interface)
- Contains the modeled UI (will be included automatically when needed)
- Work Management
- REQUIRED. This is the main TD/OMS navigation GUI.
- X-Analysis Interface
- Provides the interface between TD/OMS and X-Analysis. It requires X-Analysis version 11 or higher to be installed first.
After selecting the required modules you follow the instructions of the wizard. Your plugins are available after you have restarted the client.
Updating the Software
When new software is available you can repeat the process described here. The "Available Software Sites" link in the previous image will bring you to a dialog where you can remove old repositories.
Unattended Installation in an Existing Product
An unattended or silent installation is an installation that can be performed without a user interface. This makes it an ideal tool for the devops or system admin.
Use the Headless Installation when:
- You want to script the installation of TD/OMS GUI Components;
- You have to administer many clients at once;
- You want to automate the installation and update process.
Prerequisites
The Unattended Installation requires that you have the target product already in place. This target product can be an Eclipse based installation or the IBM Rational Developer for i. For the IBM Rational Developer for i we support version 9.6 and 9.8.
In some situations it may be required to have 3rd party bundles already installed in the target environment. This is the case for example with our X-Analysis integration. This integration requires the availability of the Fresche X-Analysis product already installed in the target Eclipse installation.
We have 2 types of unattended installation procedures. An unattended install can be done by using the Eclipse P2 director or by using the silent install option available in our RDi installers.
Note that the RDi installers can also be used for any non RDi Eclipse installation. The only limitation here is that you cannot install the RSE (Remote Systems Explorer) integration in a standard or SDK Eclipse installation. Depending on the target Eclipse installation, use either the RDi 9.6 or RDi 9.8 unattended install procedure. The RDi 9.6 installer supports Eclipse installations requiring Java 8 runtime (for example Eclipse Neon), the RDi 9.8 installer expects the Eclipse installation to be supported by at least the Java 11 runtime (as of Eclipse 4.19).
Using the silent option available in the RDi installer is the most straight forward option to use and the most easily applied. Using the Eclipse P2 director will be covered here but should be reserved for installation requirements not covered by the silent installer option. Also note that P2 director does not automatically uninstall previously installed TD/OMS client features. This is something that will have to be taken care of before installing a new set of TD/OMS client features.
Unattended install with the silent option
The following TD/OMS client installers support the silent option:
tdoms_for_rdi96_installer_user_?version-date?.exe
tdoms_for_rdi98_installer_user_?version-date?.exe
Note that the installers are specific for there intended target environment, for example you cannot use the tdoms_for_rdi98_installer_user_?version-date?.exe to install the TD/OMS client in an RDi 9.6 installation, so make sure you select the correct installer for your situation. The latest installers can be found on our web site
The installers also take care of uninstalling a previously installed version of the TD/OMS client. An automatic uninstall will only take place if the installer software directory is put in the same location of a previously installed TD/OMS client installer (the installer must be able to find the uninstall executable).
Except where documented the installers utilize the same silent mechanism and options. An unattended install can be run by executing the installer executable with at least the /S parameter followed by the /ECLIPSE parameter and 1 or more optional parameters. Aside the parameters used for the choice of integrations there are parameters used to override installer/installation locations and the runtime TD/OMS client configuration directory:
/ECLIPSE - Mandatory parameter to set the directory of the target Eclipse/RDi installation.
/D - Optional parameter to set the directory to be used for the installer software.
/USERDIR - Optional parameter to set an overriding location of the TD/OMS client runtime configuration directory.
For example to run an unintended install of the TD/OMS client for an RDi 9.6 installation the following can be executed:
tdoms_for_rdi96_installer_user_?version_date?.exe /S /ECLIPSE="c:\Program Files\IBM\SDP" /USERDIR="x:\users\tom\tdoms" /D=c:\apps\remain\tdoms_client_installer"
This will install a default TD/OMS client and if applicable will have de-installed the previously installed TD/OMS client. As per /D directive, the installer software will be installed in the directory "c:\apps\remain\tdoms_client_installer" and optionally replacing any existing software in that directory.
List of available parameters
By enabling any of the available installer options the corresponding integration or TD/OMS functionality will be installed. Except for the HELP an option is enabled by setting it to YES, for example 'RSE=YES'. Note that the YES value is expected to be all capitol letters.
- /S - Mandatory parameter required to enable the installers silent mode.
- /ECLIPSE - Mandatory parameter to set the directory of the target Eclipse installation.
- /D - Optional parameter to set the directory to be used for the TD/OMS client installer software.
- /USERDIR - Overriding location for the TD/OMS client configuration, by default this is the user's home directory as determined by the operating system.
- /HELP=JA - Apply Japanese help to replace the default installed English help.
- /AZUREDEV=YES - Azure integration, only to be used on RDi 9.8.
- /BITBUCKET=YES - Bitbucket Cloud integration.
- /BITBUCKETSERVER=YES - Bitbucket Server integration (Bitbucket on premise).
- /CONNECTWISE=YES - ConnectWise integration.
- /DATASTAGE=YES - DataStage integration.
- /GIT=YES - Git integration.
- /GITHUB=YES - Github integration.
- /GITLAB=YES - GitLab integration.
- /GRAVITY=YES - Gravity integration.
- /JENKINS=YES - Jenkins integration, default for RDi 9.6, available for RDi 9.8.
- /JIRA=YES - Jira integration.
- /LANSA=YES - LANSA integration.
- /MYLYN=YES - Mylyn integration.
- /NLS=YES - Add National Language.
- /OAS3=YES - Add Remain API Studio, requires a license.
- /OTRS=YES - OTRS integration.
- /REPORTER=YES - Add TD/OMS Issue Reporter.
- /RESTGEN=YES - Add the TD/OMS Rest Generator.
- /RMTDISTR=YES - Add Remote Distribution support.
- /RSE=YES - Integration with the IBM Remote Systems Explorer, only to be used on RDi installations.
- /SERVICEDESK=YES - ServiceDesk integration.
- /SERVICENOW=YES - ServiceNow integration.
- /SONARQUBE=YES - SonarQube integration.
- /XA=YES - X-Analysis integration.
- /XREF=YES - Xref integration.
- /ZENDESK=YES - ZenDesk integration.
The following example will install the TD/OMS client in an RDi 9.6 installation located in the directory "C:\Program Files\IBM\SDP". As only integration the RSE will be installed and the TD/OMS client installer will be installed in the default location "C:\Apps\Remain\tdoms_for_rdi_installer".
tdoms_for_rdi96_installer_user_?version-date?.exe /S /ECLIPSE="C:\Program Files\IBM\SDP" /JIRA=YES /XREF=YES
The following example will install the TD/OMS client in an RDi 9.8 installation located in the directory "C:\Apps\IBM Rational Developer for i". The TD/OMS client installer will be installed in the default location "C:\Apps\Remain\tdoms_for_rdi98_installer" and RSE will be the only installed TD/OMS client integration.
tdoms_for_rdi98_installer_user_?version-date?.exe /S /ECLIPSE="C:\Apps\IBM Rational Developer for i" /JIRA=YES /XREF=YES
To start an unattended installation so that it will run as a background process you can do the following from a Windows batch file (for example):
start "" /WAIT tdoms_for_rdi96_installer_user_?version-date?.exe /S /ECLIPSE="c:\Program Files\IBM\SDP" /RSE=YES /SERVICENOW=YES /XA=YES
Installation results
In the case of an installation failure, the result of an unattended (or attended) install will have been logged in the tdoms.log and eclipse.log. Both files are located in the root of the installer directory. The tdoms.log contains the specific RDi/Eclipse install actions and results. The eclipse.log contains the output of the RDi/Eclipse application for the time the unattended install is running.
Unattended install using the P2 Director
Using the Eclipse P2 director it also also possible to add bundles to an RDi/Eclipse location without the use of the Eclipse IDE.
Scenario 1: Install the base plugins into RDi
This scenario assumes you have
- an existing RDi installation, fro example RDi 9.6 in C:\Program Files\IBM\SDP;
- downloaded the plugins repository in c:\apps\tdoms\tdoms_plugins.zip;
- downloaded the dependencies in c:\apps\tdoms\tdoms_dependencies.zip.
Execute the following command:
 "C:\Program Files\IBM\SDP\eclipsec.exe"
    -application org.eclipse.equinox.p2.director
    -noSplash
    -repository jar:file:/c:\apps\tdoms\tdoms_dependencies.zip!/,jar:file:/c:\apps\tdoms\tdoms_plugins.zip!/
    -installIU com.remainsoftware.core.feature.feature.group
    -installIU nl.remain.td.workmanagement.feature.feature.group
    -installIU com.remainsoftware.help.feature.feature.group
    -installIU com.remainsoftware.net.dialog.feature.feature.group
    -installIU com.remainsoftware.td.distribution.remotelocation.feature.feature.group
    -installIU com.remainsoftware.planning.feature.feature.group
    -installIU com.remainsoftware.impactanalysis.feature.feature.group
    -installIU com.remainsoftware.reporting.feature.feature.group
    -installIU nl.remain.td.team.feature.feature.group
    >> c:\apps\tdoms\tdoms.log 2>&1
The result of the command is written to the log file c:\apps\tdoms\tdoms.log for further examination. See a full example of a windows shell script here
Note, the above example script will need to be adapted as it is now presented without line continuation characters (in DOS batch you can use the caret ^)
To first uninstall a feature before installing you can use -uninstallIU.
A minimal TD/OMS client installation should contain the following installation units: nl.remain.td.workmanagement.feature.feature.group, com.remainsoftware.core.feature.feature.group, com.remainsoftware.help.feature.feature.group and nl.remain.td.team.feature.feature.group
All available features
Below is the list of features available for the installation of the TD/OMS client.
Main TD/OMS features required for a minimal TD/OMS client installation
- TDOMS-Core
- com.remainsoftware.core.feature.feature.group
- Workmanagement
- nl.remain.td.workmanagement.feature.feature.group
- Help-English
- com.remainsoftware.help.feature.feature.group
- Teaming
- nl.remain.td.team.feature.feature.group
Optional TD/OMS features
- AiChat
- com.remainsoftware.chat.feature.feature.group
- AzureDevops
- com.remainsoftware.td.tracker.azuredevops.feature.feature.group, only to be installed in RDi 9.8 or Eclipse equivalent
- ConnectWise
- com.remainsoftware.td.tracker.connectwise.feature.feature.group
- Bitbucket-Cloud
- com.remainsoftware.td.tracker.bitbucket.feature.feature.group
- Bitbucket-On-Premise
- com.remainsoftware.td.tracker.bitbucket.server.feature.feature.group,
- BIRT-Reporting
- com.remainsoftware.reporting.feature.feature.group, only to be installed in RDi 9.6 or Eclipse equivalent
- DataStage
- com.remainsoftware.datastage.command.feature.feature.group
- Git
- com.remainsoftware.td.git.feature.feature.group
- Github
- com.remainsoftware.td.tracker.github.feature.feature.group
- GitLab
- com.remainsoftware.td.tracker.gitlab.feature.feature.group
- Gravity
- com.remainsoftware.td.tracker.gravity.feature.feature.group
- Help-Japanese
- com.remainsoftware.help.ja.feature.feature.group
- Impact-Analysis
- com.remainsoftware.impactanalysis.feature.feature.group
- Issue-Reporter
- com.remainsoftware.td.reporter.feature.feature.group
- Jira
- com.remainsoftware.td.tracker.jira.feature.feature.group
- Jenkins
- com.remainsoftware.jenkins.feature.feature.group
- LANSA
- com.remainsoftware.lansa.feature.feature.group
- Mylyn
- com.remainsoftware.mylyn.connector.feature.feature.group
- Maven
- com.remainsoftware.td.maven.feature.feature.group
- Mylyn
- com.remainsoftware.mylyn.connector.feature.feature.group
- Net-Dialog
- com.remainsoftware.net.dialog.feature.feature.group
- NLS-French
- com.remainsoftware.tdoms.nls.fr.feature.feature.group,
- NLS-German
- com.remainsoftware.tdoms.nls.de.feature.feature.group
- OTRS
- com.remainsoftware.td.tracker.otrs.feature.feature.group
- Planning
- com.remainsoftware.planning.feature.feature.group
- Remain API Studio
- com.remainsoftware.oas3.feature.feature.group
- Remote-Location-Distribution
- com.remainsoftware.td.distribution.remotelocation.feature.feature.group
- Remote System Explorer-for-RDi
- nl.remain.td.RSESubsystem.feature.feature.group, only to be installed in RDi
- Restgen-for-RDi
- com.remainsoftware.restgen.rdi.feature.feature.group
- ServiceDesk-Plus
- com.remainsoftware.td.tracker.servicedeskplus.feature.feature.group
- ServiceNow
- com.remainsoftware.td.tracker.servicenow.feature.feature.group
- SonarQube
- com.remainsoftware.td.tracker.sonarqube.feature.feature.group
- Xref
- com.remainsoftware.tdoms.xref.feature.feature.group
- Xref-for-RDI
- com.remainsoftware.tdoms.xref.rdi.feature.feature.group, only to be installed in RDi
- X-Analysis
- com.remainsoftware.td.xa.feature.feature.group
- Zendesk
- com.remainsoftware.td.tracker.zendesk.feature.feature.group
Headless Installation of TD/OMS Stand Alone Client
The TD/OMS Stand Alone Client can be downloaded as a zip file. It is a portable application so it can be installed anywhere by just unzipping the file.
The file you are looking for has the following syntax:
tdoms-rcp-x86-V.R.M-YYYYMMDD-eclipsename.zip
For example:
tdoms-rcp-x86-8.0.3-20160509-luna.zip

