GR:Gravity/Getting Started
Introduction video
Concepts
ALM
Gravity is a workflow tool geared towards Application Lifecycle Management. Gravity enables your community to manage the development and maintenance of your applications by creating an administration that will manage your issues, feature requests, and releases. In future releases, Gravity will enable you to perform version control on your sources and will be able to promote source and binary artifacts through the development lifecycle.
Cross Platform
Gravity is a cross-platform application which not means that the application will run on various hardware platforms. Server and database can run on different platforms.
Development Administration
The administration of the software development department may consist of software releases, iterations, tickets, bug reports, change requests and the like. Gravity does not enforce a predefined structure but enables you to define your own. Gravity comes with a number of definitions based on a development process which includes Scrum, XP, Helpdesk and TD/OMS Classic. More information about defining Gravity can be found in the tutorials.
Service Architecture
Gravity is created using a service architecture. This enables application developers and system integrators to hook into the Gravity API with great ease. A description of the Gravity REST API can be found here.
<translate>

Evaluating Gravity
This section enables you to install Gravity for evaluation purposes. It shows you how to:
- Install Java
- Install a Gravity Server on your Windows machine
- Introduction to the Web Client
- Install the Gravity Administration Client
- Introduction to the Administration functions
Install Java
You need to install Java 8 or higher before the Server can run. Java also needs to be in your path. You can download a Java installer from Oracle. After the installation of Java, open a command line and type "java -version". This will print out some Java information. If you get the message "'java' is not recognized as in internal or external program" then Java is not on your path.
Installation of the Windows Server
Installation of the Windows Server Instruction Video
GR:Gravity/Server/Installation/Windows Installer/en
Introduction to the Web Client
Sign in / Log in
After Gravity has been installed, a web client is available on the following address:
http://localhost:45050/gravity/wm
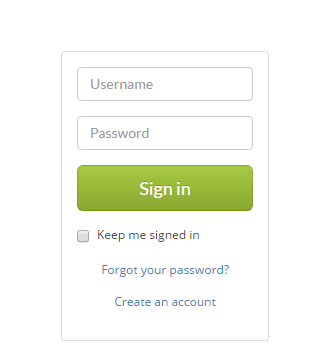
You will be presented with the Login screen. You can only log in with the following credentials:
user:     admin
password: admin
(If you have problems logging in, try to press CTRL+F5 to reload all java script code from the server. Sometimes the information is stale when you upgrade.)
Press Sign in
To avoid signing in each your session has been dead, you can check the box (under the Sign in button) saying: Keep me signed in.
Sign up / Register
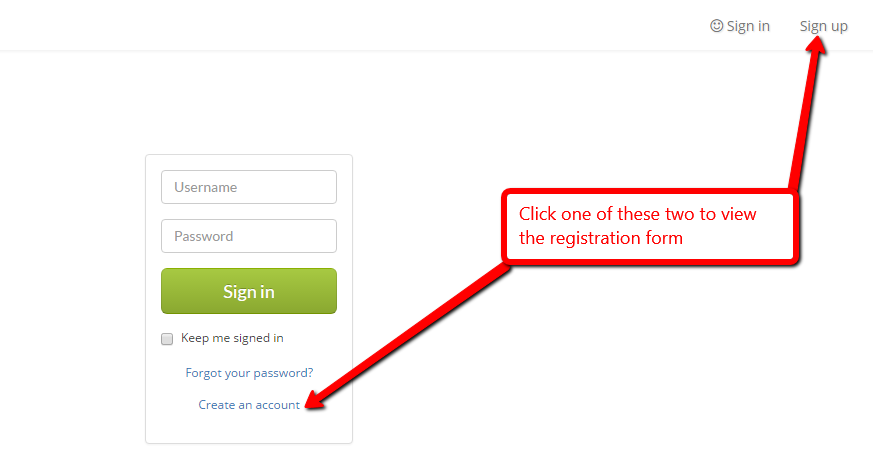
To register as new user, click the Sign up link in the top right of the page or Create an account link in the bottom of the login form.
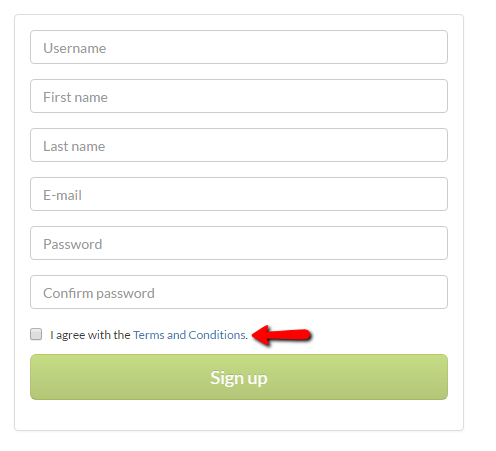
Then fill in the registration form fields, check the agreement box (The one stating: I agree with the Terms and Conditions) then click Sign up.
Forgot password
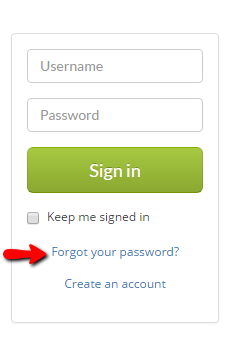
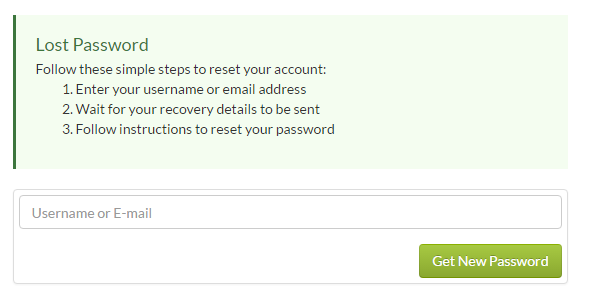
To reset your password, click the Forgot your password? link in the bottom of the login form.
A form shows up, fill it in then click Get New Password button.
Gravity version
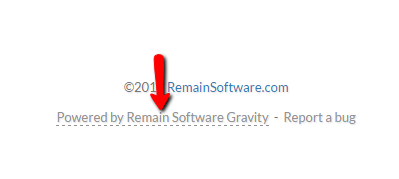
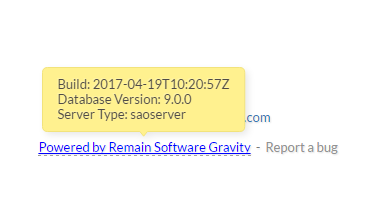
Some version related data (Gravity server build and name and the such) can be viewed from the welcome page (before signing in) footer
Hover over the link stating Powered by Remain Software Gravity
The Administration Client
With the Administration Client you are able to;
- Install licenses;
- Change Definitions
- Add new document types
- Add fields to documents
- Manage applications
- Manage the workflows
- Add user and group types
- User Management;
- Manage Users
- Manage Groups
- Manage Roles
- Manage Authority
- Configuration Management
- Change web and email configurations
- Create new databases
- Manage events
- Configure event handlers
- Change email templates
- Manage your work
- Create work items
- Planning
- Full-Text Search
- Connect work items to projects/milestones/etc..
Work Management
Please consult the Work Management Guide to learn how to use the rich client to manage your documents.
Configuring Gravity
Please consult the Gravity Configuration Guide if you want to learn how to configure Gravity. If you have questions or come across issues, please sign up for our | Gravity Helpdesk (powered by Gravity).
</translate>
<translate>

Getting Started
HelpDesk
If you should encounter any problems during the installation or setup of Gravity, please contact the Remain Helpdesk. The Remain Helpdesk can be reached on the location http://helpdesk.remainsoftware.com.
Installing the server
The Gravity Server is used to provide centralized functions and it is running on an application server like IBM Websphere or Apache Tomcat. You either choose your own database or use a Gravity Server with an embedded H2QL database. The latter is ideal for evaluation purposes or to get started quickly.
Creating the Database
Gravity can run on multiple databases. Your best bet at this point in time is to use a DB2 database or a MySQL database. These are the Databases that Remain R&D is testing Gravity on a daily basis. However, you can also choose any of the other popular referential databases available. Please see this link to find the supported databases.
MySQL
If you want to run Gravity on a stand alone PC without the need for access to a network, you can choose to run Gravity on a MySQL database. In order to install MySQL we recommend to install XAMPP for Windows. This also installs some additional support software that enables you to maintain the database and run the Gravity Web Application. For more information on installing XAMPP please follow this link.
Then create (by running the CREATE SCHEMA command in the SQL tab) or empty the database that hold the Gravity tables. You could call it gravitydb which is the name that is used throughout this section. If you use another name then remember to replace gravitydb by the name you choose.
DB2 on IBM-i
In order to install Gravity's database on an IBM-i with DB2, you need to create a database. To do so, use the following steps:
- Log on to the IBM-i 5250 terminal and create a user called gravitydb and remember the password.
- On the command line, enter the STRSQL command.
- In the SQL console:
- enter DROP SCHEMA GRAVITYDB to drop any previously created gravity database. Ignore any CPF1124 errors (database never fully saved) with I
- enter CREATE SCHEMA GRAVITYDB
Other Databases
If you use any other database then follow the instructions for that database to create an empty schema or database. You could call it gravitydb which is the name that is used throughout this section. If you use another name then remember to replace gravitydb for the name you choose.
Download
To install Gravity, you first need to download it from the download area. If you cannot access this location but you feel you should, then please contact the Remain Software Helpdesk. The Gravity Download is currently available for the following platforms:
- Windows 32 bit
- Windows 64 bit
- Linux, GTK 32 bit
- Mac OSX 64 bit
Starting Gravity Admin Client
After you have dropped or created the database it is time to start Gravity Admin Client. If you downloaded an executable just run it and follow the instructions to install Gravity. The installer will generate an icon on your desktop and add Gravity to the "All programs" structure. Double-click the icon to start Gravity. If you downloaded a zip file you must unzip the downloaded file into a directory somewhere in your home directory. This can be your Desktop folder, your Documents folder, your Downloads folder or any other folder in your home directory. Traverse into the unzipped directory until you encounter the executable file. This can be GravityAdmin.exe on windows or GravityAdmin on Linux and Mac OS. Please start Gravity for the first time by double-clicking on this file or by running it the way it should be run on your platform (e.g. through the command line).
The first thing you will see is the Gravity Dashboard. This Dashboard signals the health of your installation. If you start Gravity for the first time, then it is normal to see some red lines. You can read more about the Gravity Dashboard here.
Configuring the Database
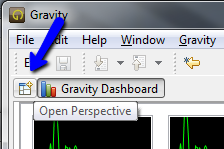
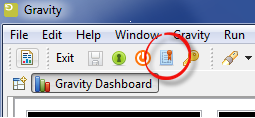
When no database is found Gravity will automatically start the process to add one and set it as the default database. More information on Adding a Database is found here. To configure the database we must open the Configuration Perspective. This perspective contains some views that are used to configure various parts of the Gravity system. These are all nuts and bolts configurations like ip-addresses, mail servers and the likes. Press on the icon represented in the view and select "Configuration Admin". You can read more about the Configuration Perspective here.
Once in the Configuration Admin perspective you will see the Configuration Admin view. Expand the "Configuration Admin" tree node by clicking on the configuration icon (![]() ). Then right click on the database icon (
). Then right click on the database icon (![]() ) and select the option to add a new database configuration.
) and select the option to add a new database configuration.
After the database was configured, a node appears under the Databases node in the view. Open the Databases node and select the Database config you just created. Then open the context menu and set the database as default
If the set as default did not complete normally then you are able to change the database. In the change screen there is a test option to see if a connection can be made to the DBMS.
Restart
Now press the Exit button in the main toolbar and start Gravity again by clicking on the link again. This enables Gravity to go through a refresh cycle which is needed (for now) to initialize the database.
In a few moments there will be a pop-up window where you can enter a user name and password.
Specify admin for both fields.
After the login you can take another look at the Dashboard perspective. You will see that almost all processes are now presenting a solid heartbeat. The processes that are still red are less critical and we will deal with that later.
Congratulations. You have now setup a running Gravity system. In order for it to be useful you have to configure it your specific needs. This includes
- Defining Types and Type Spaces;
- Creating a Workflow;
- Creating an Application;
- Creating Users, Groups and Roles;
- Configuring E-mail;
- Defining Mail Templates and Automatic Comments.
Adding Licenses and Keys
You can work with the Admin user up to some extend but to fully use the system you need to install licenses and keys. Licenses and keys can be acquired from your distributor.
A nominal Gravity system where users can log-in and work with Gravity requires a license Confirm Key, a Base license and a Work-management license. The Base license enables the Gravity licensing system and the Work-management license enables 1 or more users to log in to Gravity. The Confirm Key is required to validate acquired licenses.
Gravity can run in either trial or non-trial mode. Trial mode is the default Gravity run mode. In this mode Gravity only requires a trial Work-management license for users to use Gravity. A trial license can be made available by your distributor, of course a trial license has a time constraint and can only be used for the period agreed upon with your distributor. If you want to start using Gravity in non-trial mode then a commercial Confirm-key and license must be acquired.
To use Gravity in trial mode then start the license import wizard by pressing the licenses toolbar button. Select the received trial license file and press finish. After a successful license import you can start creating users and assigning them to a license. See License Management for a more detailed explanation on how to apply and use Gravity licenses.
Next Steps
Please follow the Setup Tutorial later in the manual to create a setup. </translate>
