GR:Gravity/Job Management
Job Management
This section describes the Job Management in Gravity which is the task of a job service. Before delving into the details, this is the essence of all that Gravity Job management tale is about:
Gravity manages job services → A job service manages subsystems → A subsystem manages job queues and job templates → A job queue manages jobs.
In addition to being OSGi-ready, job and subsystem services are REST-ful as well enabling a Gravity user to manage jobs both on local and remote machines seamlessly from the same UI.
Job Management Perspective
You can open the perspective by clicking on the Open Perspective shortcut on the Perspective bar. 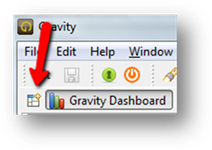
Job Management View
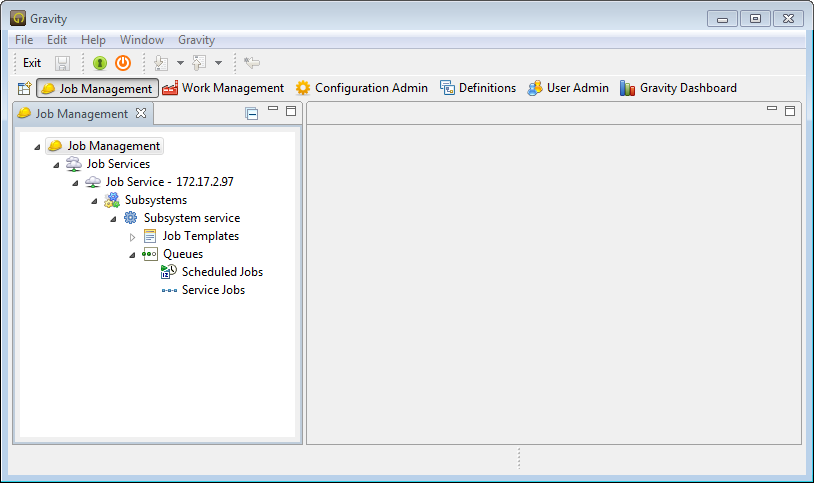
The following is a screenshot of the Job Management view which is the entry point to interact with jobs.
Let's have a look at this view and see how it's built.
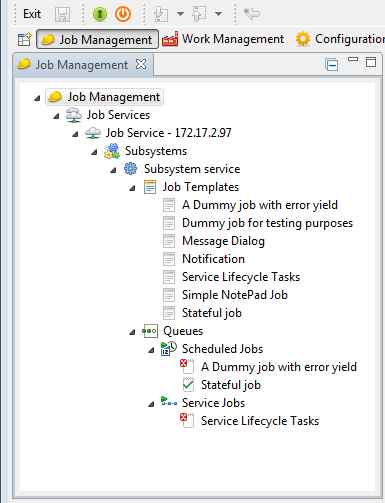
The Job Management view will show locally running job and subsystem services as well as those running on a remote machine which are discovered by Gravity.
Each node in this tree view reacts on double and/or right clicks.
The Job Management view (the screenshot above) has, roughly speaking, the following tree structure: (Nodes within [ ] are variable ones.)
› Job Management This is the tree root
- › Job Services All discovered job services (both local and remote ones) will show up under this node.
- › [some job service], for example:
 running on machine with the shown IP address
- › Subsystems All discovered subsystems belonging to the parent job service
 will show up under this node.
- › [some subsystem service], for example:

- › Job Templates All discovered job templates within the parent subsystem
 will show up under this node.
- › Queues All job queues defined within the parent subsystem
 . Queues are either trigger-time, FIFO or priority based
- › Scheduled Jobs A full-fledged time-triggered 'queue' based on Quartz scheduling. There is only one of such queues per system and it's created by Gravity itself:
 .
.
- › [some user-created job Queue] A job queue which is either FIFO(First In, First Out) or priority based. Such queues are created by the user. For example:

- › Scheduled Jobs A full-fledged time-triggered 'queue' based on Quartz scheduling. There is only one of such queues per system and it's created by Gravity itself:
- › Job Templates All discovered job templates within the parent subsystem
- › [some subsystem service], for example:
- › Subsystems All discovered subsystems belonging to the parent job service
- › [some job service], for example:
- › Job Services All discovered job services (both local and remote ones) will show up under this node.
Subsystem
A job service manages one or more subsystem services. A subsystem service is responsible for job queues and job templates within its borders.
Subsystem Overview
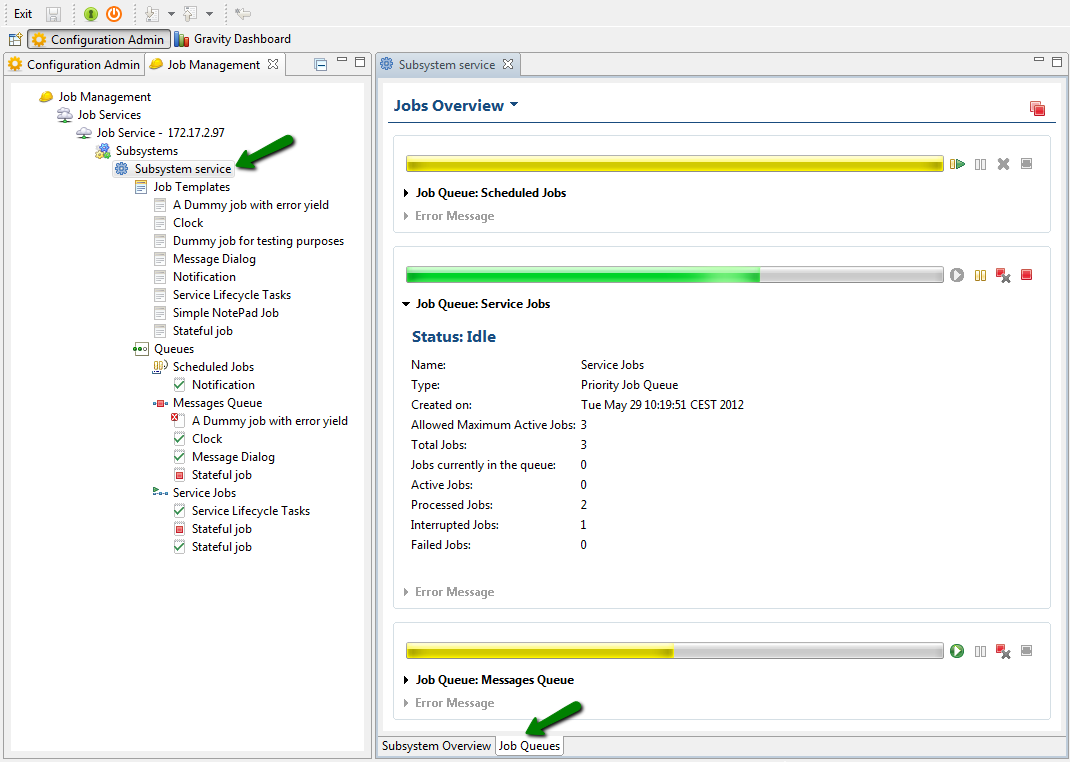
Double-click the subsystem node you want to open. In our case: ![]() . An editor is opened. Click on the editor's foot-tabs to manage the subsystem's info, queues and jobs in action.
. An editor is opened. Click on the editor's foot-tabs to manage the subsystem's info, queues and jobs in action.
 .
.
Job Queue
in Gravity, you can queue a job for execution based on its insertion order (FIFO), priority or trigger-time:
- For the first two cases, you create and use either a FIFO or Priority queue. ( See how to create a new job queue here.)
- For the last case you use the provided trigger-based queue Scheduled Jobs (..having this icon
 ).
).
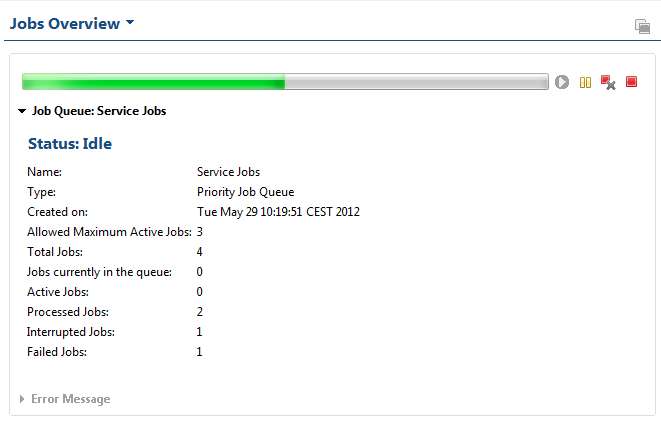
Job Queue Overview
Double-click a job queue to see its overview.
Create a New Job Queue
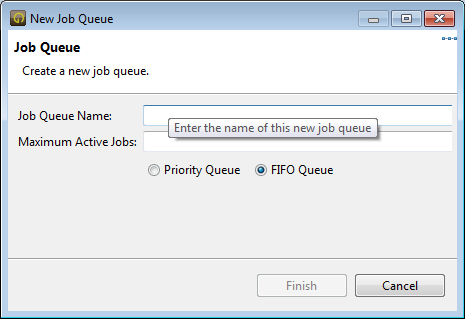
To create and add a new job queue to a subsystem, right-click on node ![]() or
or ![]() , then choose for New Job Queue from the pop-up menu.
, then choose for New Job Queue from the pop-up menu.
A wizard shows up prompting for this new job queue's fields, fill them in then press Finish. Your new job queue shows up in the view under ![]() node. (It may take a bit longer to show up if you're creating it on a remote subsystem).
node. (It may take a bit longer to show up if you're creating it on a remote subsystem).
Tip: Hover with your mouse over a field to get its tool tip with more details.
Queueing Jobs
Jobs are instances created from templates. What Gravity will execute is a job instance, not the template itself. So, you can instantiate and execute as many jobs (instances) as you like from the same unique template
and have each job run with its own context/parameters. In the view, job templates are visible under node: Job Templates (![]() ).
).
You can open a template's editor by double-clicking its name.
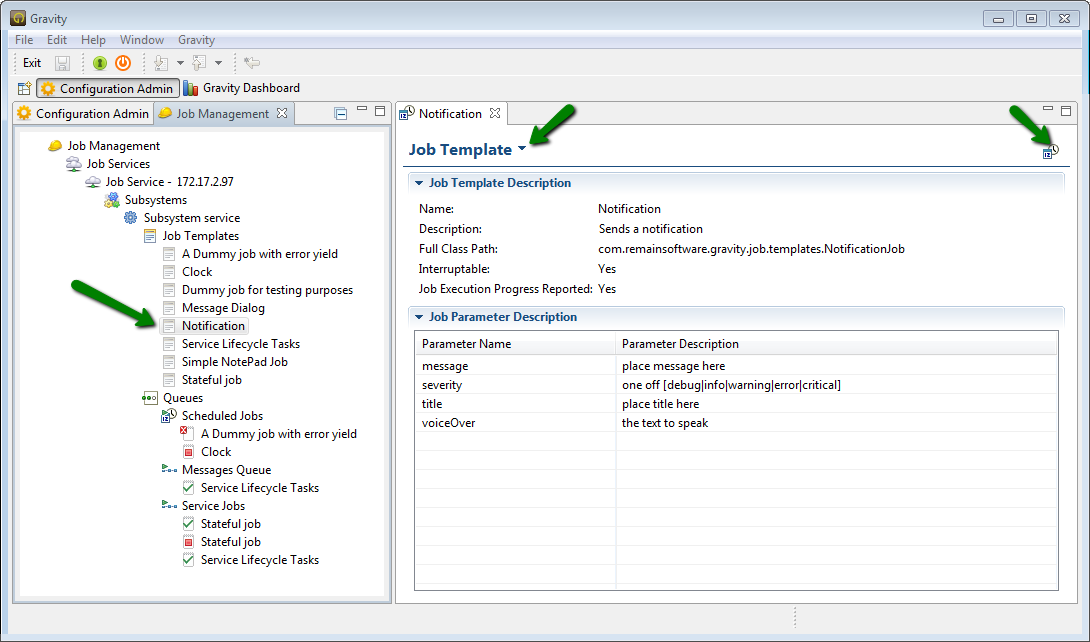
You can queue/schedule your job by first right-clicking a template ![]() . Or by clicking one of the two places in the template's editor as shown in the screenshot above.
. Or by clicking one of the two places in the template's editor as shown in the screenshot above.
You get, then, a wizard opened where you can step by step configure your job. This wizard provides some useful info by clicking Help button.
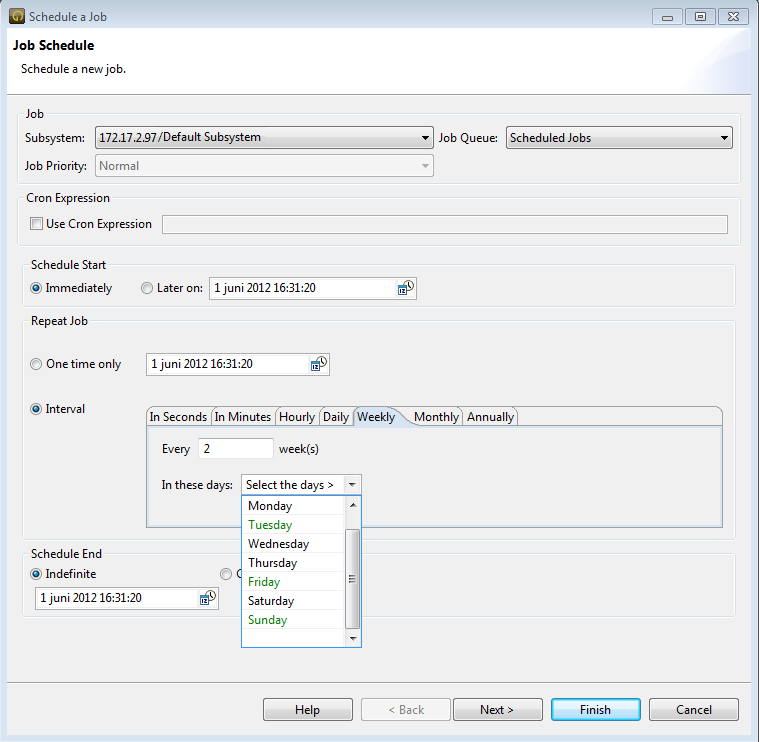
From your new job wizard, select the queue you want your job to be added to.
- Selecting Scheduled Jobs, which is time-based, requires entering either a CRON expression (click wizard's Help for some CRON details) or the job's start, repeat and end time sections.
- Selecting a FIFO/Priority queue omits the rest of the fields as they're not needed.
Click 'Next' if you want to pass specific parameter values to this job instance. Then click Finish'. Your newly created job should show up in the view under your queue of choice.
