Translations:PRINT:EWM:Graphical Work Management Guide/4/en
Open with
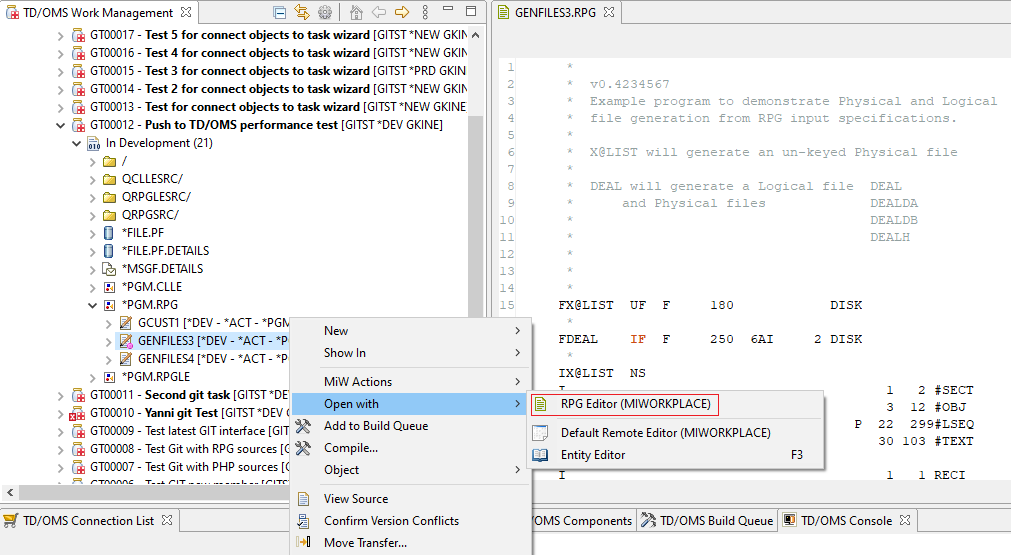
A file can be opened in various ways. For this reason the 'Open with' menu has been created.
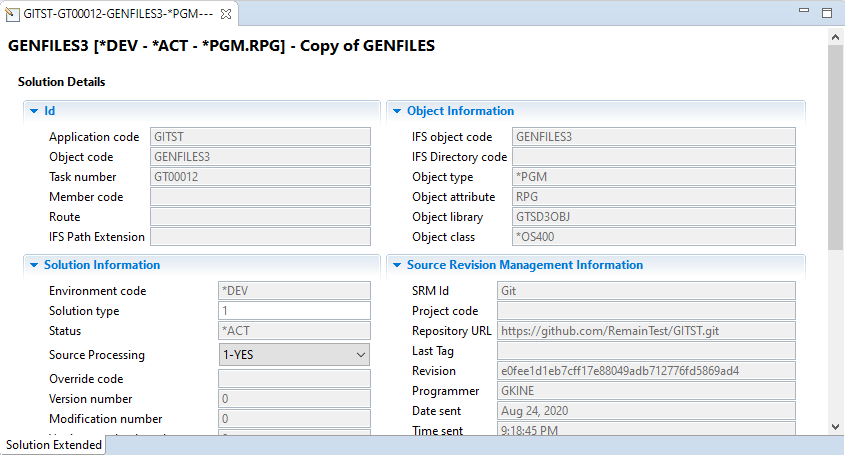
If you want to see information about the file and its attributes then the 'Entity Editor' option must be used.
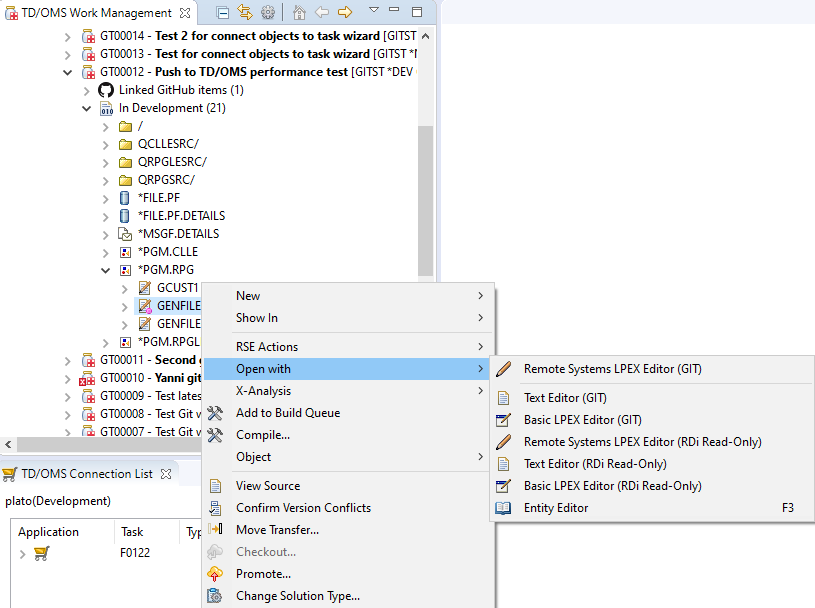
If you want to see the contents of the file then you have to choose from the which integration of TD/OMS you want the file to be opened with and with which editor. The first option will always be the default option which is the best for that file calculated by TD/OMS. Double clicking the file will always open it with the first option on this menu. Remember that you will be able to edit the contents only if the solution is on the development or emergency environments.
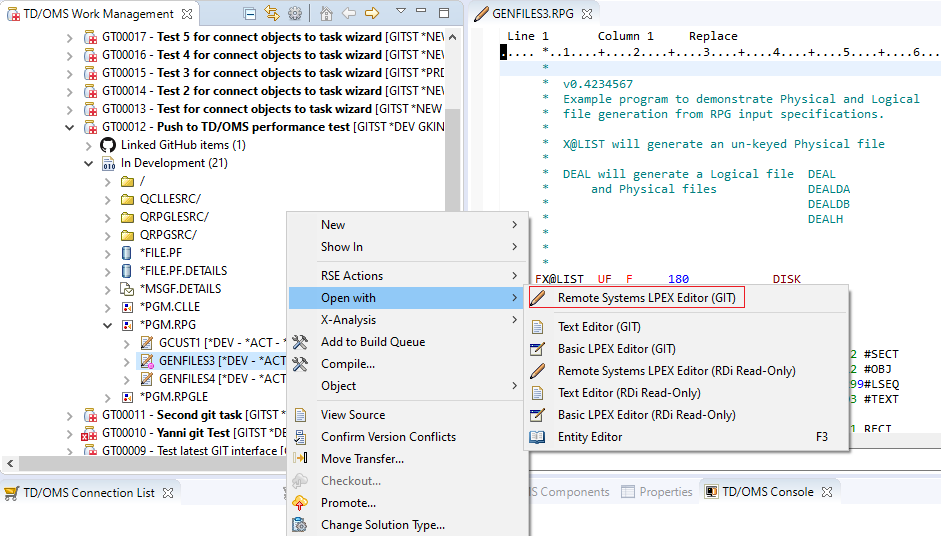
In this example we have a TD/OMS installation with three integrations installed Git, RDi and RSE. The RSE editors are not available in this case because they are only for json or yaml files. A text editor will always be present as well with each integration in case there are no alternative options. Notice that only the Git editors are editable because when Git is installed then all editors from other integrations will be read only because all changes must be managed through Git. Here we open the file with the LPEX editor through Git.
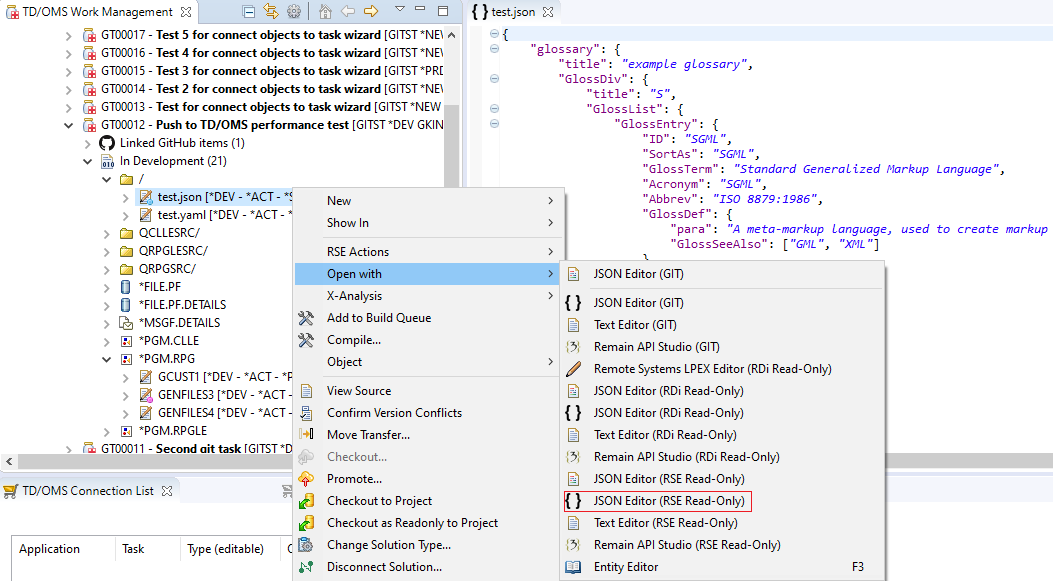
When we want to open a json or a yaml file then more editors are available through the RSE integration.
In this example we have a TD/OMS installation with only the MiWorkplace integration installed.
There are four available integrations in TD/OMS related to editors:
View source
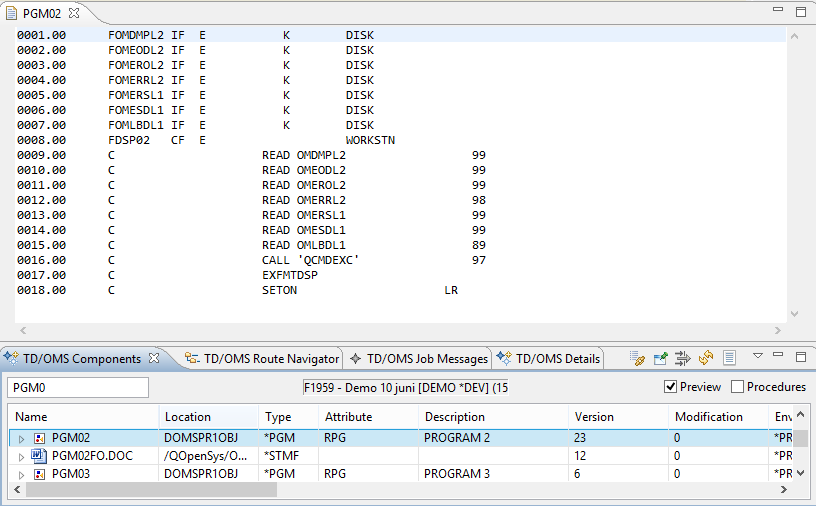
The action View Source displays the contents of the selected component in a separate view. This source can be:
- The SEU-source of an IBM i-object
- The SEU-source-member for a detail-solution representing a source-member.
- The object itself for objects with type *STMF
Every source is displayed in the editor that is configured in eclipse for the type of the selected component. If such an editor cannot be found, the default text editor is used. This default-editor is also used for SEU-Sources. The SEU-line-number is displayed on the left side. The editor is always opened in read-only mode.
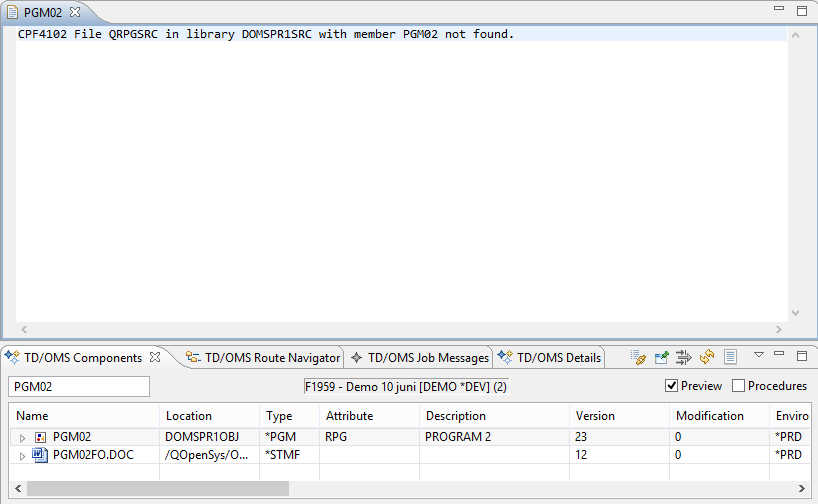
If the source cannot be located a message is shown.
Editor Actions
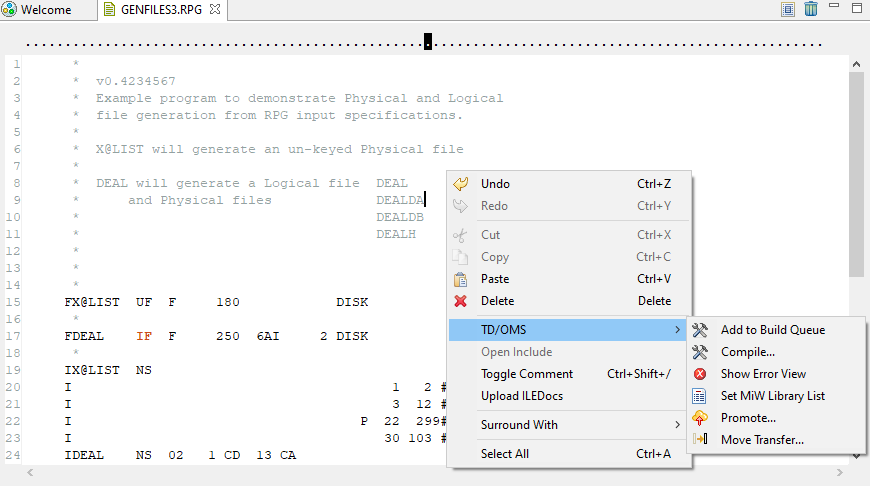
When a file is open on an editor TD/OMS related actions are available based on the editor. In this example the MiWorkplace editor actions are shown but similar actions exist in RSE LPEX as well.
- Add to Build Queue: Add the solution to the build queue. This will also bring the build queue view to the foreground.
- Compile: Compile the solution by opening the compile wizard with all the compile options.
- Show Error View: Open the compile error view for the solution after a failed compile to see the errors. In MiWorkplace this is the compile result view which will also be brought to the foreground.
- Set MiW Library List: Set the MiWorkplace library list for the solution.
- Checkout: Checkout the solution to the development environment. This action is available only if the solution is not on the development or emergency environment.
- Promote: Promote the solution to the next environment.
- Move Transfer: Open the transfer wizard for the solution with all the options to decide where you want to transfer.
Declaring objects
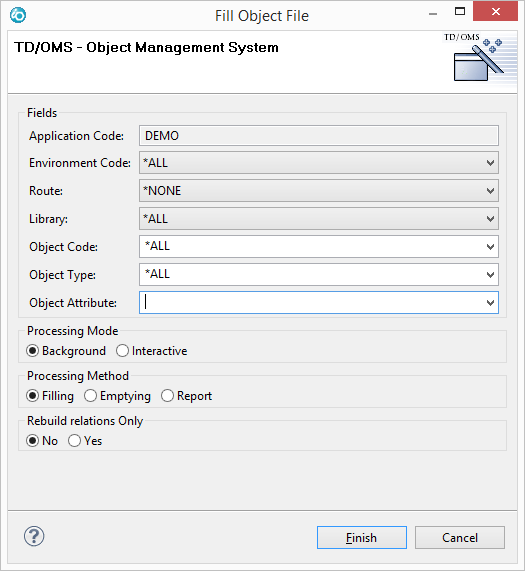
Objects must be registered within the TD/OMS repository to enable management of the objects within TD/OMS. One way of registering objects is by running the Fill Object File function. This function can be activated by right-clicking:
- an application in the Applications tab of the TD/OMS Work Management View
- a component in the TD/OMS component view
- a route in the TD/OMS route navigator view
Select Fill Object File. The Fill Object File option will only be available when you have sufficient authorisation within TD/OMS.
This function works as the TD/OMS command STRFOF. For an application to be filled quickly, set all fields (except the Application Code) to *ALL and press the Finish button.
Process Connection List
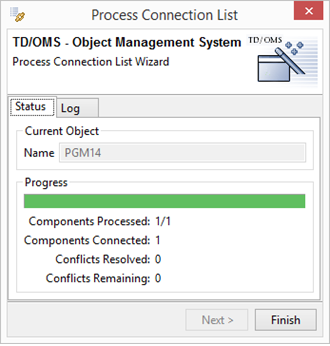
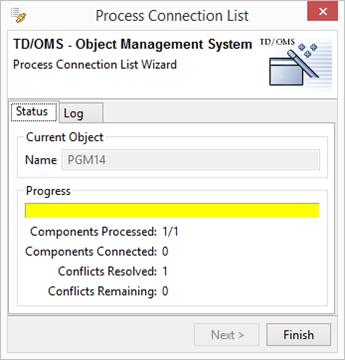
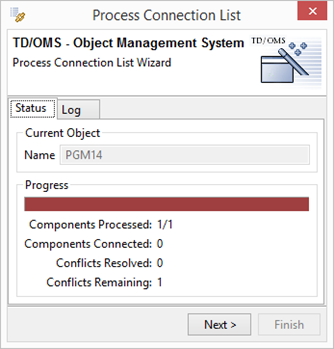
A window will be displayed showing the progress of the connection list processing process. The progress bar will be filled during the process. The colour indicates the status of the entire process.
GREEN: No problems found (yet)
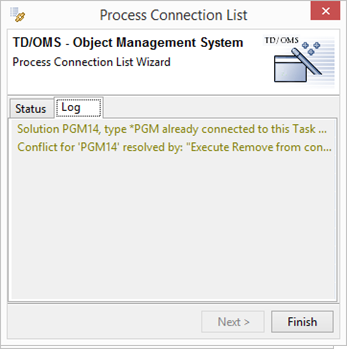
YELLOW: (at least) one of the components had a problem but the problem could be resolved automatically. You can select the Log tab to see what the problem was and how it was resolved.
The settings used for resolving solution conflicts can be maintained within the Preferences (see 1.6.4 ).
RED: (at least) one of the components had a problem that requires manual intervention. You can select the Log tab to see what the problem is
Sometimes a component must be part of several tasks each requiring a modification of the object. This may cause ‘solution conflicts’.
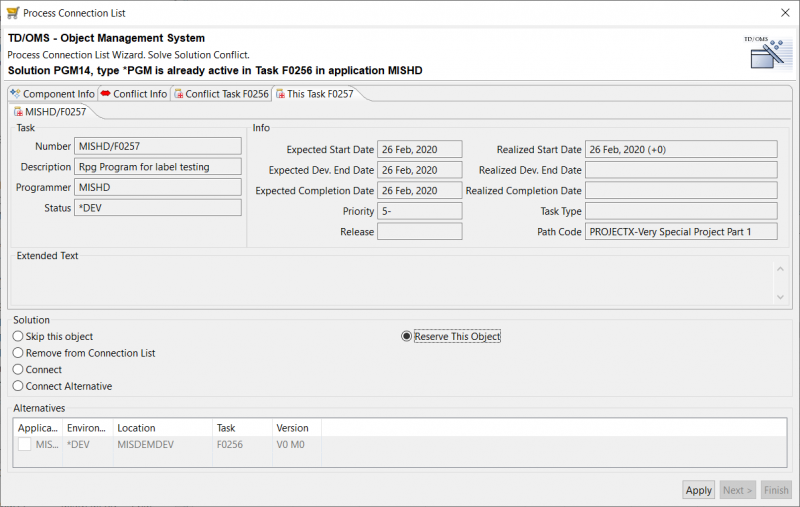
Within a TD/OMS application cycle, an object can have multiple occurrences (in every library and in every environment). A solution however, may occur ‘active’ only once. If an object is already connected to a task and you want to connect it again to another task, then you have to decide what to do. This process is called ‘solve solution conflicts’.
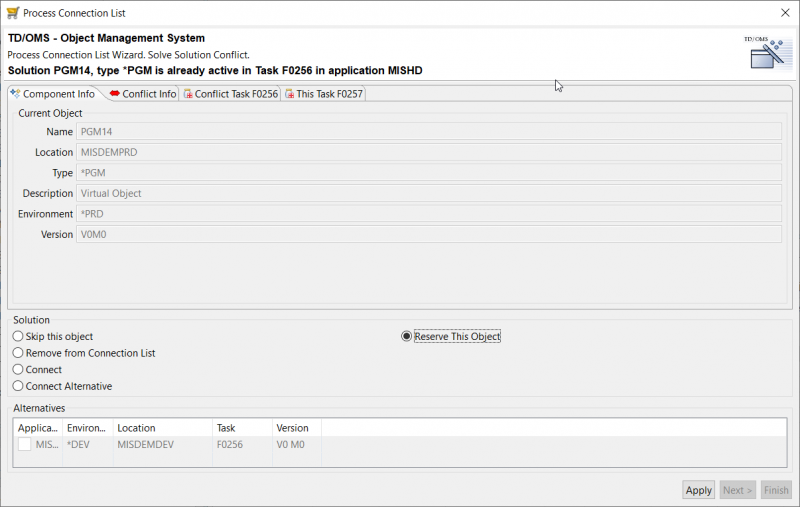
If this occurs you have several choices:
- Skip this object
- Remove from connection list
- Connect
- Connect alternative
- Reserve this object
Solution conflicts are automatically detected by TD/OMS when components are linked to a task, i.e. when solutions are being created. When a conflict occurs that can (or should) not be resolved automatically, a panel is displayed for solving the Solution Conflict.
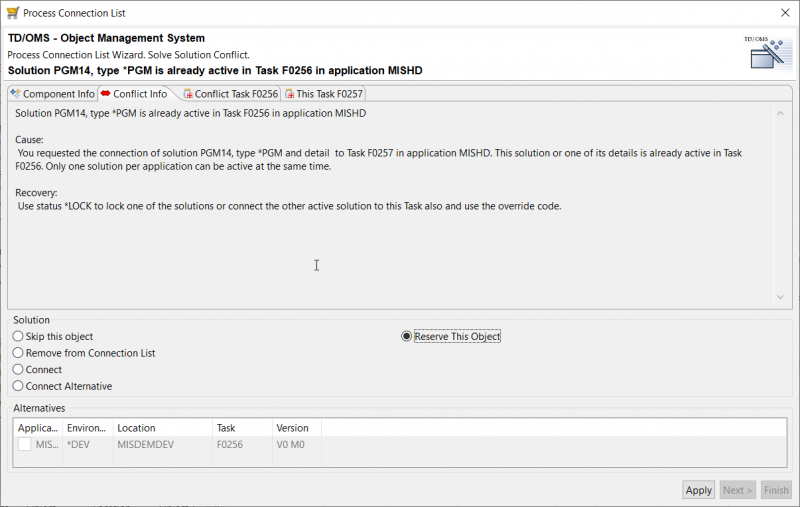
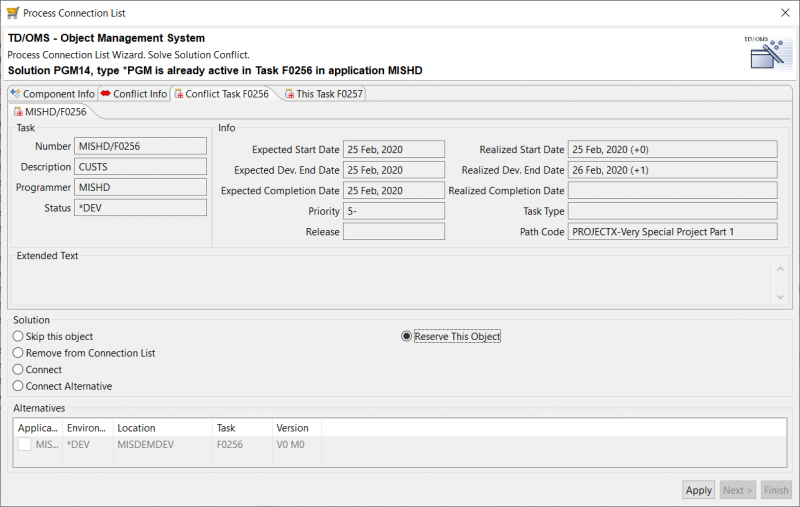
The screen shows information with respect to the Component, Conflict and the conflicting tasks/requests. The Solution options that are displayed on this screen depend on the situation at hand.
Explanation of the solution conflict options
- Connect
You did not select the latest version of the object. A list was presented to you with an object that has more recent versions than the object you have selected. This can occur if you select an object from the production environment where another occurrence of the object is already in the cycle. Use this option to force the connection of the object you have initially selected.
- Connect alternative
The object you have selected was already connected to a task. It was not the exact same object that is already active, but another occurrence of it. Use this choice in combination with one of the objects in the alternatives list to connect the alternative object to the task.
- Reservation
Reserving a component means that the component will become available for maintenance as soon as the solution that is currently active is moved to the production environment. At that moment a message will be sent to the user who has made the first reservation. Reserved solutions can be viewed with the TD/OMS Reserved Solutions view (see 2.18 ).
- Skip
The component is skipped. The component will stay in the connection list. When the same connection list is processed again at a later time, TD/OMS will again try to connect the component.
- Remove from Connection List
The component will be permanently removed from the connection list.
You can select the various tabs to display the conflict info, information regarding the conflicting task(s) and information regarding the current task.
Assign/unassign programmer
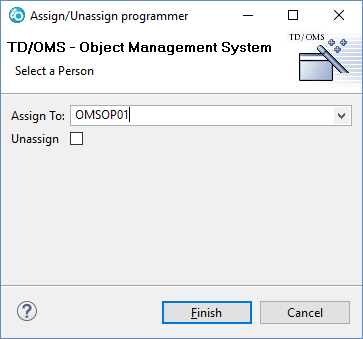
This action is used to change the employee assigned to the selected task(s). The person currently assigned to the first selected task in the list is the programmer, shown as the default for the assignment. The special value <unassigned> is available to remove a previous assignment. This action can be easily done by clicking the ''Unassign'' checkbox, that is shown in TD/OMS V9 Milestone 3 and later.
Connect Task to Request
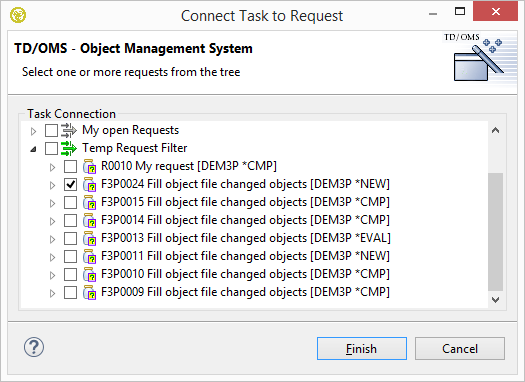
This action is used to connect a task to 1 or more requests.
It is possible to create a new (temporary) Request filter to enable selection of requests from applications not available within the existing filters. Requests can be selected by clicking the checkbox.
Connect Request to Task
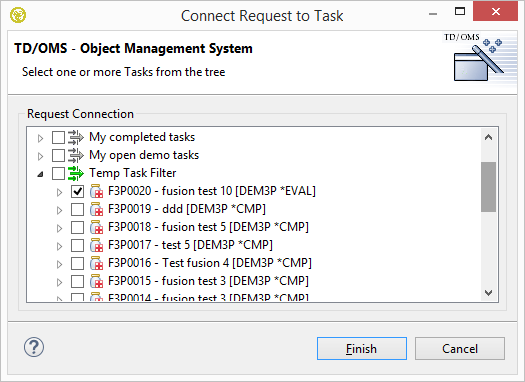
This action is used to connect a request to 1 or more tasks.
It is possible to create a new (temporary) Task filter to enable selection of tasks that are not available within the existing filters.
Disconnect Task
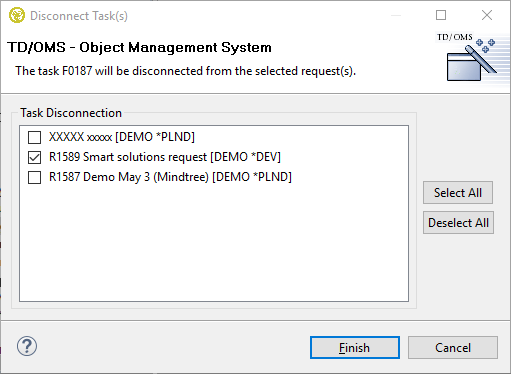
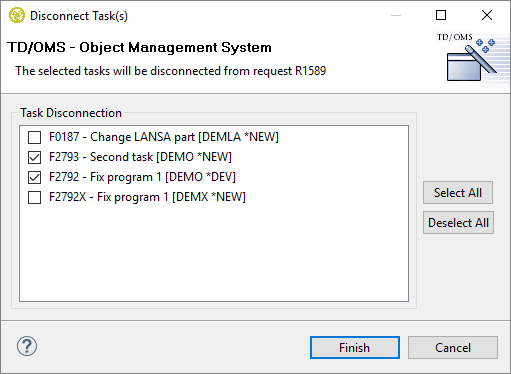
The Disconnect Task action is used to disconnect tasks from requests and can operate in two modes:
When a Task is Selected
When a task is selected then this action shows all connected requests. You are able to select one ore more requests to disconnect.
When a Request is Selected
When a request is selected then this action shows all connected tasks. You are able to select one ore more tasks to disconnect.
Compile Actions
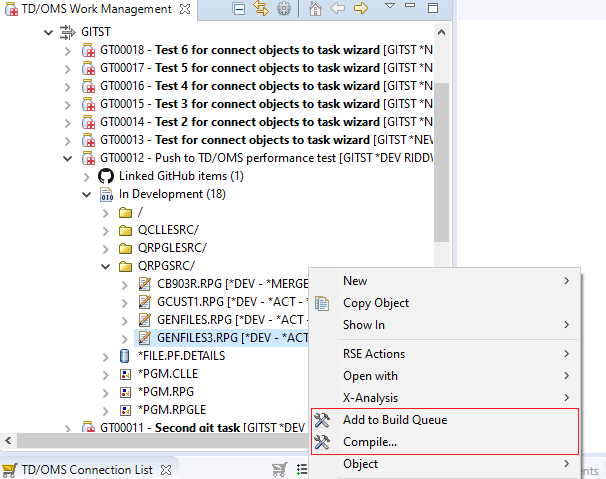
There are two compile options available: Add to Build Queue and Compile.
Add to Build Queue
This will add the solution the build queue and based on the preferences for this view it will compile directly or just add it to queue. This action is available when:
- One or many solutions are selected that belong to the same task and all of them are in the development or emeergency environments.
- Environment folders that contain solutions (only the ones in the valid environments will be added).
- Folders that contain solutions (only the ones in the valid environments will be added).
- A single task that contains solutions (only the ones in the valid environments will be added).
More information about this view can be found here.
Compile
This action enables you to directly compile a single solution opening the compile wizard for more options.
More information about compile options can be found here.
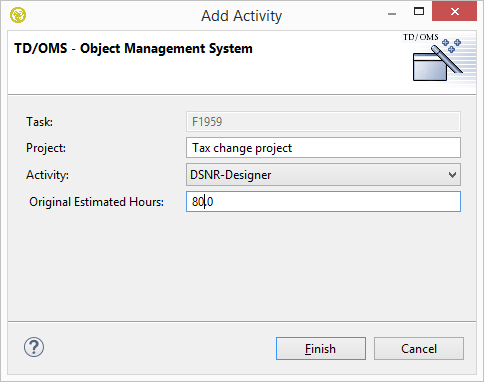
Add Activity
This action is only available when the (optional) hour registration module has been activated and is part of the task context menu.
The screen enables you to register the estimated hours for each activity available in the activity table with respect to the selected task.
Registration of the estimated hours is only possible once. The Activity view offers you the opportunity to enter a revised number of hours or to remove the activity. After removing you will be able to add the same activity for the task again.
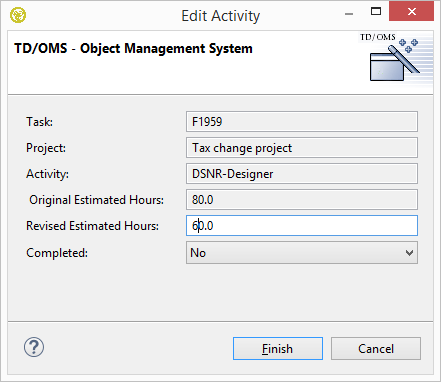
Edit Activity
This action is only available when the (optional) hour registration module has been activated. Open the TD/OMS Activity view and select Edit from the context menu of a selected activity.
The screen enables you to register the Revised estimated hours for each activity available in the activity table with respect to the selected task.
It is also possible to indicate that that activity being edited has been completed. Changing completed to Yes will disable the Add/Edit Effort actions. You can change this value back to No again at a later moment in time.
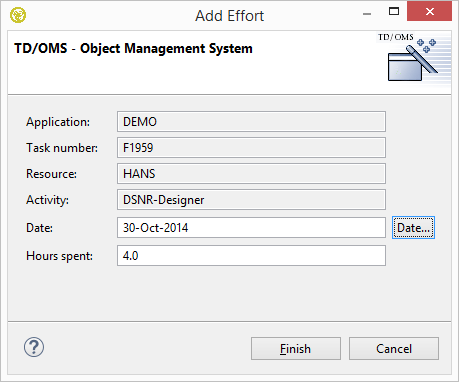
Add Effort
This action is only available when the (optional) hour registration module has been activated. It is available in the TD/OMS activity view on the context menu of your name.
The screen enables entry of the total amount of time spend by you on a specific activity during a specific day.
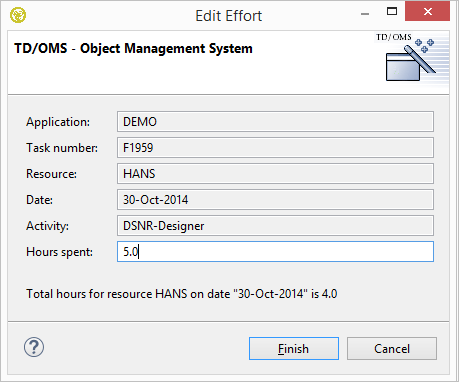
Edit Effort
This action is only available when the (optional) hour registration module has been activated.
The screen enables you to change the total amount of time spend by you on a specific activity during a specific day.
The total hours you have already reported (including the amount of time you originally reported on the activity being edited) is displayed as a reminded.
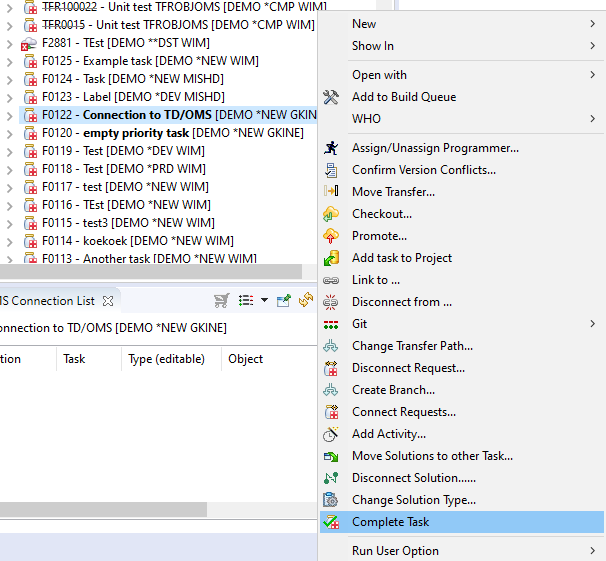
Complete Task
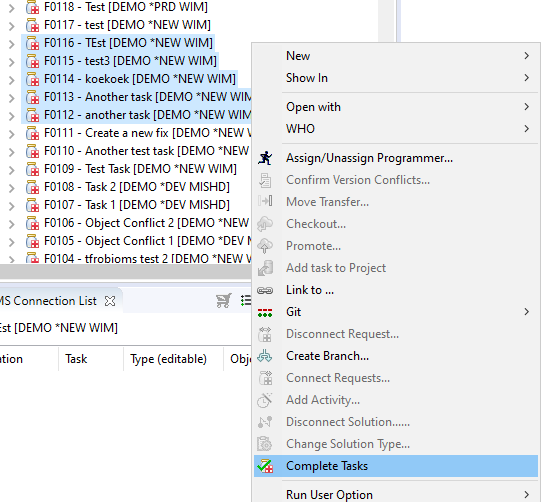
When work on a task has finished it can be completed. To do that, right click on a task and select the Complete Task option. The option will only be available if the task has the *NEW status. Note that a task can't be physically deleted only marked as completed.
If many tasks need to be completed then they all need to have the *NEW status or the option won't be available. They can also be from different applications but not from a different host.
Another option is to right click a single task filter.
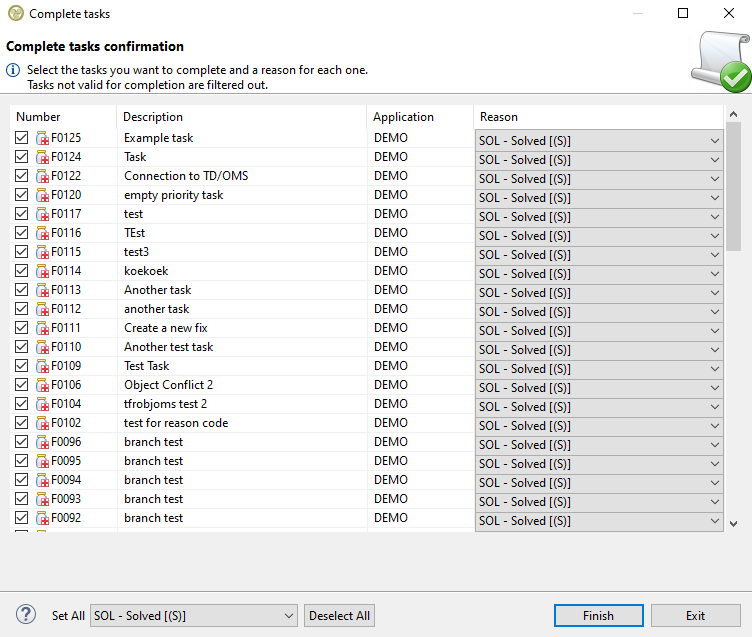
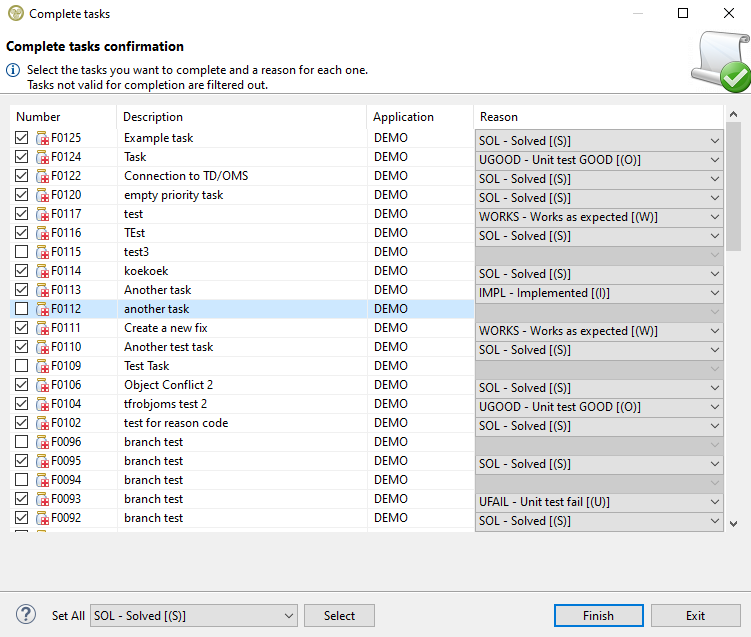
The complete task wizard has a table with the tasks and a drop down menu for each one stating the reason as to why its completed. In case a task filter was selected, any tasks that don't have the *NEW status will be automatically filtered out and won't show in the table. When the wizard opens all valid tasks will be preselected for completion.
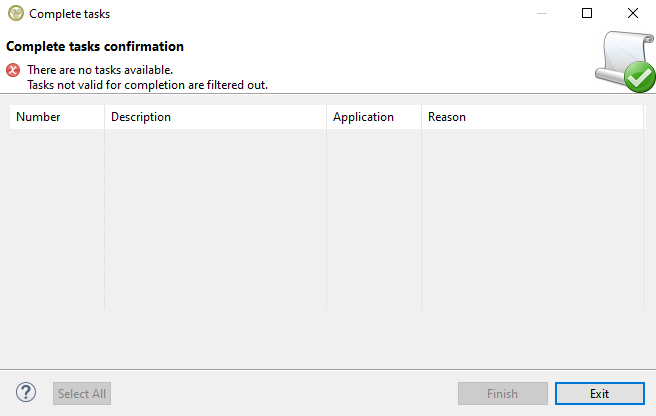
If a task filter doesn't have a single task with the *NEW status then no tasks are valid for completion and the wizard will show the error with the table will being empty without any possible actions.
The same behavior will happen (with a different error message) if all tasks have no reason codes set for their applications.
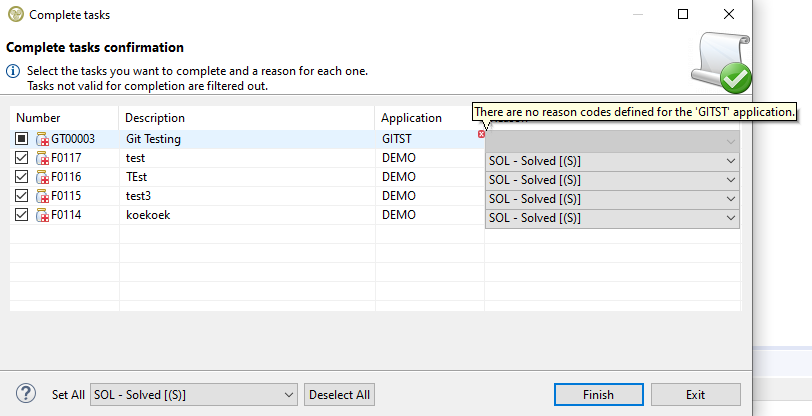
If a task has no reason codes set for its application (but the rest have) then it will be gray checked meaning its not possible to select it and it will be excluded from any actions in the wizard. Its possible to see the error by mouse-hovering over the error icon on the top left of the drop down menu.
Wizard Content and Actions
The table itself has four resizable columns with the task number, description, application and a drop down menu to select the reason why a task is completed with a default reason already preselected (configurable in the green screen). The table can be ordered by clicking on the columns to sort the tasks based on their number, description or application. On the bottom left there are shortcut buttons that allow you to set the same reason for all selected tasks (available only when all tasks belong to same application) and a button to select/deselect all available tasks or select only the ones that are selected on the table (grayed tasks will be excluded).
When you have made your choices press finish to start the process.
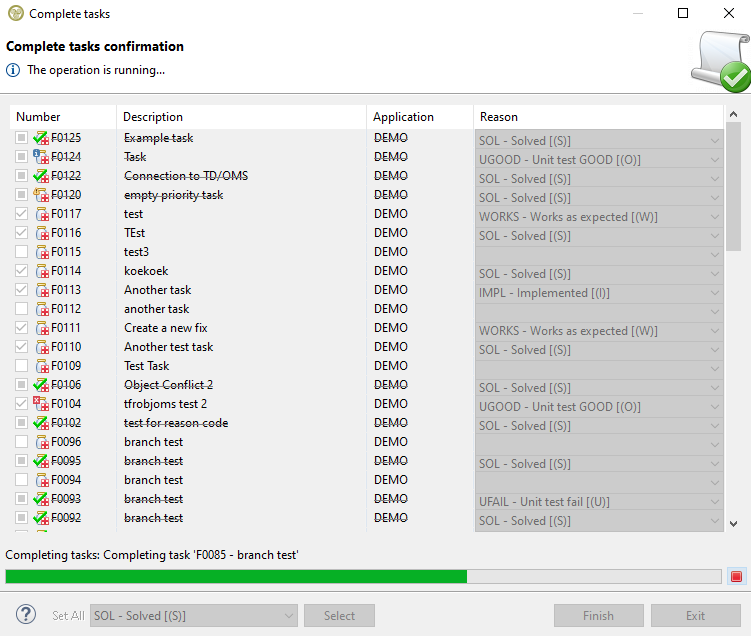
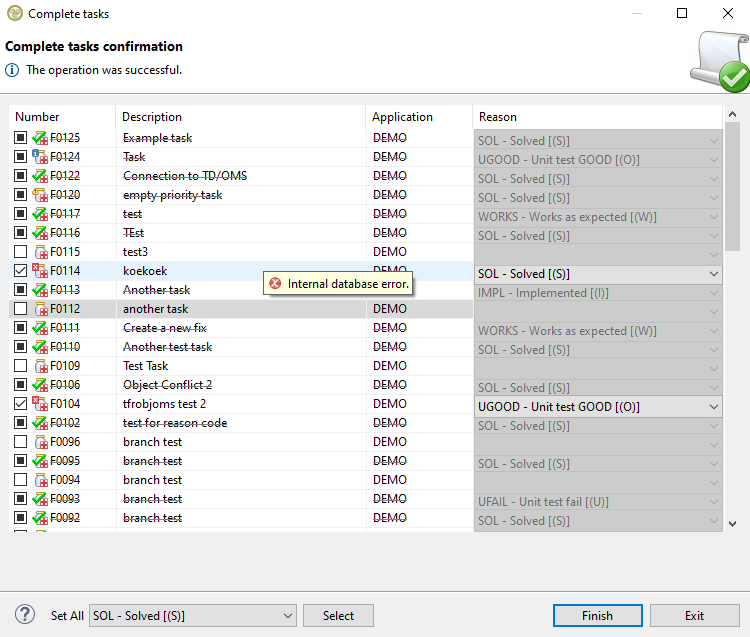
A progress bar will appear showing which task is processed at the moment. As the progress continues the table will update the tasks based on the returned status of each one: Completed, Completed with an informational or warning message, or Not Completed with an error. If the task is completed it will have a strike-through line in the middle of its text and if there is no extra information to display then it will have a green check on its icon. If there is extra information to display it can be viewed when hovering over a task row with an extra icon.
The operation can be cancelled by pressing the red box at the right of the progress bar and the table will show the status of the tasks that have been processed already. Any completed tasks will be gray-checked and won't be available for selection anymore.
If all available tasks on the table are completed without any extra messages to show then the wizard will close automatically when the process is finished. Any affected objects that are visible in a tree in all open views will be refreshed and all affected open editors will be refreshed or closed accordingly.
Complete Request
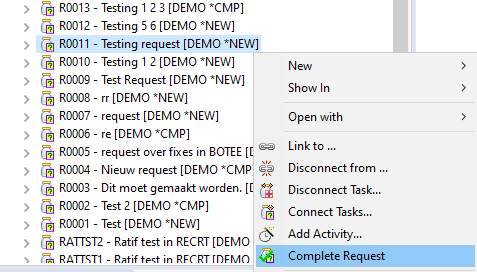
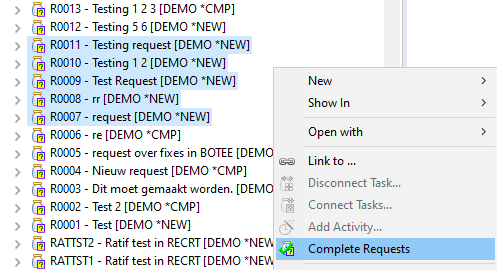
When work on a request has finished it can be completed. To do that, right click on a request and select the Complete Request option. The option will only be available if the request has the *NEW status. Note that a request can't be physically deleted only marked as completed.
If many requests need to be completed then they all need to have the *NEW status or the option won't be available. They can also be from different applications but not from a different host.
Another option is to right-click a single request filter.
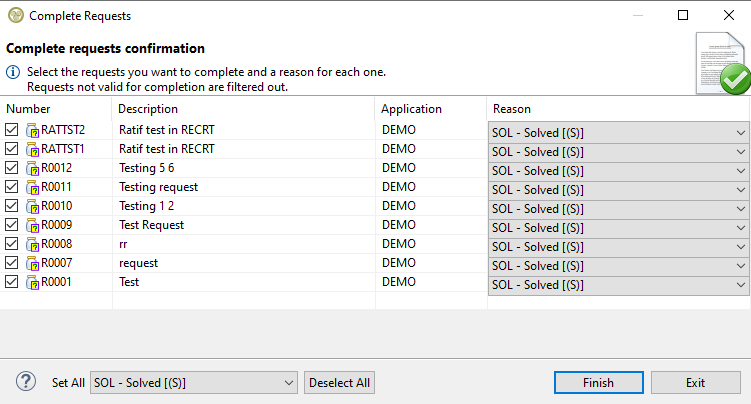
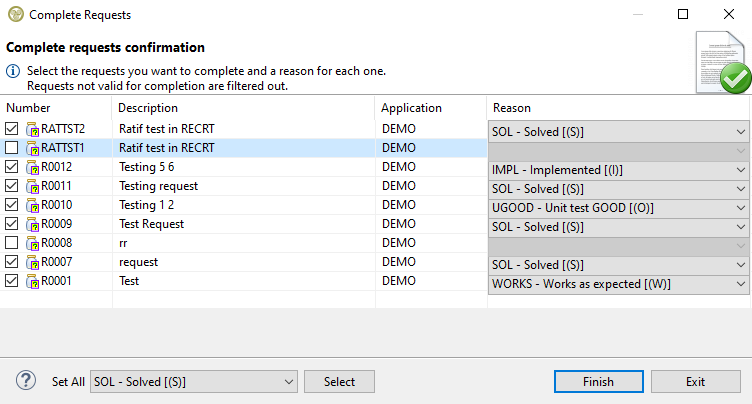
The complete request wizard has a table with the request and a drop-down menu for each one stating the reason as to why its completed. In case a request filter was selected, any requests that don't have the *NEW status will be automatically filtered out and won't show in the table. When the wizard opens all valid requests will be preselected for completion.
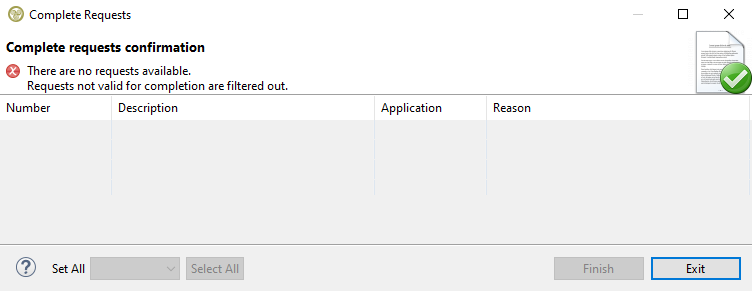
If a request filter doesn't have a single request with the *NEW status then no requests are valid for completion and the wizard will show the error with the table will being empty without any possible actions.
The same behavior will happen (with a different error message) if all requests have no reason codes set for their applications.
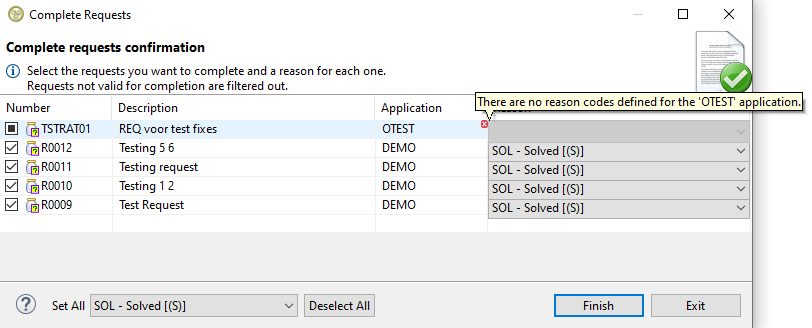
If a request has no reason codes set for its application (but the rest have) then it will be gray checked meaning its not possible to select it and it will be excluded from any actions in the wizard. Its possible to see the error by mouse-hovering over the error icon on the top left of the drop-down menu.
Wizard Content and Actions
The table itself has four resizable columns with the request number, description, application and a drop-down menu to select the reason why a request is completed with a default reason already preselected (configurable in the green screen). The table can be ordered by clicking on the columns to sort the requests based on their number, description or application. On the bottom left there are shortcut buttons that allow you to set the same reason for all selected requests (available only when all requests belong to same application) and a button to select/deselect all available requests or select only the ones that are selected on the table (grayed requests will be excluded).
When you have made your choices press finish to start the process.
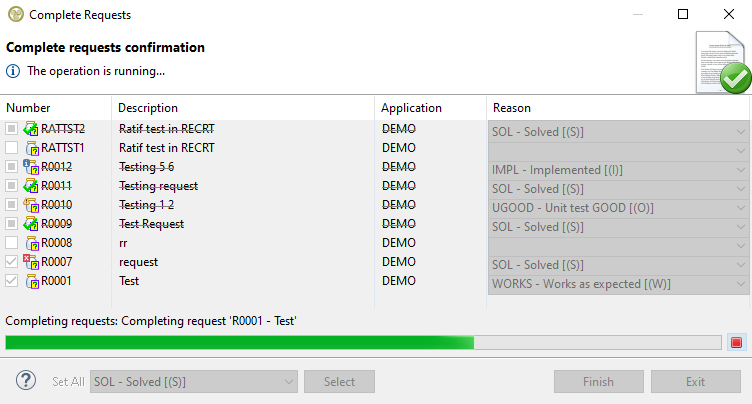
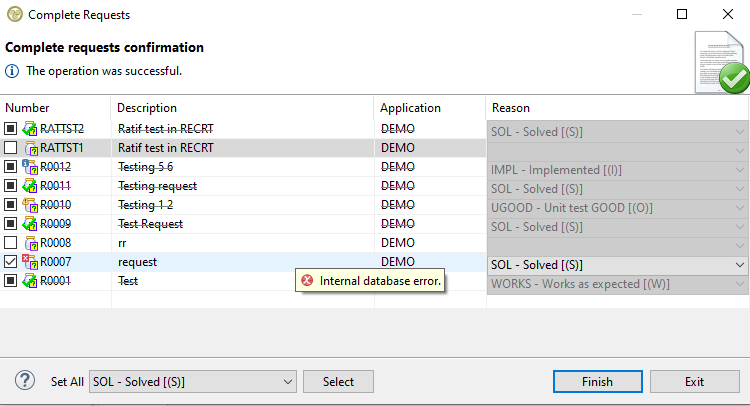
A progress bar will appear showing which request is processed at the moment. As the progress continues the table will update the requests based on the returned status of each one: Completed, Completed with an informational or warning message, or Not Completed with an error. If the request is completed it will have a strike-through line in the middle of its text and if there is no extra information to display then it will have a green check on its icon. If there is extra information to display it can be viewed when hovering over a request row with an extra icon.
The operation can be cancelled by pressing the red box at the right of the progress bar and the table will show the status of the requests that have been processed already. Any completed requests will be gray-checked and won't be available for selection anymore.
If all available requests on the table are completed without any extra messages to show then the wizard will close automatically when the process is finished. Any affected objects that are visible in a tree in all open views will be refreshed and all affected open editors will be refreshed or closed accordingly.
Disconnect solution
A solution is generated by connecting a component to a task. There may come a moment when you want to disconnect the solution. This can be because you have selected the incorrect component, because you want to connect the solution to another task or because you no longer require the solution and you want to complete the task.
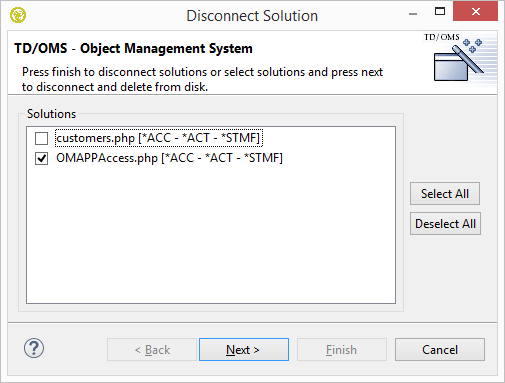
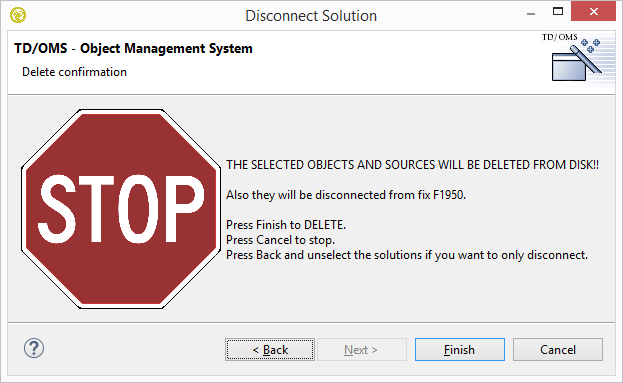
The Disconnect solution action will process the selected solutions and enables you to indicate that (a subset of) the selected solutions should also be removed from disk.
Selecting solutions in the Disconnect Solution action should only be done when you are absolutely certain that this will not lead to loss of information. The finish button will be disabled when you select a solution. Press the Next button to display the confirmation screen.
This action will remove the objects and should not be applied when objects are required in a sub environment. It will be required to perform additional activities (eg manually restore objects, perform a manual fall-back or undo a database conversion) to restore these required objects to their previous state.
Change Solution Type
Solutions can be of three types:
- 1 or *CHANGE
- The object will be changed as part of a normal maintenance cycle.
- 3 or *COMPILE
- The object will be recompiled but it will not be changed
- 9 or *TERMINATE
- The object will be removed from the application.
A solution is generated by connecting a component to a task. Normally, the solution will be a *CHANGE solution. The "Change Solution Type" wizard enables you to change the type.
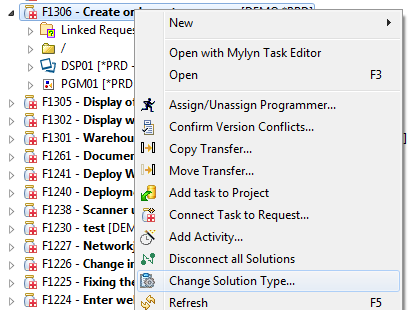
To start this action, select one or more Solutions or one Task from the Work Management view and open the context menu.
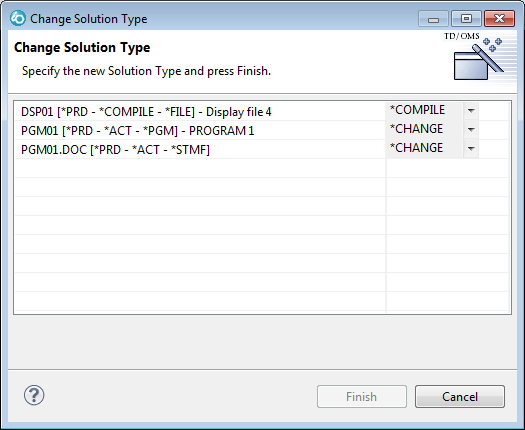
From the menu select the option Change Solution Type .... This will start the following wizard.
Use the combo box to change one or more Solutions to a different type and press "Finish".
Possible Conflicts
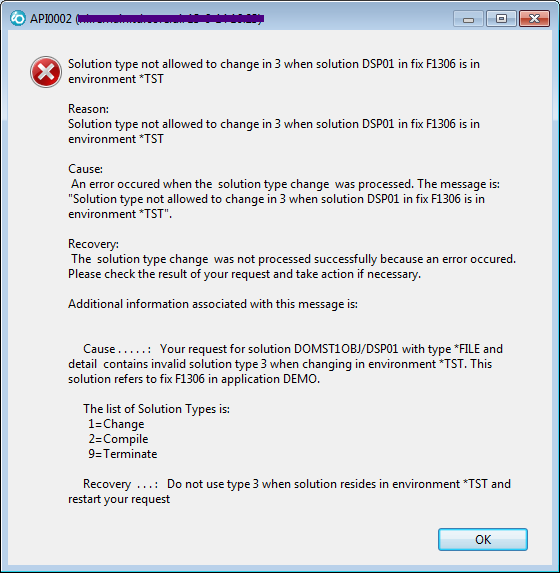
You can only change a Solution to *COMPILE in the development or the production environment. You may change a Solution to *TERMINATE everywhere but please keep in mind that the Solution will not be removed from lower environments and/or remote systems that are below the environment that the Solution is in when you select this action.
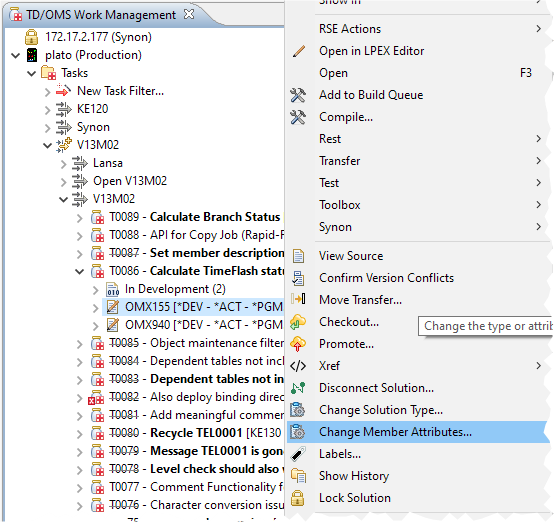
Change Member Attributes
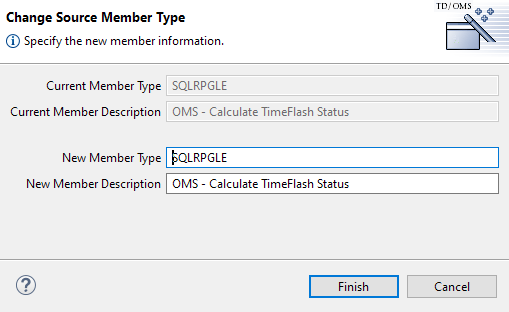
To change the description of an object, or to trigger a different compile, sometimes it is needed to change the attributes of a source member.
To start this action, select one Solution from the Work Management view and open the context menu.
The object must be in development, it must be a copy member or an object with a source and it must be a "CHANGE" solution.
From the menu select the option Change Member Attributes.... This will start the following wizard.
Use the text fields to change the member attribute, the member description or both. Then press "Finish".
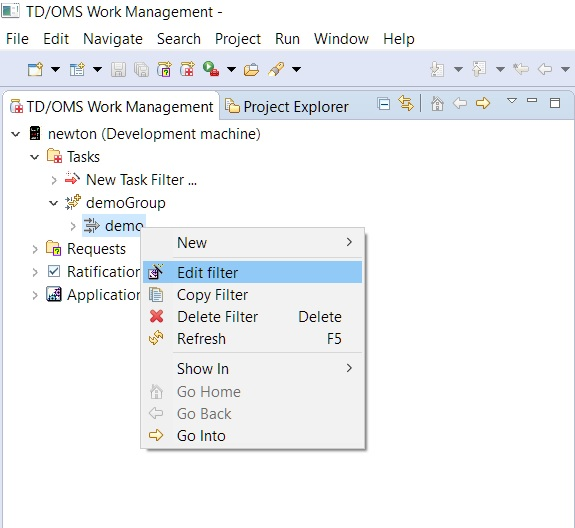
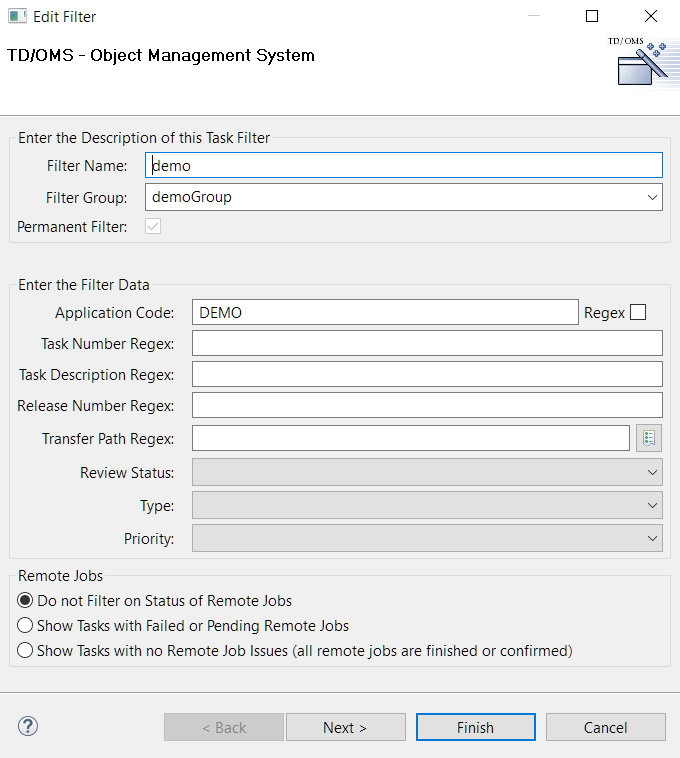
Edit a Task Filter
Right click the task filter you want to edit and click Edit Filter.
Then the Edit Task Filter window appears.
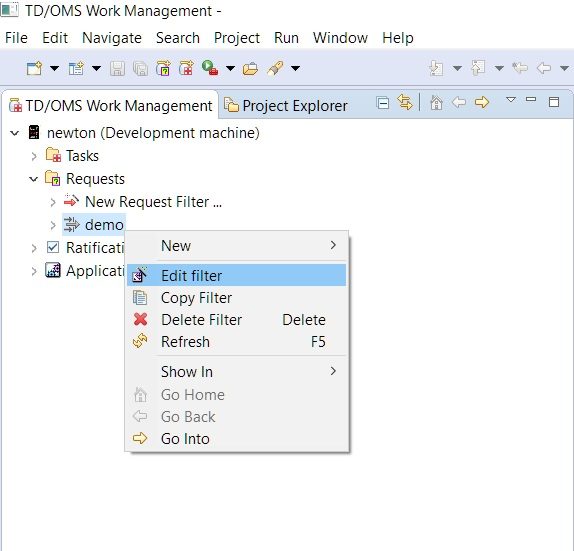
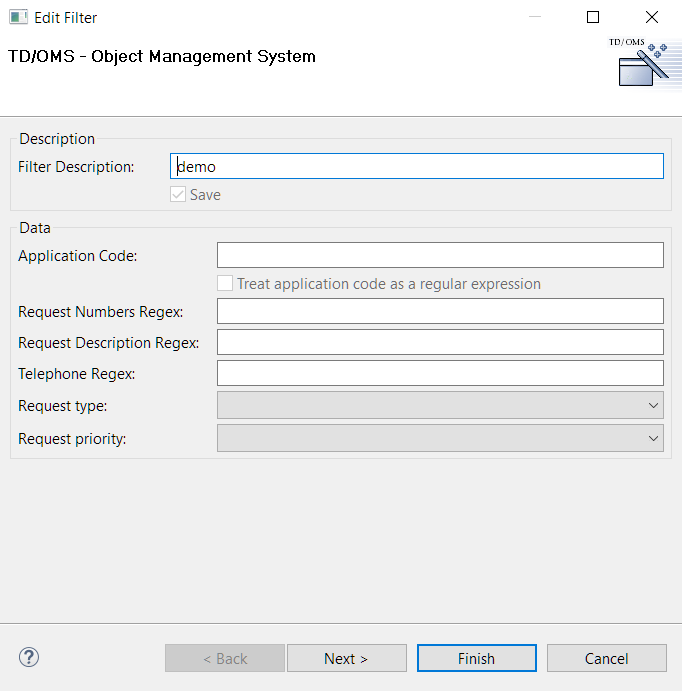
Edit a Request Filter
Right click the request filter you want to edit and click Edit Filter.
Then the Edit Request Filter window appears.
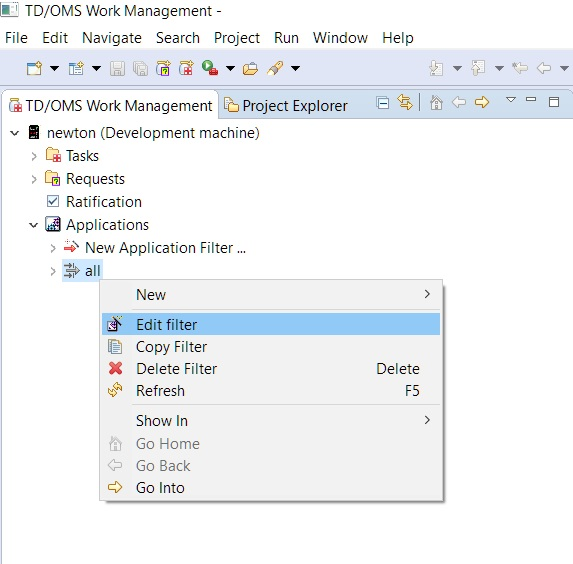
Edit an Application Filter
Right click the application filter you want to edit and click Edit Filter.
Then the Edit Application Filter window appears.
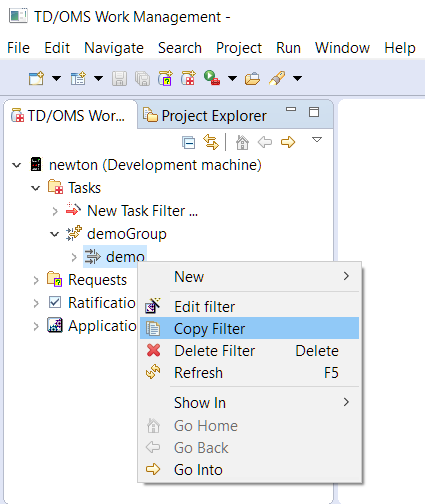
Copy a Filter
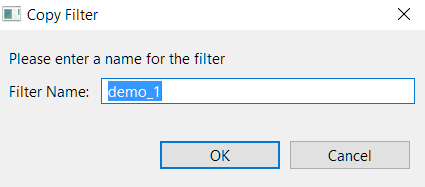
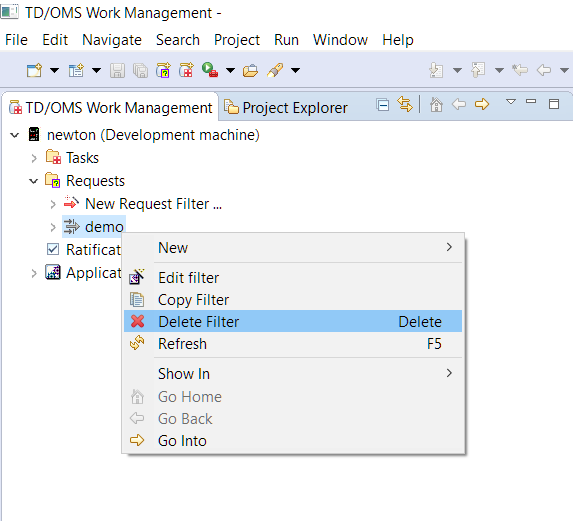
Right click the filter you want to copy and click Copy Filter.
Then the copy filter dialog appears where you have only to enter a unique name for the new copied filter.
Delete a Filter
Right click the filter you want to delete and click Delete Filter.
Move Solutions
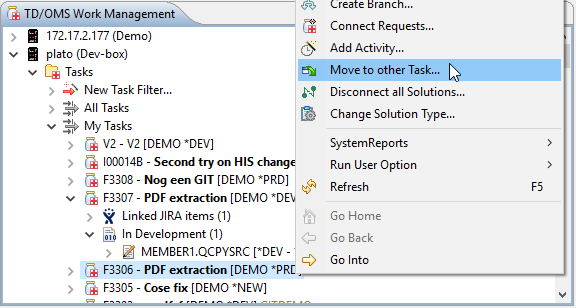
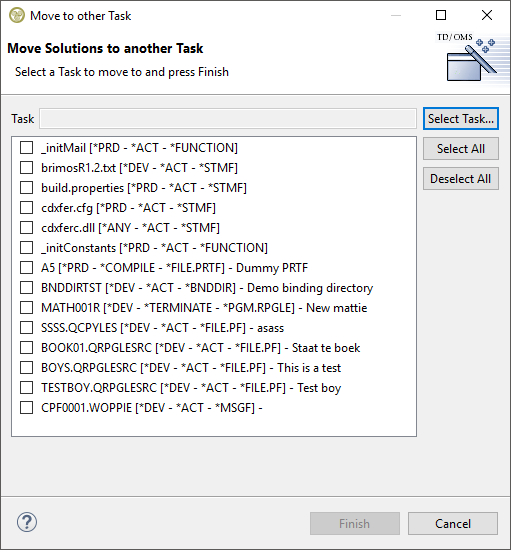
With this option you can move Solutions to another Task. You want to do this e.g. if you want to promote only parts of the Task and move the unfinished components to another Task.
The Move Solutions action enables you to select the Solutions that should be moved to the target Task.
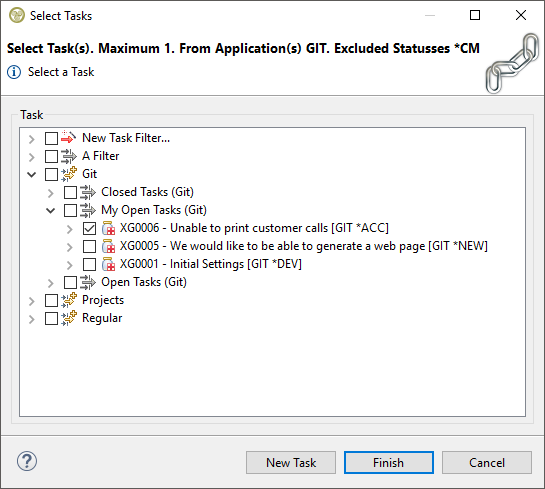
Before you may finish the wizard you have to select a target Task from the top of the screen. This will present the Task Selection Dialog. Choose the Task that is the target of the move or create a new Task on the fly.
After you press Finish, the solutions will be moved to the target Task. The move will fail if the target Task already contains this Solution.

