Translations:PRINT:EWM:Graphical Work Management Guide/4/ja
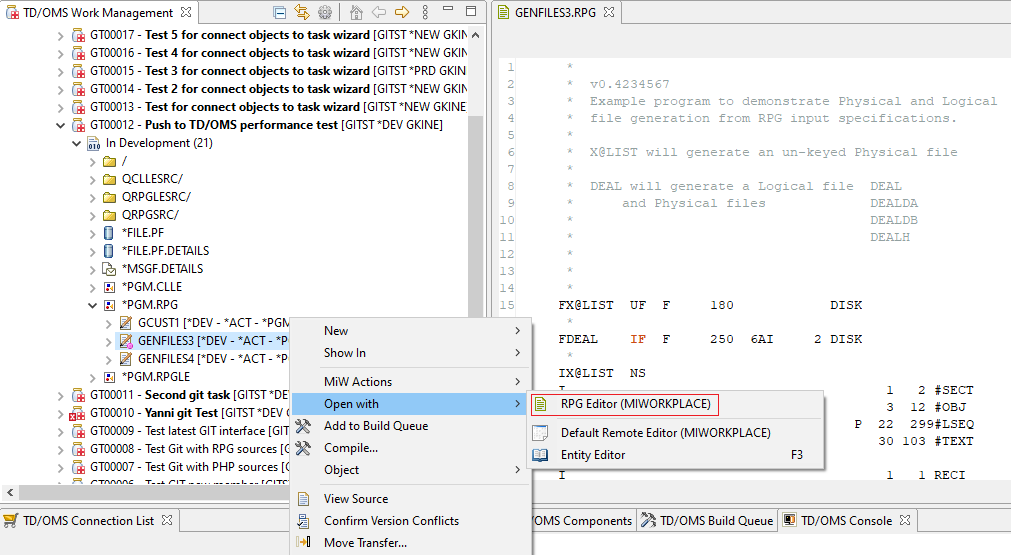
Open with
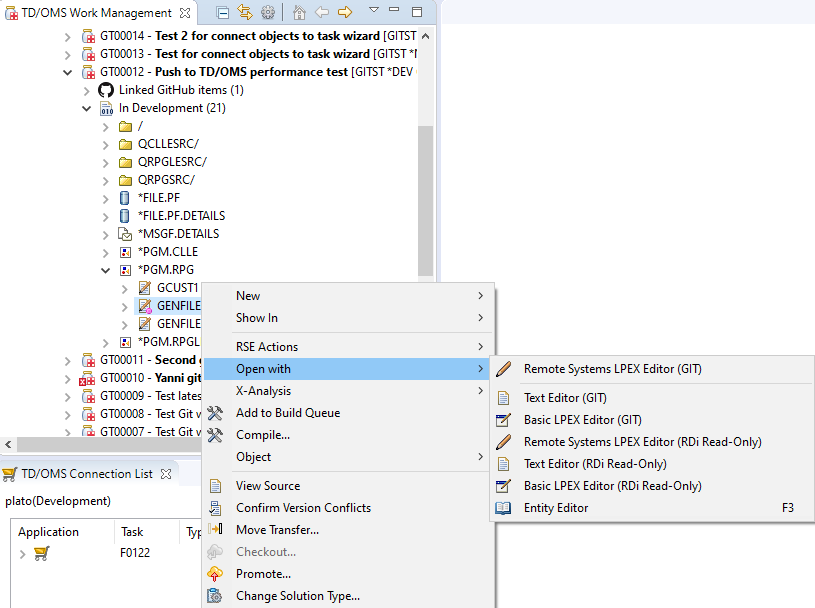
A file can be opened in various ways. For this reason the 'Open with' menu has been created.
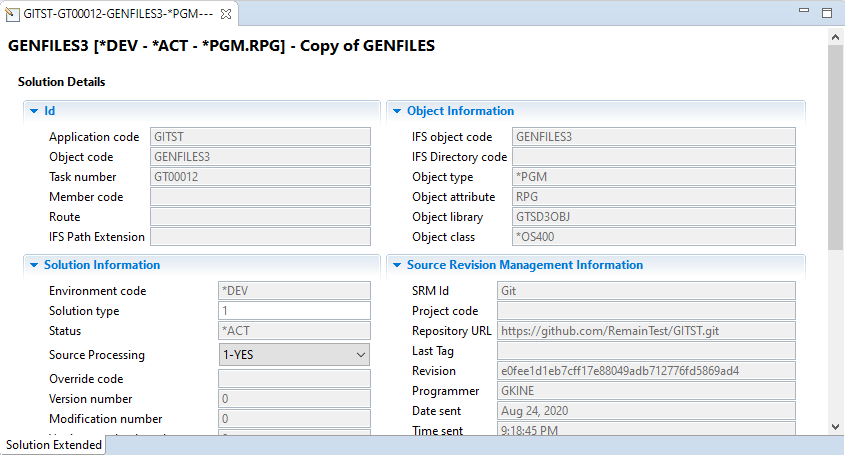
If you want to see information about the file and its attributes then the 'Entity Editor' option must be used.
If you want to see the contents of the file then you have to choose from the which integration of TD/OMS you want the file to be opened with and with which editor. The first option will always be the default option which is the best for that file calculated by TD/OMS. Double clicking the file will always open it with the first option on this menu. Remember that you will be able to edit the contents only if the solution is on the development or emergency environments.
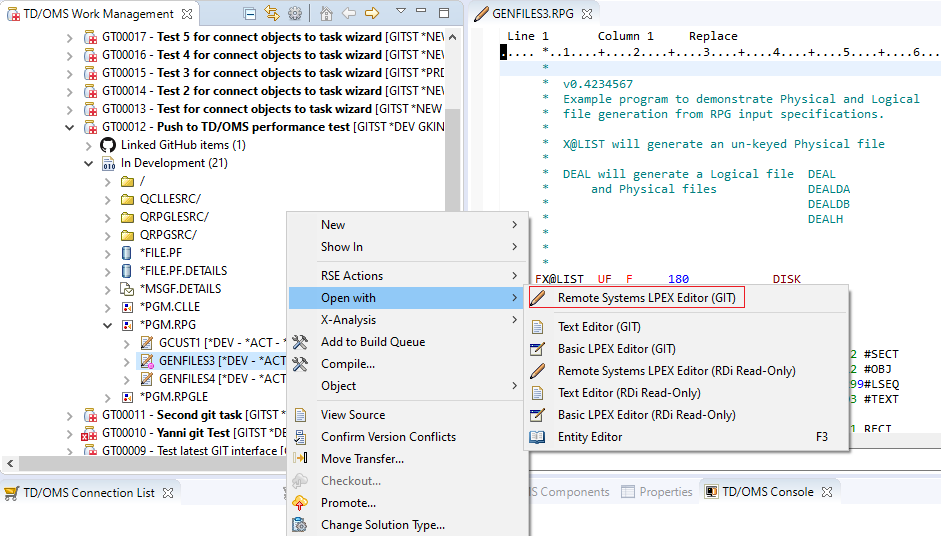
In this example we have a TD/OMS installation with three integrations installed Git, RDi and RSE. The RSE editors are not available in this case because they are only for json or yaml files. A text editor will always be present as well with each integration in case there are no alternative options. Notice that only the Git editors are editable because when Git is installed then all editors from other integrations will be read only because all changes must be managed through Git. Here we open the file with the LPEX editor through Git.
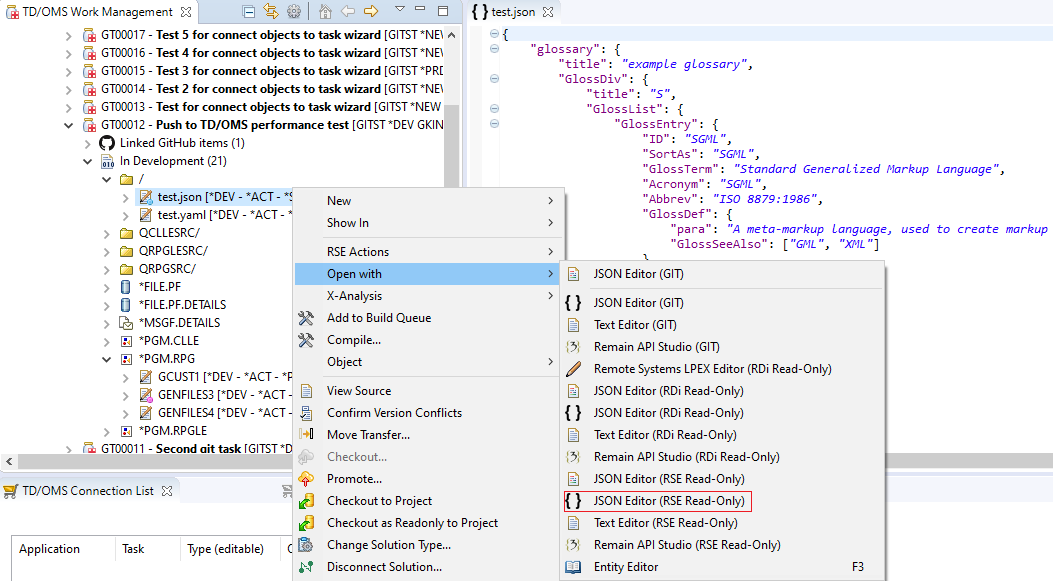
When we want to open a json or a yaml file then more editors are available through the RSE integration.
In this example we have a TD/OMS installation with only the MiWorkplace integration installed.
There are four available integrations in TD/OMS related to editors:
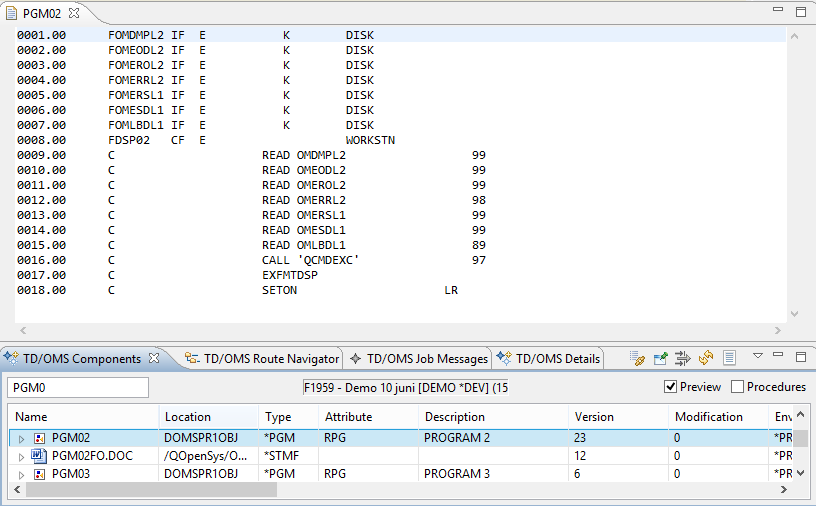
ソースの表示
アクションView Sourceは別のビューで選択したコンポーネントの内容を表示します。このソースは次のようになります。
- IBM iオブジェクトのSEUソース
- ソース・メンバーを表す詳細ソリューションのSEUソース・メンバー
- タイプ*STMFを持つオブジェクト自体
選択したコンポーネントのタイプに対し、すべてのソースはEclipseで設定したエディタに表示されます。エディタが見つからない場合、デフォルトのテキスト・エディタが使用されます。SEUソースもデフォルトのエディタを使用します。SEUライン番号は左側に表示されます。エディタは常に読み取り専用モードで開かれます。
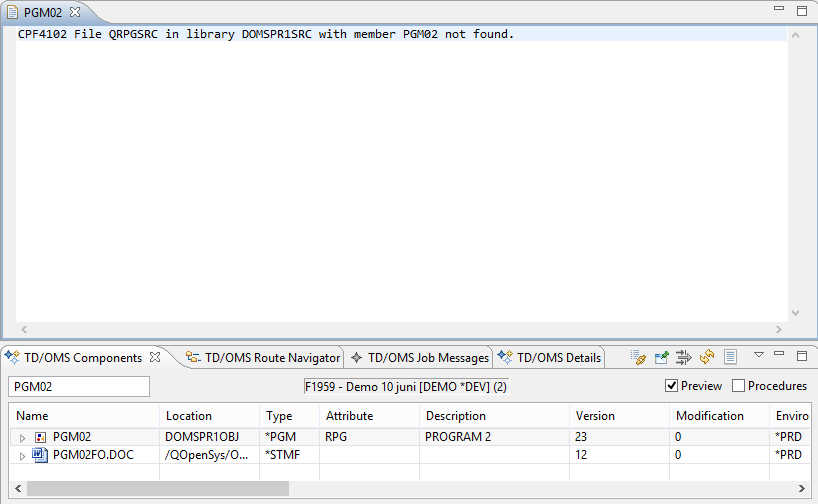
ソースが見つからない場合、メッセージが表示されます。
Editor Actions
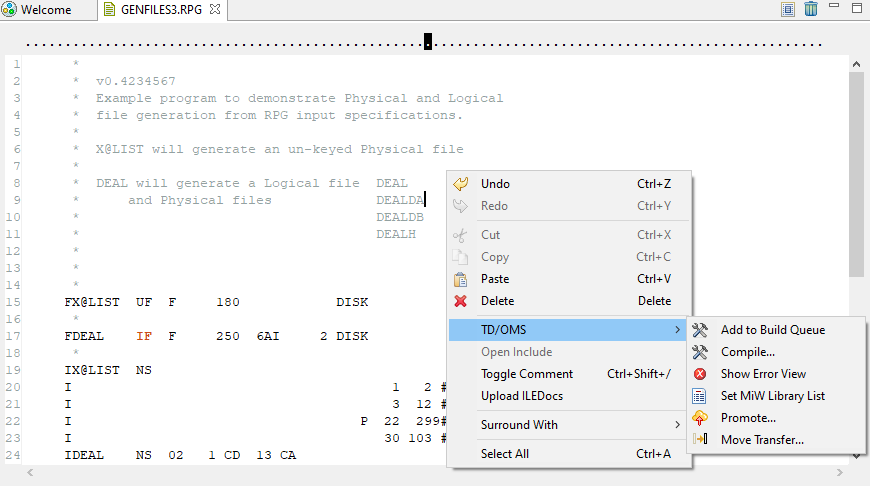
When a file is open on an editor TD/OMS related actions are available based on the editor. In this example the MiWorkplace editor actions are shown but similar actions exist in RSE LPEX as well.
- Add to Build Queue: Add the solution to the build queue. This will also bring the build queue view to the foreground.
- Compile: Compile the solution by opening the compile wizard with all the compile options.
- Show Error View: Open the compile error view for the solution after a failed compile to see the errors. In MiWorkplace this is the compile result view which will also be brought to the foreground.
- Set MiW Library List: Set the MiWorkplace library list for the solution.
- Checkout: Checkout the solution to the development environment. This action is available only if the solution is not on the development or emergency environment.
- Promote: Promote the solution to the next environment.
- Move Transfer: Open the transfer wizard for the solution with all the options to decide where you want to transfer.
オブジェクトの宣言
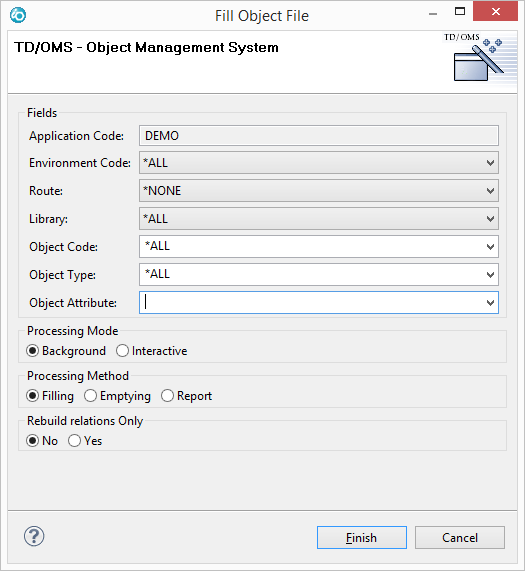
TD/OMS内でオブジェクトの管理を可能にするため、オブジェクトはTD/OMSリポジトリ内に登録される必要があります。オブジェクトを登録する一つの方法は Fill Object File 機能を実行することです。以下を右クリックすることによって、この機能を起動できます。
- TD/OMS作業管理ビューのApplicationsタブにあるアプリケーション
- TD/OMSコンポーネント・ビューにあるコンポーネント
- TD/OMSルート・ナビゲーター・ビューにあるルート
Fill Object File を選択します。TD/OMS内に十分な権限を持つときのみ、Fill Object Fileオプションが利用可能です。
この機能はTD/OMSコマンドSTRFOFとして動作します。迅速に登録したいアプリケーションに対し、すべてのフィールド(アプリケーション・コード以外)に*ALLを設定して 「Finish」 ボタンを押します。
接続リストの処理
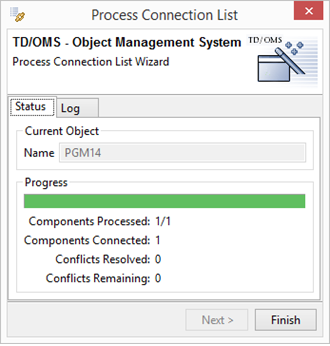
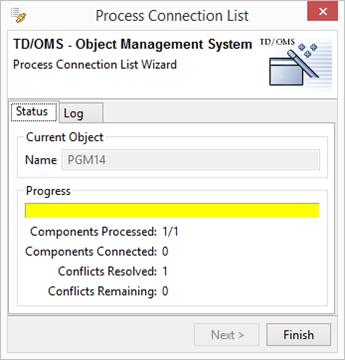
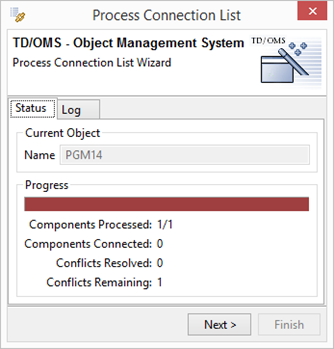
接続リスト処理プロセスの進捗を表示するため、ウィンドウが表示されます。プロセス中、進捗バーが満たされます。色は全体プロセスのステータスを示します。
緑色は(今のところ)問題がありません。
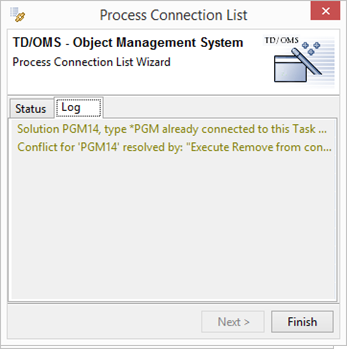
黄色は、(少なくとも)一つのコンポーネントは問題がありましたが、自動的に問題を解決できました。問題および、それがどう解決されたかを確認するため、Logタブを選択できます。
ソリューション競合を解決するために使用した設定はプリファレンス内に保守できます(1.6.4を参照)。
赤色は、(少なくとも)一つのコンポーネントは手動解決が必要な問題があります。問題を確認するため、Logタブを選択できます。
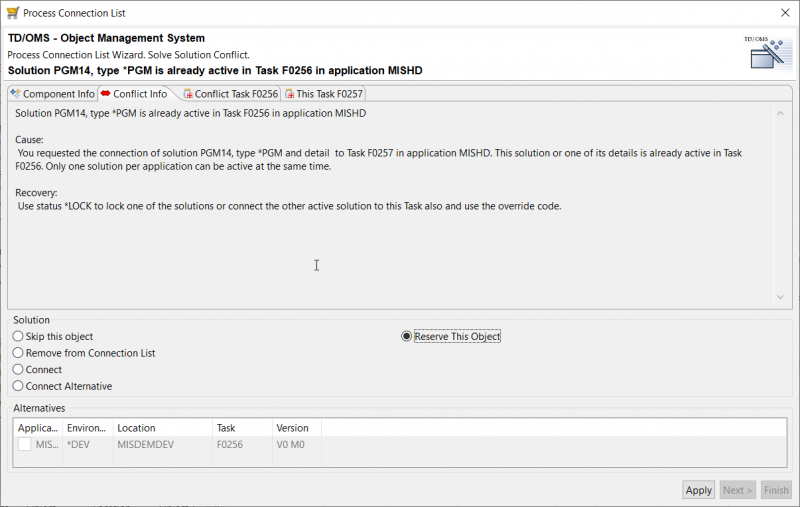
時には、コンポーネントは各オブジェクトの変更を必要とするいくつかのタスクの一部でなければなりません。これは「ソリューション競合」を引き起こす可能性があります。
TD/OMSアプリケーション・サイクル内にオブジェクトは、(すべてのライブラリおよびすべての環境で)複数登録されることができます。しかしながら、ソリューションは一度だけ「アクティブ」になることができます。オブジェクトが既にタスクに接続しており、それを別のタスクに再度接続したい場合、何をすべきかを決定する必要があります。このプロセスは「ソリューション競合の解決」と呼ばれています。
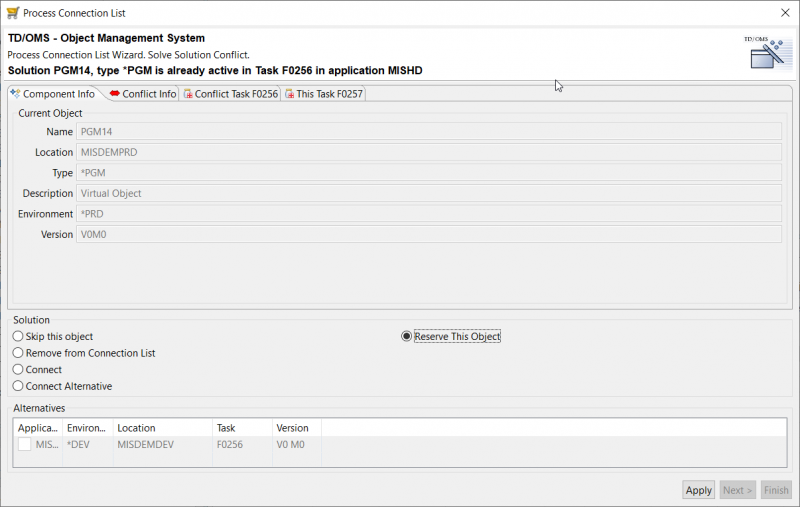
この問題が発生した場合、いくつかの選択があります。
- Skip this object
- Remove from connection list
- Connect
- Connect alternative
- Reserve this object
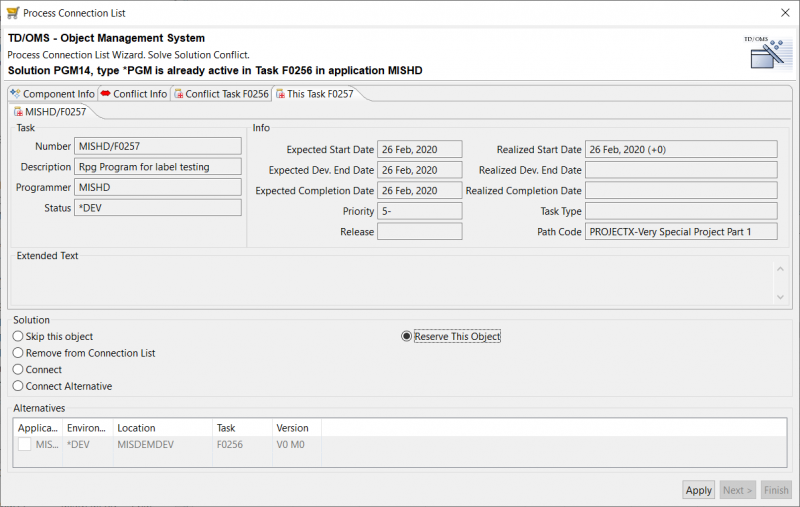
コンポーネントがタスクにリンクされたとき(換言すれば、ソリューションが作成されたとき)、ソリューション競合が自動的にTD/OMSによって検出されます。自動的に解決できない競合が発生した場合、ソリューション競合を解決するために、パネルが表示されます。
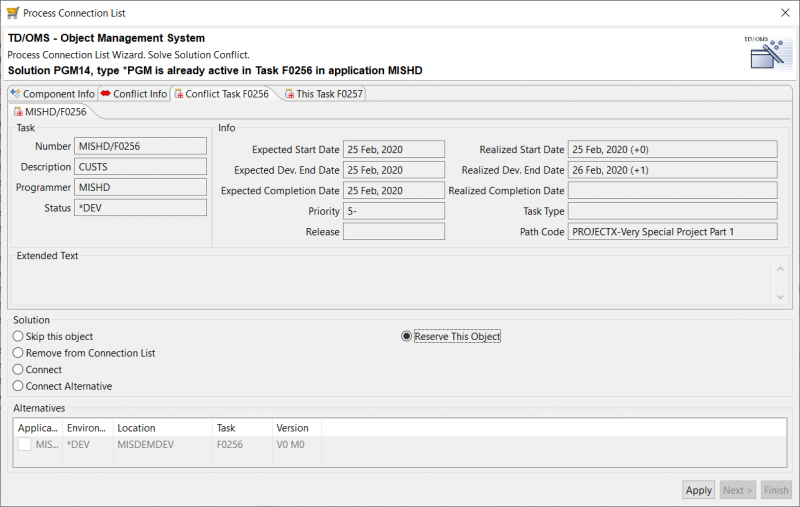
画面にはコンポーネント、競合および競合するタスクまたはリクエストに関する情報を表示します。この画面に表示するソリューション・オプションは手元の状況に依存します。
Explanation of the solution conflict options
- Connect
You did not select the latest version of the object. A list was presented to you with an object that has more recent versions than the object you have selected. This can occur if you select an object from the production environment where another occurrence of the object is already in the cycle. Use this option to force the connection of the object you have initially selected.
- Connect alternative
The object you have selected was already connected to a task. It was not the exact same object that is already active, but another occurrence of it. Use this choice in combination with one of the objects in the alternatives list to connect the alternative object to the task.
- 予約(Reservation)
コンポーネントを予約することは、現在アクティブになっているソリューションが本番環境に移動するとすぐに利用可能になることを意味します。そのとき、メッセージは最初の予約を行ったユーザーに送信されます。予約済みのソリューションはTD/OMS予約ソリューション・ビューで確認できます(2.18を参照)。
- スキップ(Skip)
コンポーネントはスキップされます。コンポーネントが接続リストにとどまります。同じ接続リストが後で再処理されるとき、TD/OMSは再びコンポーネントを接続しようとします。
- 接続リストから取り除きます(Remove from Connection List)
コンポーネントは永久的に接続リストから取り除かれます。
競合情報および競合するタスクに関する情報、現在のタスクに関する情報を表示するため、様々なタブを選択できます。
Assign/unassign programmer
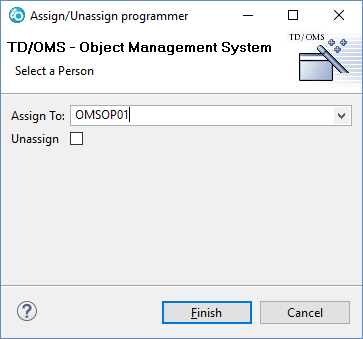
This action is used to change the employee assigned to the selected task(s). The person currently assigned to the first selected task in the list is the programmer, shown as the default for the assignment. The special value <unassigned> is available to remove a previous assignment. This action can be easily done by clicking the ''Unassign'' checkbox, that is shown in TD/OMS V9 Milestone 3 and later.
タスクのリクエストへの接続
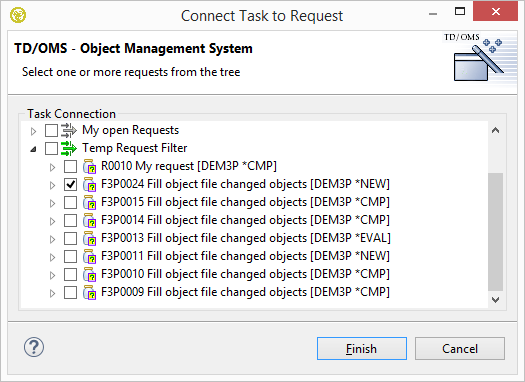
このアクションはタスクを一つ以上のリクエストに接続するために使用します。
既存のフィルタ内で利用できないアプリケーションからリクエストの選択を可能にするため、新しい(一時的な)リクエスト・フィルタを作成できます。チェックボックスをクリックすることによって、リクエストは選択できます。
リクエストのタスクへの接続
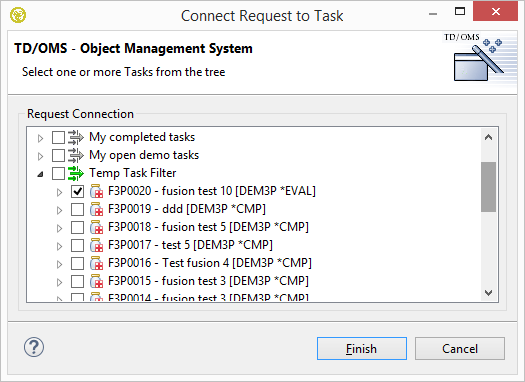
このアクションはリクエストを一つ以上のタスクに接続するために使用します。
既存のフィルタ内で利用できないタスクの選択を可能にするため、新しい(一時的な)タスク・フィルタを作成できます。
タスクの接続解除
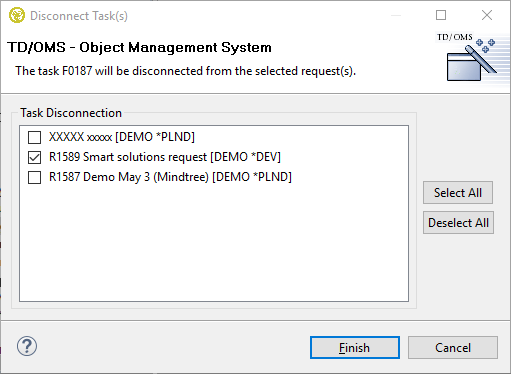
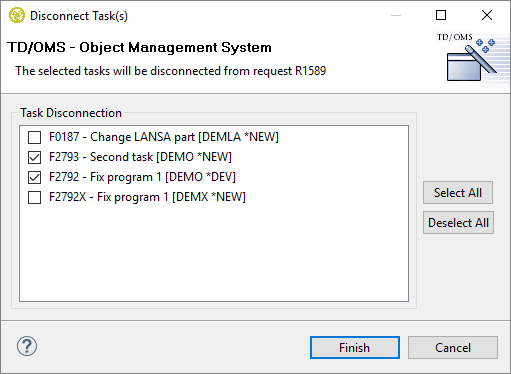
Disconnect Task はリクエストからタスクを接続解除するために使用され、二つのモードで動作できます。
タスクが選択されたとき
タスクが選択されたとき、このアクションはすべての接続しているリクエストを表示します。一つ以上のリクエストを選択して接続解除できます。
リクエストが選択されたとき
リクエストが選択されたとき、このアクションはすべての接続しているタスクを表示します。一つ以上のタスクを選択して接続解除できます。
Compile Actions
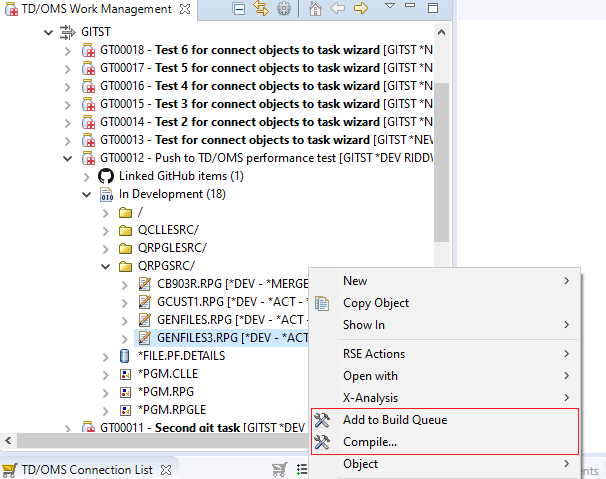
There are two compile options available: Add to Build Queue and Compile.
Add to Build Queue
This will add the solution the build queue and based on the preferences for this view it will compile directly or just add it to queue. This action is available when:
- One or many solutions are selected that belong to the same task and all of them are in the development or emeergency environments.
- Environment folders that contain solutions (only the ones in the valid environments will be added).
- Folders that contain solutions (only the ones in the valid environments will be added).
- A single task that contains solutions (only the ones in the valid environments will be added).
More information about this view can be found here.
Compile
This action enables you to directly compile a single solution opening the compile wizard for more options.
More information about compile options can be found here.
アクティビティの追加
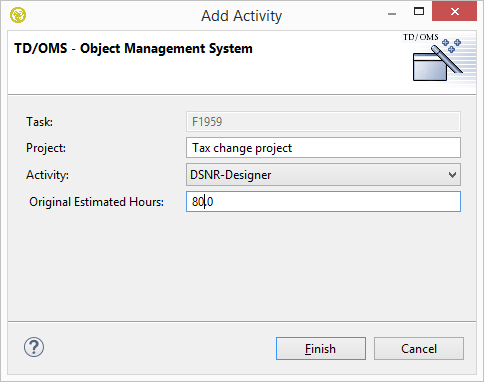
時間登録モジュール(オプション)がアクティブになったときのみ、タスク・コンテキスト・メニューの一部にあるこのアクションが使用可能です。
画面では選択したタスクに対するアクティビティ・テーブルにある利用可能な各アクティビティの推定時間を登録できます。
推定時間の登録は一回のみです。アクティビティ・ビューは時間の改訂番号を入力するか、またはアクティビティを取り除く機会を提供します。取り除いた後、再度タスクに同じアクティビティを追加できます。
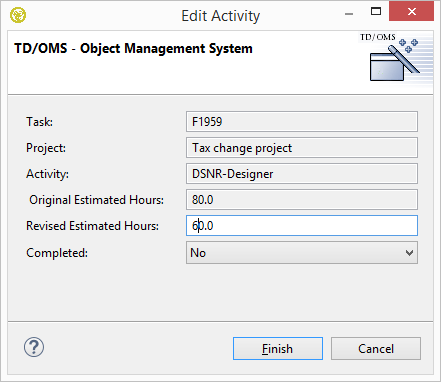
アクティビティの編集
時間登録モジュール(オプション)がアクティブになったときのみ、このアクションが使用可能です。TD/OMSアクティビティ・ビューを開き、選択したアクティビティのコンテキスト・メニューから Edit を選択します。
画面では選択したタスクに対するアクティビティ・テーブルにある利用可能な各アクティビティの推定時間を登録できます。
編集中のアクティビティが完了したことを示すことも可能です。完了をYesに変更すると、工数の追加または編集アクションを無効にします。後で再びこの値をNoに変更できます。
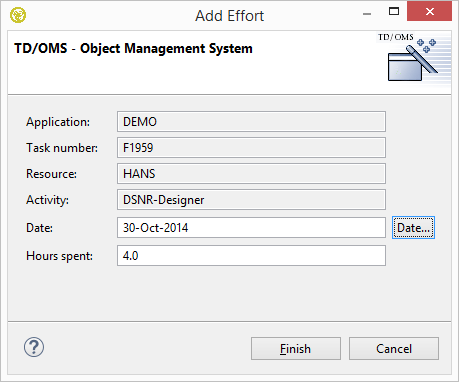
工数の追加
時間登録モジュール(オプション)がアクティブになったときのみ、このアクションが使用可能です。TD/OMSアクティビティ・ビューのあなたの名前のコンテキスト・メニュー上で利用できます。
画面では特定の日で特定のアクティビティにあなたが費やした時間合計を入力できます。
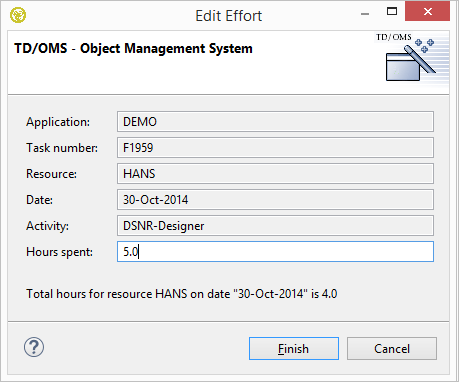
工数の編集
時間登録モジュール(オプション)がアクティブになったときのみ、このアクションが使用可能です。
画面では特定の日で特定のアクティビティにあなたが費やした時間合計を変更できます。
既に報告した合計時間(編集中のアクティビティに対しもともと報告した時間を含みます)は追加情報として表示されます。
Complete Task
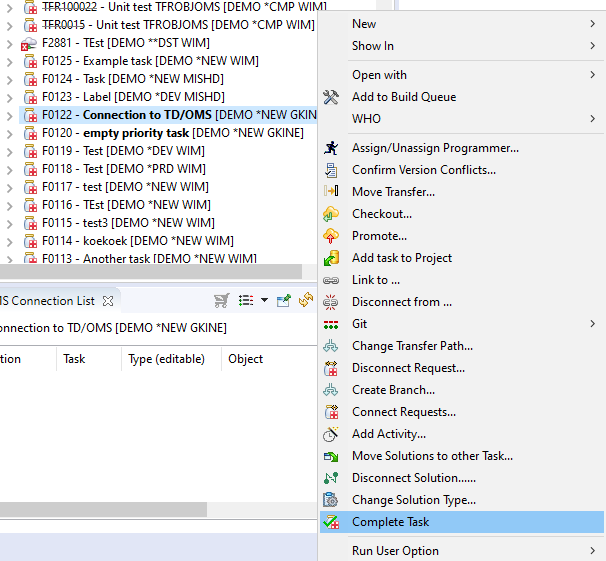
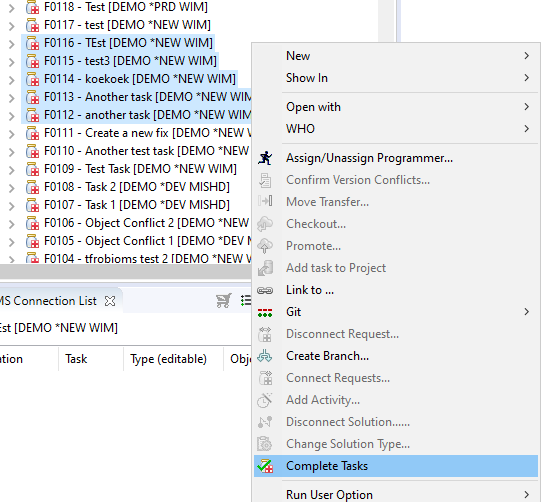
When work on a task has finished it can be completed. To do that, right click on a task and select the Complete Task option. The option will only be available if the task has the *NEW status. Note that a task can't be physically deleted only marked as completed.
If many tasks need to be completed then they all need to have the *NEW status or the option won't be available. They can also be from different applications but not from a different host.
Another option is to right click a single task filter.
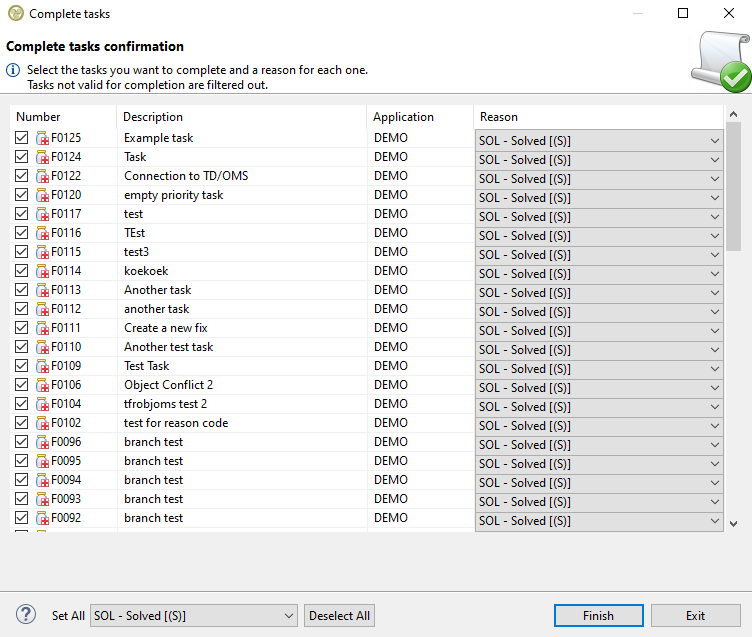
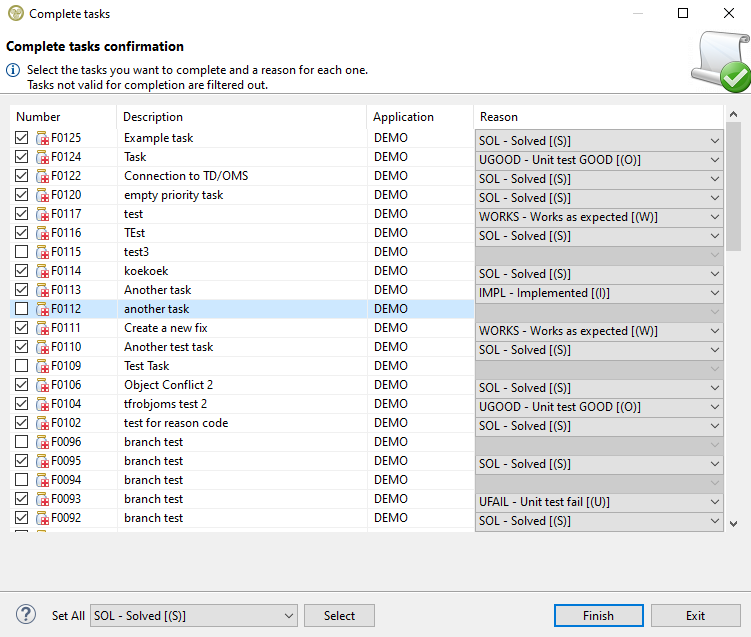
The complete task wizard has a table with the tasks and a drop down menu for each one stating the reason as to why its completed. In case a task filter was selected, any tasks that don't have the *NEW status will be automatically filtered out and won't show in the table. When the wizard opens all valid tasks will be preselected for completion.
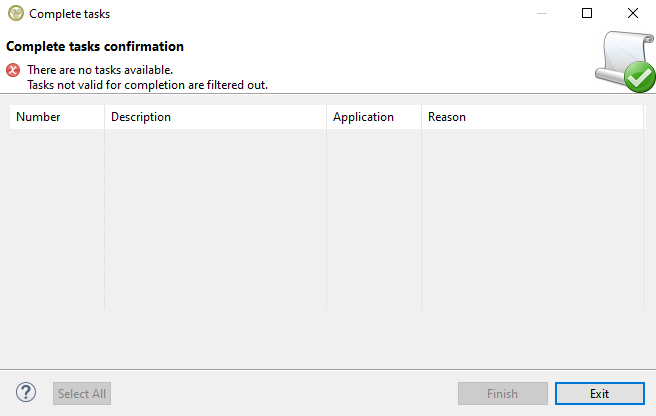
If a task filter doesn't have a single task with the *NEW status then no tasks are valid for completion and the wizard will show the error with the table will being empty without any possible actions.
The same behavior will happen (with a different error message) if all tasks have no reason codes set for their applications.
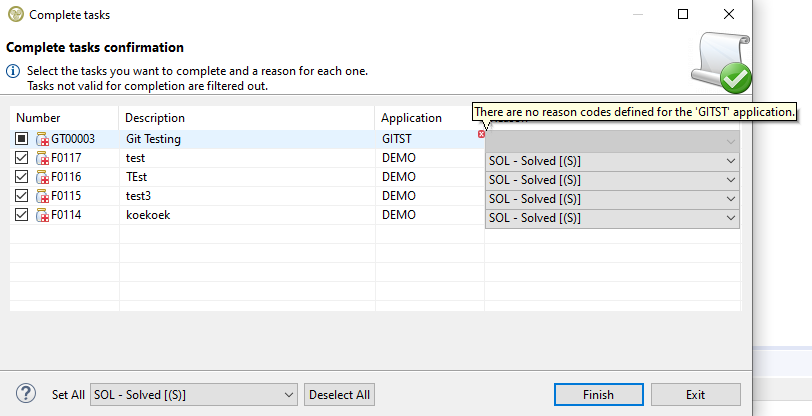
If a task has no reason codes set for its application (but the rest have) then it will be gray checked meaning its not possible to select it and it will be excluded from any actions in the wizard. Its possible to see the error by mouse-hovering over the error icon on the top left of the drop down menu.
Wizard Content and Actions
The table itself has four resizable columns with the task number, description, application and a drop down menu to select the reason why a task is completed with a default reason already preselected (configurable in the green screen). The table can be ordered by clicking on the columns to sort the tasks based on their number, description or application. On the bottom left there are shortcut buttons that allow you to set the same reason for all selected tasks (available only when all tasks belong to same application) and a button to select/deselect all available tasks or select only the ones that are selected on the table (grayed tasks will be excluded).
When you have made your choices press finish to start the process.
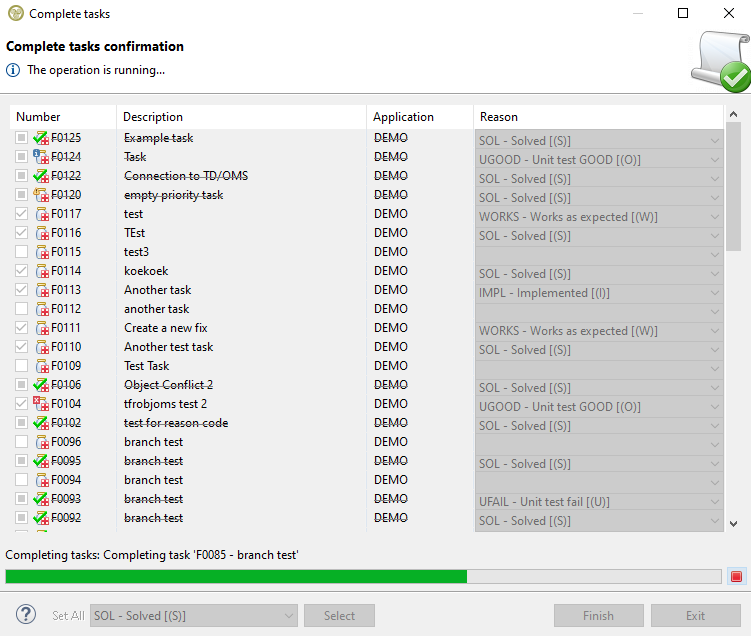
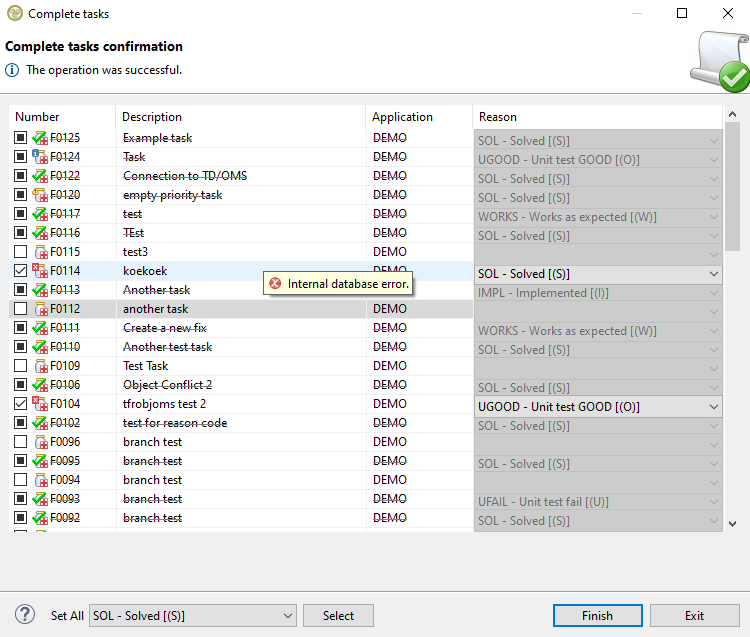
A progress bar will appear showing which task is processed at the moment. As the progress continues the table will update the tasks based on the returned status of each one: Completed, Completed with an informational or warning message, or Not Completed with an error. If the task is completed it will have a strike-through line in the middle of its text and if there is no extra information to display then it will have a green check on its icon. If there is extra information to display it can be viewed when hovering over a task row with an extra icon.
The operation can be cancelled by pressing the red box at the right of the progress bar and the table will show the status of the tasks that have been processed already. Any completed tasks will be gray-checked and won't be available for selection anymore.
If all available tasks on the table are completed without any extra messages to show then the wizard will close automatically when the process is finished. Any affected objects that are visible in a tree in all open views will be refreshed and all affected open editors will be refreshed or closed accordingly.
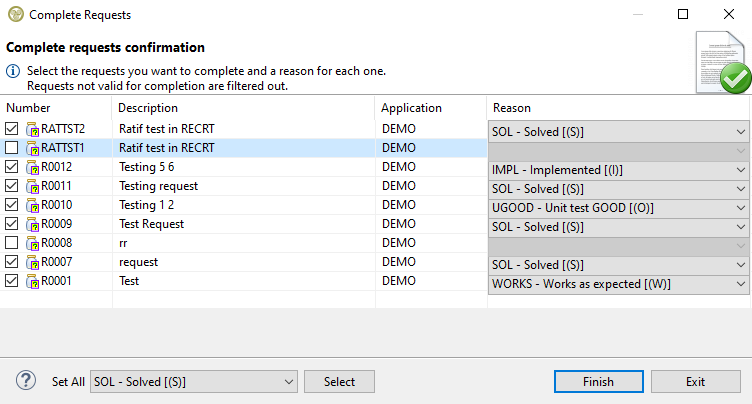
Complete Request
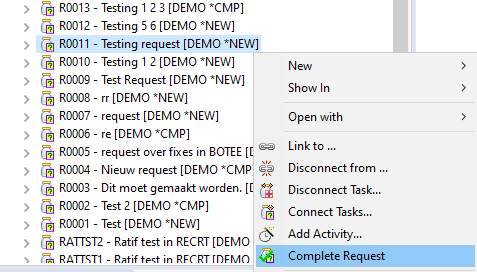
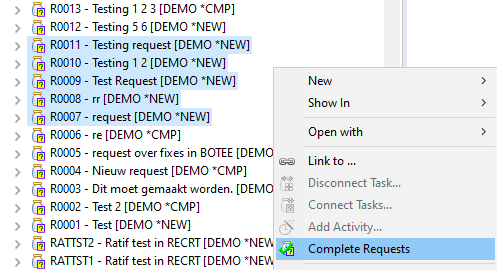
When work on a request has finished it can be completed. To do that, right click on a request and select the Complete Request option. The option will only be available if the request has the *NEW status. Note that a request can't be physically deleted only marked as completed.
If many requests need to be completed then they all need to have the *NEW status or the option won't be available. They can also be from different applications but not from a different host.
Another option is to right-click a single request filter.
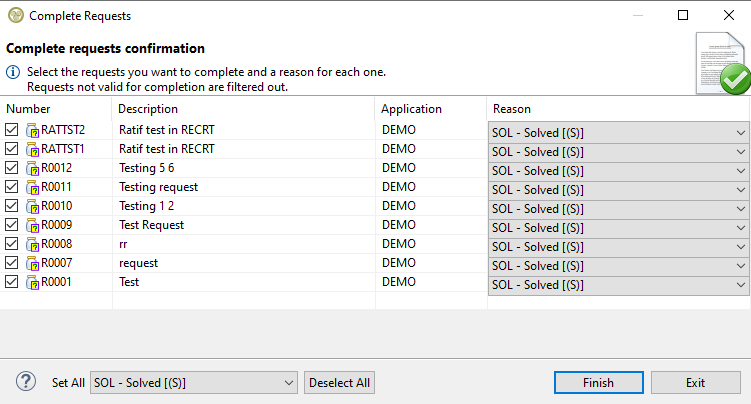
The complete request wizard has a table with the request and a drop-down menu for each one stating the reason as to why its completed. In case a request filter was selected, any requests that don't have the *NEW status will be automatically filtered out and won't show in the table. When the wizard opens all valid requests will be preselected for completion.
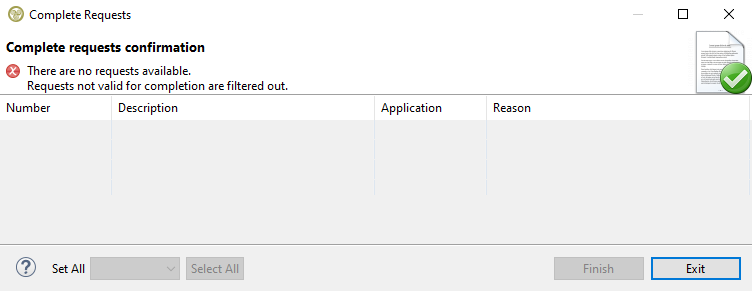
If a request filter doesn't have a single request with the *NEW status then no requests are valid for completion and the wizard will show the error with the table will being empty without any possible actions.
The same behavior will happen (with a different error message) if all requests have no reason codes set for their applications.
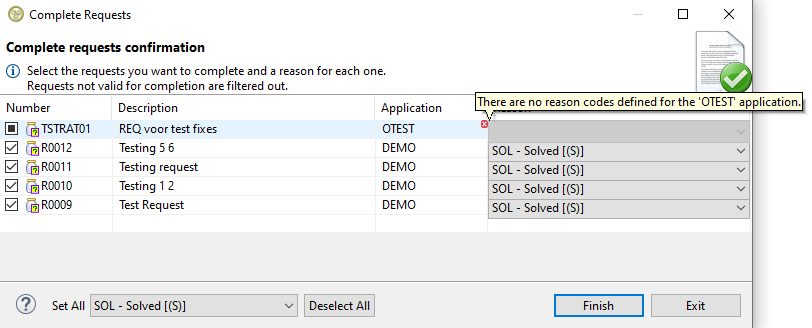
If a request has no reason codes set for its application (but the rest have) then it will be gray checked meaning its not possible to select it and it will be excluded from any actions in the wizard. Its possible to see the error by mouse-hovering over the error icon on the top left of the drop-down menu.
Wizard Content and Actions
The table itself has four resizable columns with the request number, description, application and a drop-down menu to select the reason why a request is completed with a default reason already preselected (configurable in the green screen). The table can be ordered by clicking on the columns to sort the requests based on their number, description or application. On the bottom left there are shortcut buttons that allow you to set the same reason for all selected requests (available only when all requests belong to same application) and a button to select/deselect all available requests or select only the ones that are selected on the table (grayed requests will be excluded).
When you have made your choices press finish to start the process.
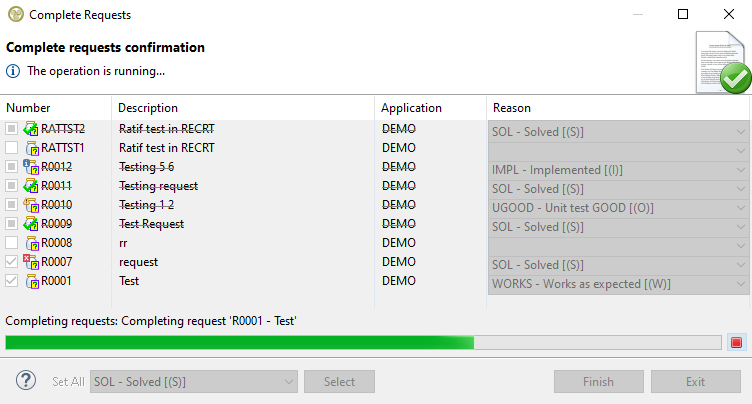
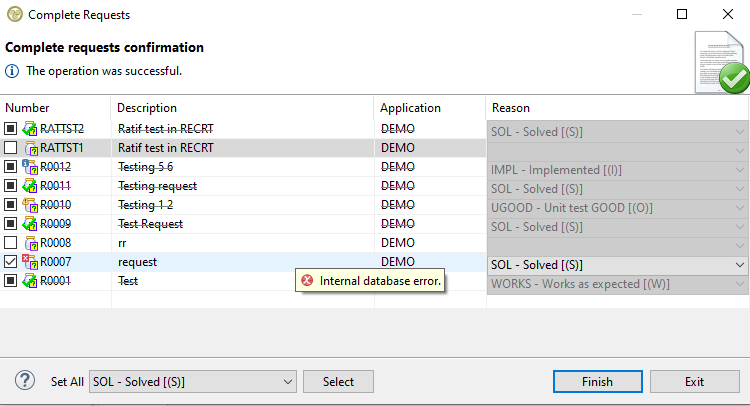
A progress bar will appear showing which request is processed at the moment. As the progress continues the table will update the requests based on the returned status of each one: Completed, Completed with an informational or warning message, or Not Completed with an error. If the request is completed it will have a strike-through line in the middle of its text and if there is no extra information to display then it will have a green check on its icon. If there is extra information to display it can be viewed when hovering over a request row with an extra icon.
The operation can be cancelled by pressing the red box at the right of the progress bar and the table will show the status of the requests that have been processed already. Any completed requests will be gray-checked and won't be available for selection anymore.
If all available requests on the table are completed without any extra messages to show then the wizard will close automatically when the process is finished. Any affected objects that are visible in a tree in all open views will be refreshed and all affected open editors will be refreshed or closed accordingly.
ソリューションの接続解除
ソリューションはコンポーネントをタスクに接続することによって生成されます。ソリューションを接続解除したい場合が来るかもしれません。例えば、間違ったコンポーネントを選択したか、ソリューションを他のタスクに接続したいか、またはソリューションをもはや必要とせず、タスクを完了したい場合です。
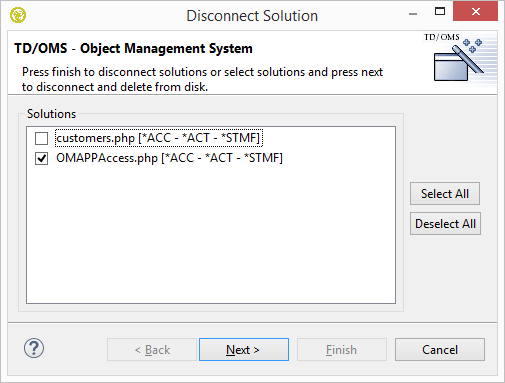
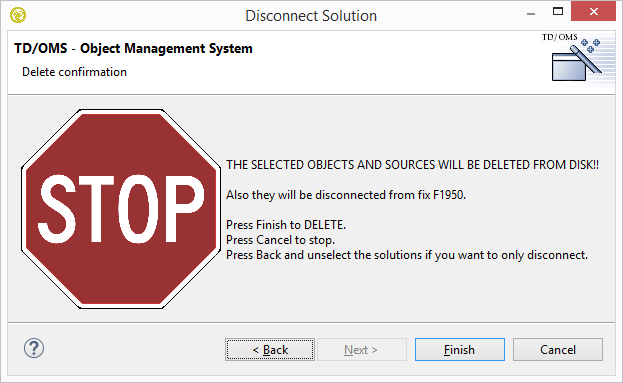
Disconnect solutionアクションは選択したソリューションを処理し、選択したソリューション(のサブセット)をディスクから取り除く必要があることを指示できます。
Disconnect Solutionアクションでソリューションを選択することは、情報の損失につながらないことに確信しているときのみ行うべきです。ソリューションを選択すると、終了ボタンは無効になります。「Next」ボタンを押して確認画面を表示します。
このアクションはオブジェクトを削除し、オブジェクトがサブ環境で必要なときに適用すべきではありません。以前の状態にこれらの必要なオブジェクトをリストアするため、追加のアクティビティ(例えば、手動でオブジェクトをリストアするか、手動でフォールバックを実行するか、またはデータベース変換を元に戻します)を実行する必要があります。
ソリューション・タイプの変更
ソリューションは三つのタイプがあります。
- 1または*CHANGE
- オブジェクトは通常の保守サイクルの一部として変更されます。
- 3または*COMPILE
- オブジェクトが再コンパイルされますがそれは変更されません。
- 9または*TERMINATE
- オブジェクトはアプリケーションから取り除かれます。
ソリューションはコンポーネントをタスクに接続することによって生成されます。通常、ソリューションは*CHANGEソリューションです。「Change Solution Type」ウィザードはタイプを変更できます。
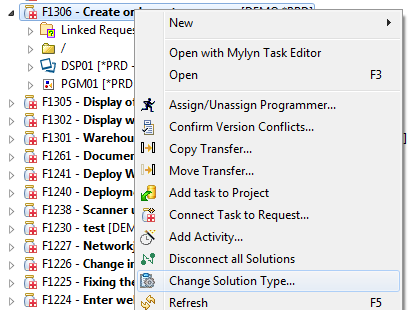
このアクションを起動するため、作業管理ビューから一つ以上のソリューションを選択してコンテキスト・メニューを開きます。
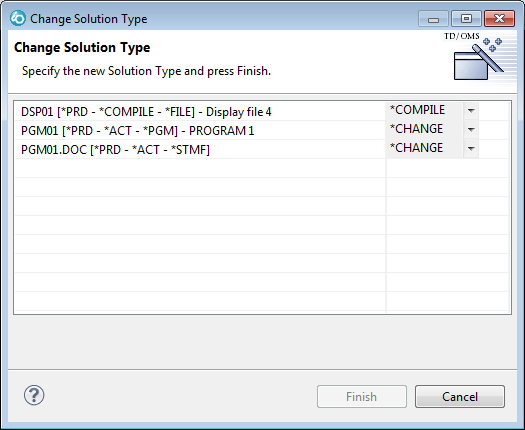
メニューからオプション 「Change Solution Type ...」 を選択します。これは次のウィザードを起動します。
コンボ・ボックスを使用し、一つ以上のソリューションを別のタイプへ変更して"Finish"を押します。
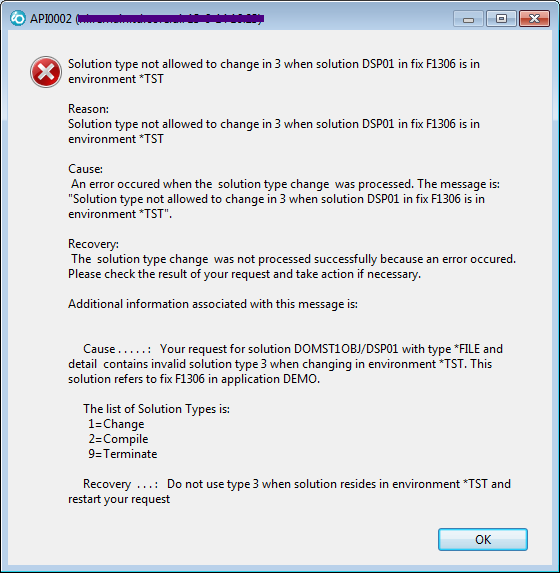
起こり得る競合
開発または本番環境のみでソリューションを*COMPILEに変更できます。どこでもソリューションを*TERMINATEに変更できますが、このアクションを選択しても、ソリューションは存在する環境以下の低レベル環境、リモート・システムから取り除かれないことに注意してください。
Change Member Attributes
To change the description of an object, or to trigger a different compile, sometimes it is needed to change the attributes of a source member.
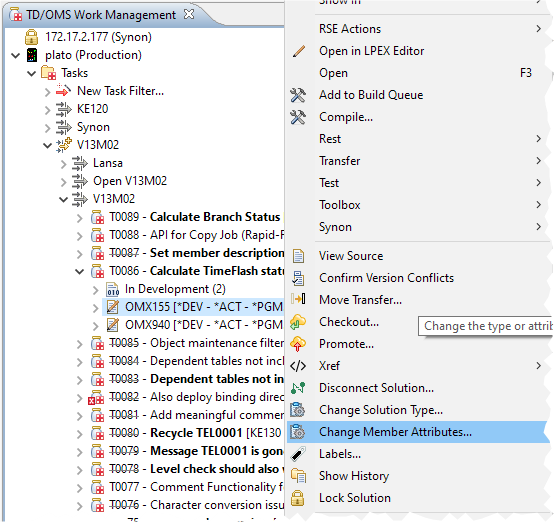
To start this action, select one Solution from the Work Management view and open the context menu.
The object must be in development, it must be a copy member or an object with a source and it must be a "CHANGE" solution.
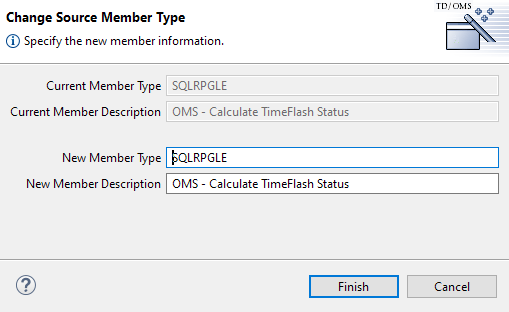
From the menu select the option Change Member Attributes.... This will start the following wizard.
Use the text fields to change the member attribute, the member description or both. Then press "Finish".
Edit a Task Filter
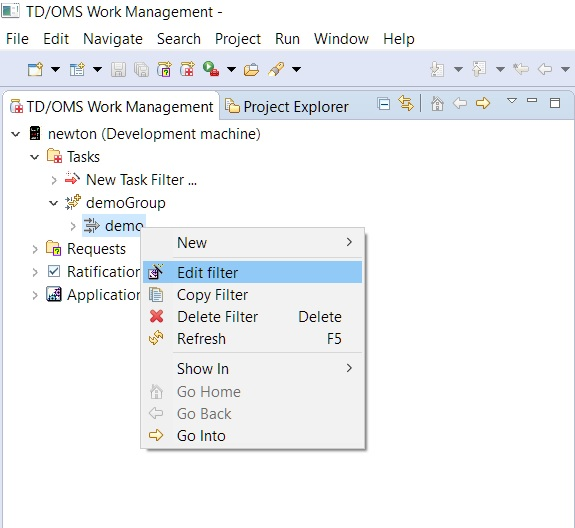
編集したいタスク・フィルタを右クリックし、「Edit Filter」をクリックします。
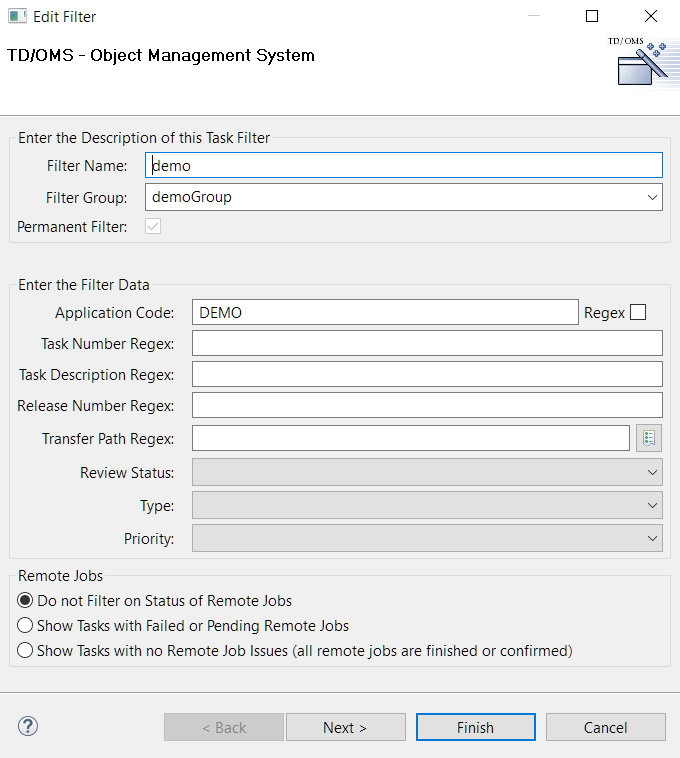
次に、「Edit Task Filter」ウィンドウが表示されます。
Edit a Request Filter
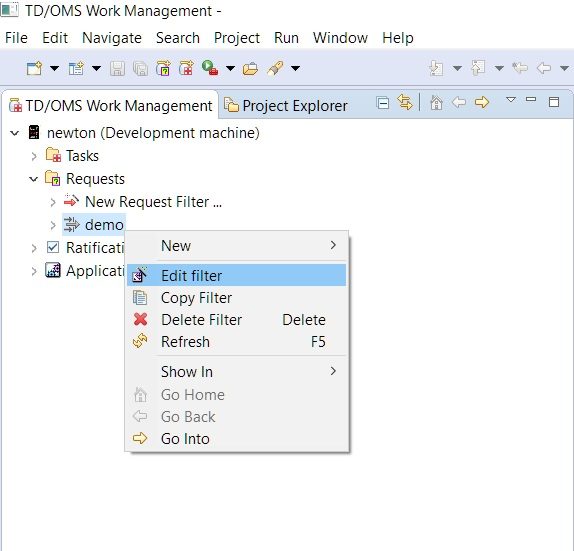
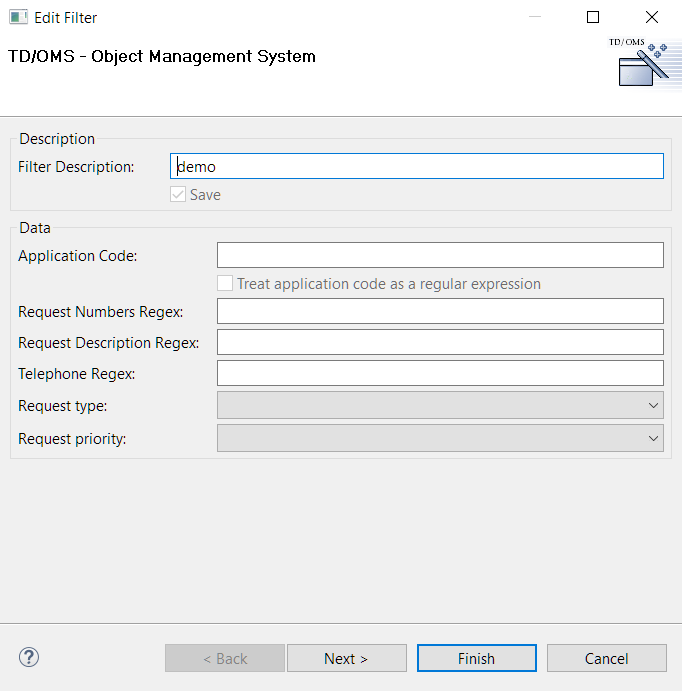
編集したいリクエスト・フィルタを右クリックし、「Edit Filter」をクリックします。
次に、「Edit Request Filter」ウィンドウが表示されます。
Edit an Application Filter
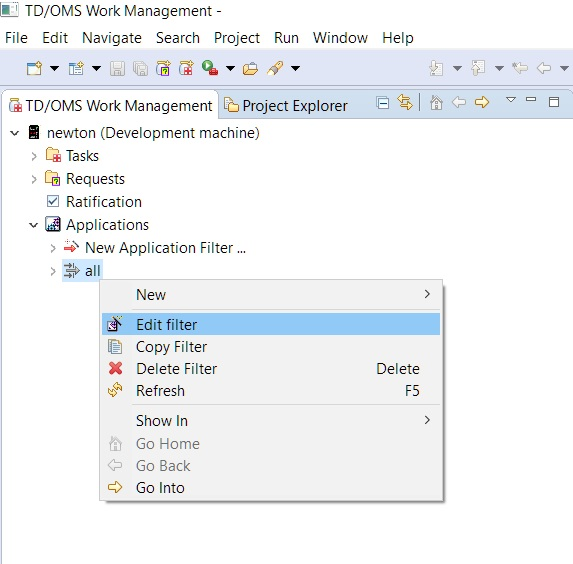
編集したいアプリケーション・フィルタを右クリックし、「Edit Filter」をクリックします。
次に、「Edit Application Filter」ウィンドウが表示されます。
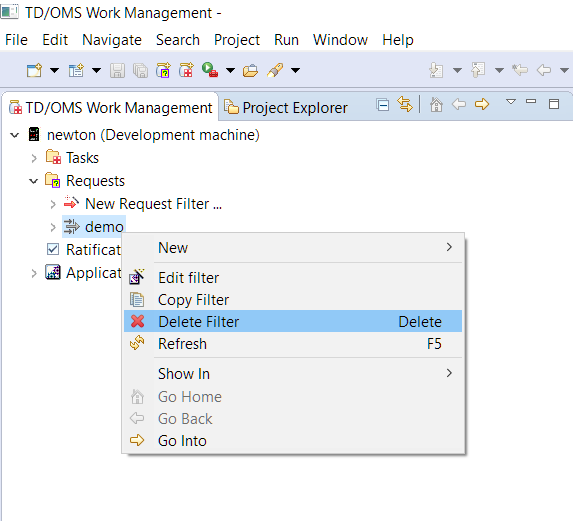
Copy a Filter
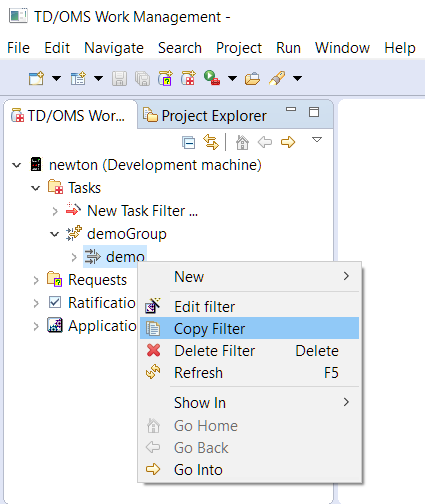
コピーしたいフィルタを右クリックし、「Copy Filter」をクリックします。
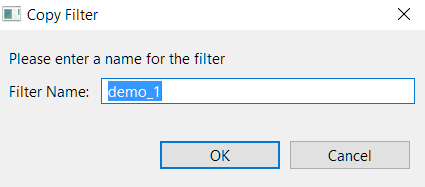
次に、「Copy Filter」ダイアログが表示され、新しくコピーして作成するフィルタの一意の名前を入力します。
Delete a Filter
削除したいフィルタを右クリックし、「Delete Filter」をクリックします。
Move Solutions
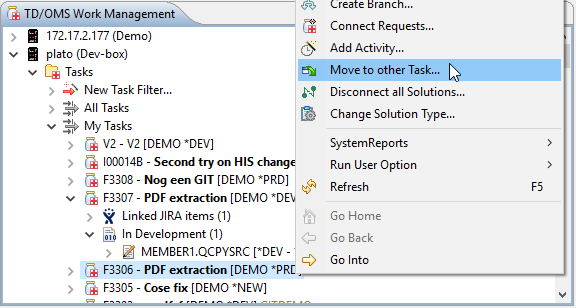
With this option you can move Solutions to another Task. You want to do this e.g. if you want to promote only parts of the Task and move the unfinished components to another Task.
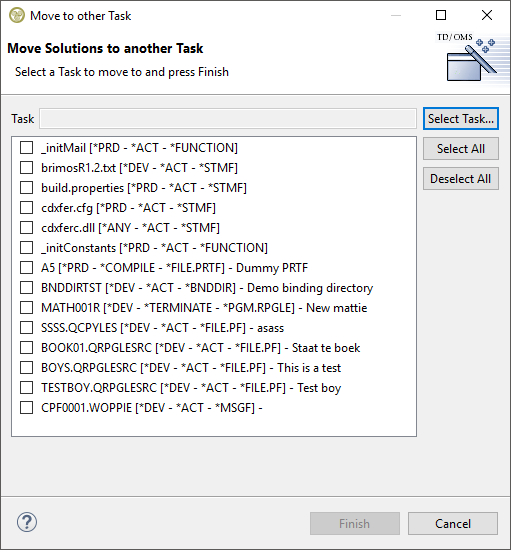
The Move Solutions action enables you to select the Solutions that should be moved to the target Task.
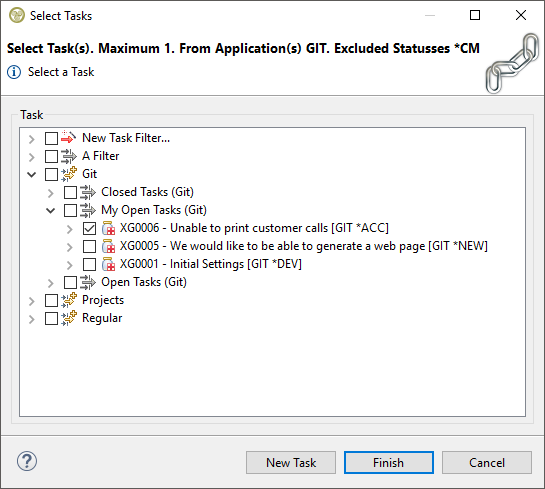
Before you may finish the wizard you have to select a target Task from the top of the screen. This will present the Task Selection Dialog. Choose the Task that is the target of the move or create a new Task on the fly.
After you press Finish, the solutions will be moved to the target Task. The move will fail if the target Task already contains this Solution.

