Translations:PRINT:PTFI:Product Installation and Update/6/ja
GUI Installation
This section describes how to install the TD/OMS graphical user interface client. The client consists of Eclipse plugins that can be installed as a standalone client (RCP) or embedded in the RDi, RTC or Eclipse clients. It is advised to close the TD/OMS workmanagement perspective and any open TD/OMS view before performing an update of a embedded installation.
TD/OMS GUI installation
TD/OMS GUIのインストール方法を選択できます。次のいずれかの方法でGUIをインストールできます。
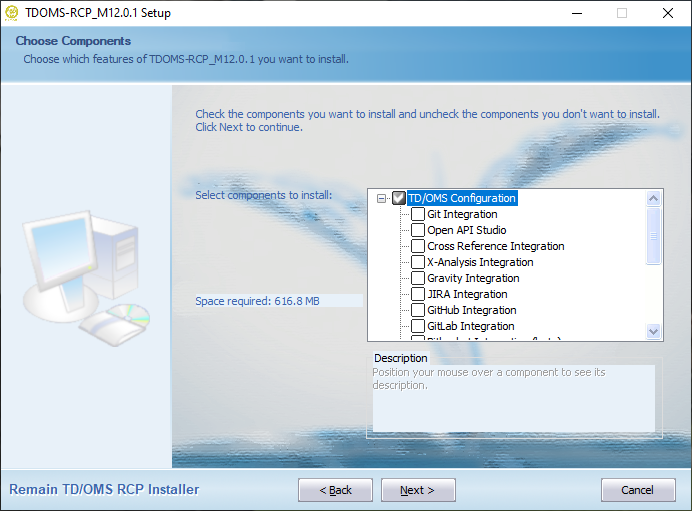
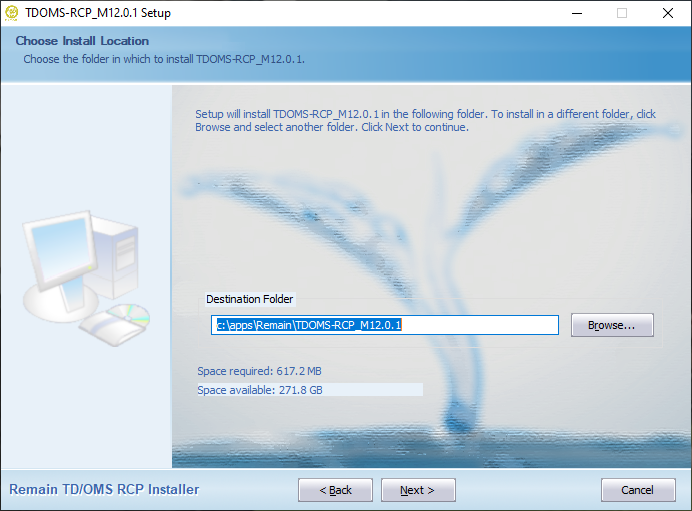
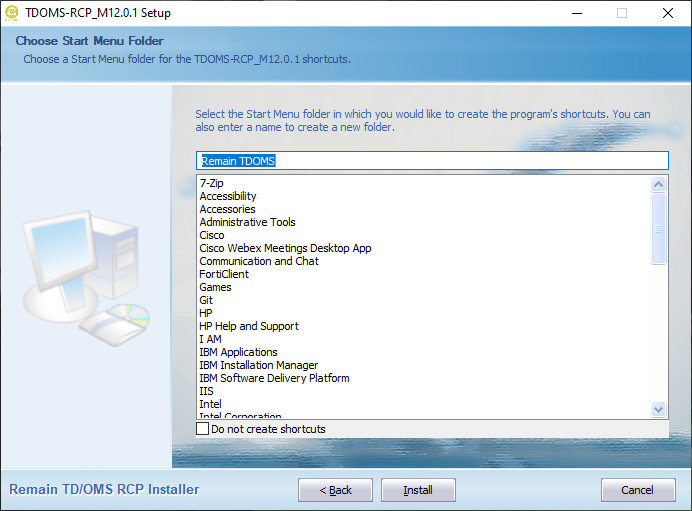
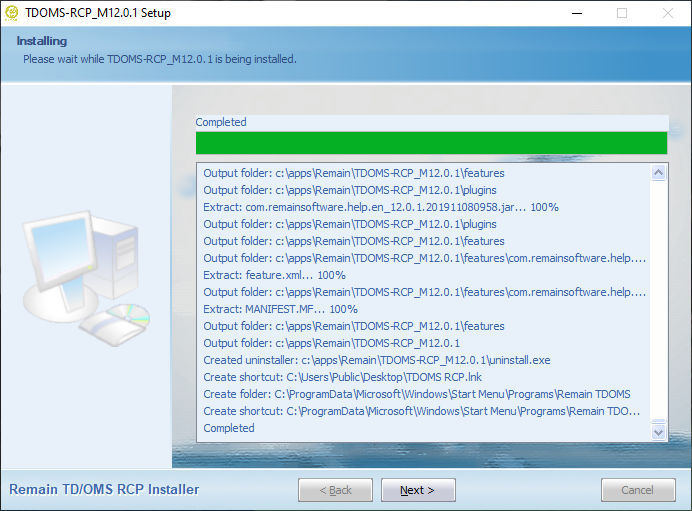
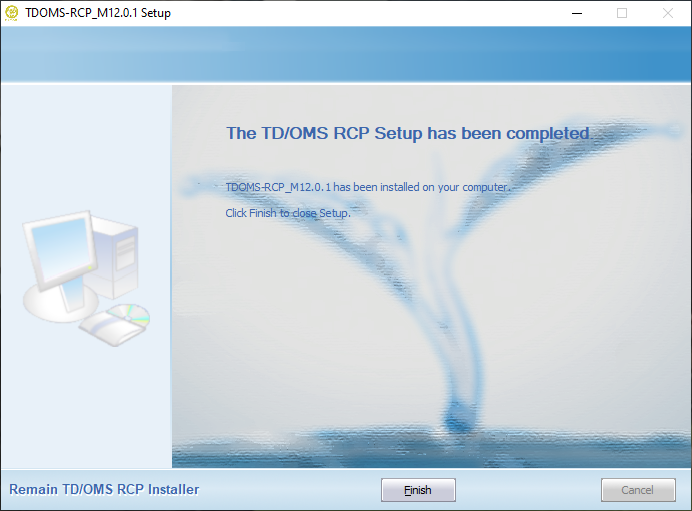
Install the TD/OMS Standalone Client
You can get the installer from our download section here. Select the Downloads button in the section of the TD/OMS version installed on your IBM i and open the folder of the relevant milestone. Look for the installer that starts with tdoms_rcp_setup_ or something similar. Once downloaded just click on the installer and follow the instructions below.
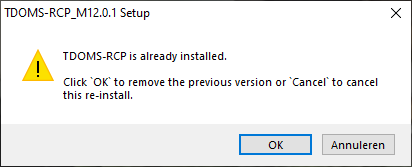
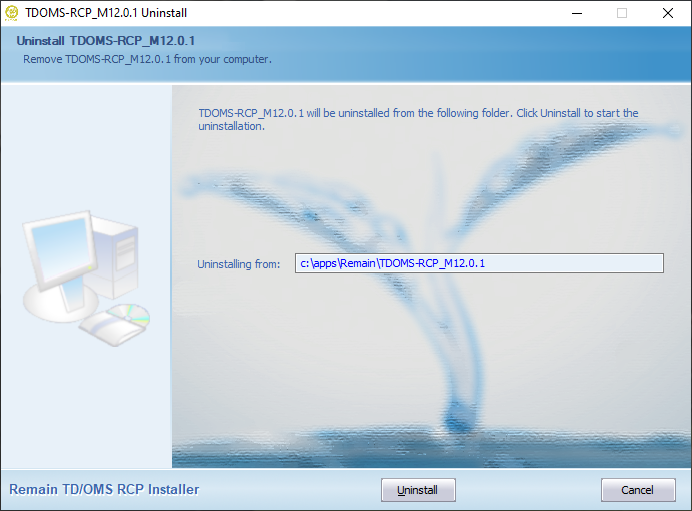
以前のインストールをお持ちの場合は、新しいソフトウェアがインストールされる前に、このインストールが自動的にコンピュータから削除されます。データは失われませんが、手動でインストールしたプラグインは、再度インストールする必要があります。
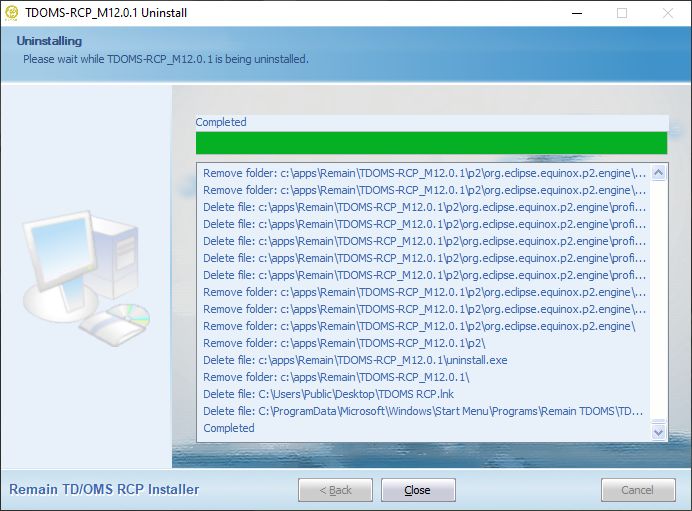
アンインストール
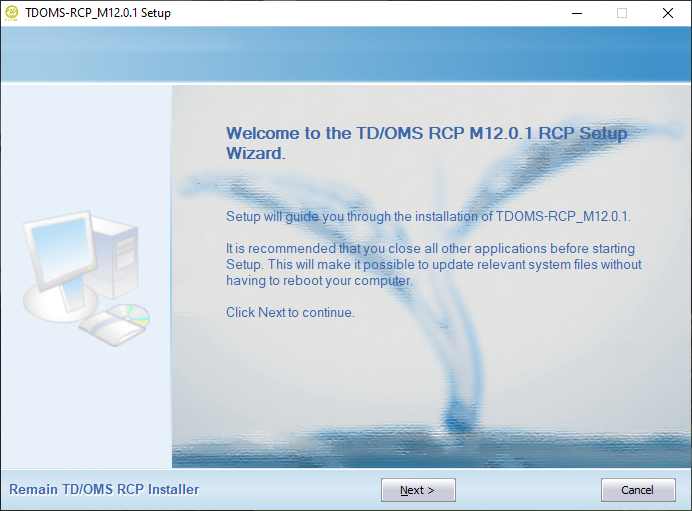
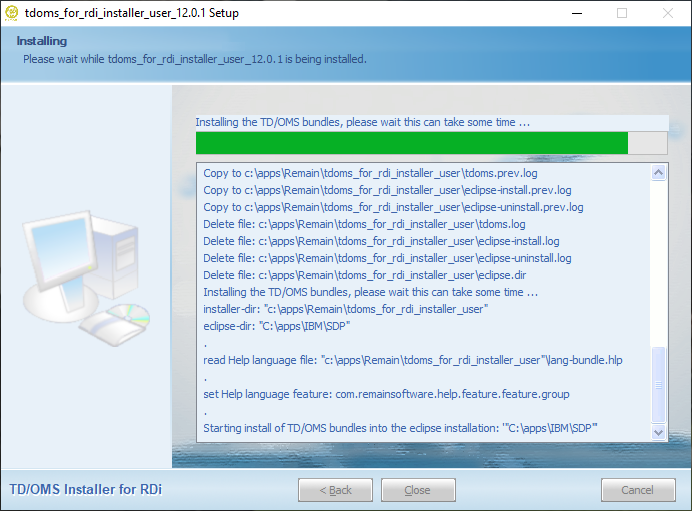
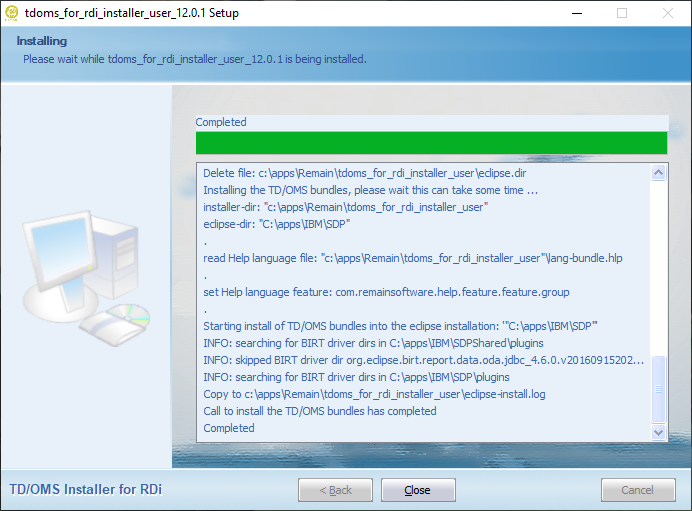
インストール
Install the TD/OMS Client inside RDi
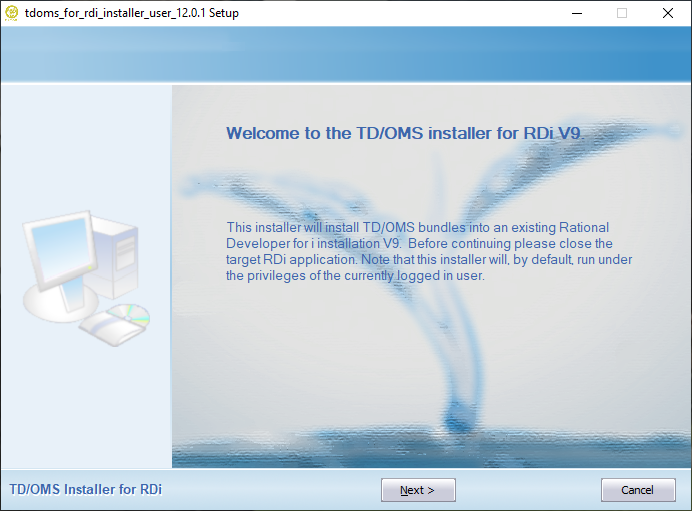
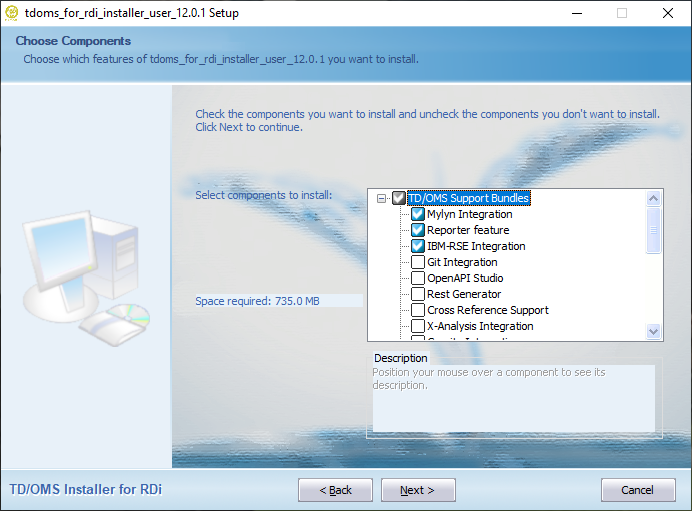
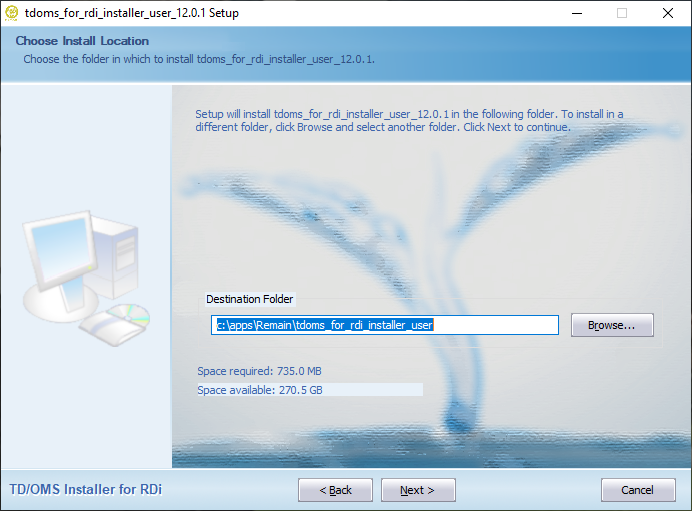
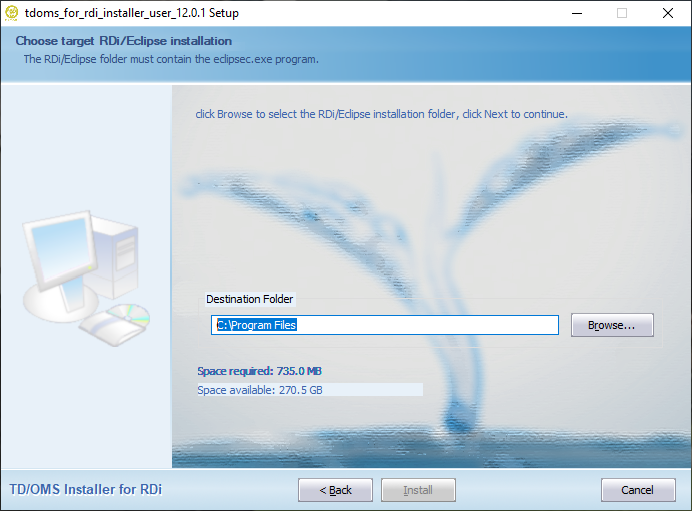
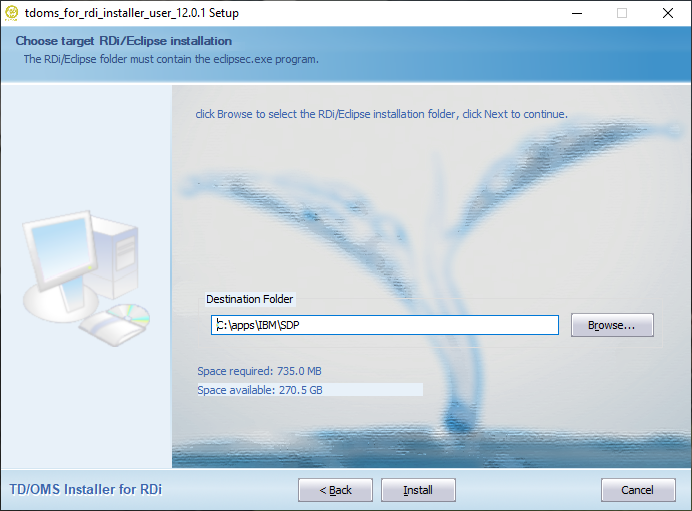
You can get the installer from our download section here. Select the Downloads button in the section of the TD/OMS version installed on your IBM i and open the folder of the relevant milestone. Look for the installer that starts with tdoms_for_rdi_installer_user_ or something similar. Once downloaded just click on the installer and follow the instructions below.
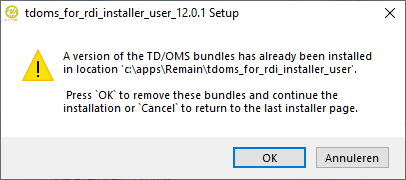
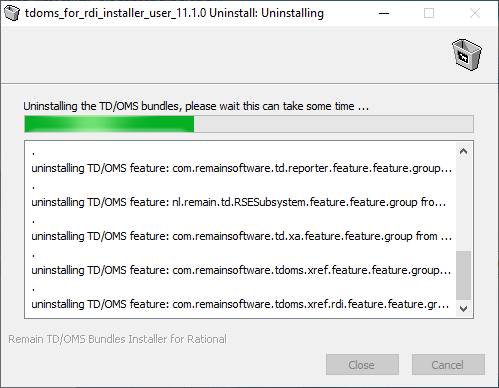
以前のインストールをお持ちの場合は、新しいソフトウェアがインストールされる前に、このインストールが自動的にコンピュータから削除されます。データは失われませんが、手動でインストールしたプラグインは、再度インストールする必要があります。
You can only install the client in ONE RDi installation.
If you have two or more installations of RDi you need to install the plugins using an update site. Please make sure that RDi is NOT running before you run the installer.
RDiにクライアントをインストール
既存のEclipseインストールにプラグインをインストール
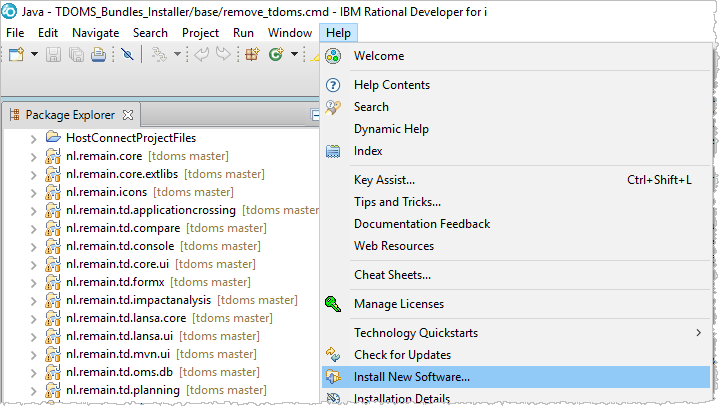
既にEclipseインストールされている場合、またはプラグインをRDiやその他のRationalツールに手動でインストールする場合は、ダウンロード・サイトからプラグイン・レポジトリをダウンロードしてください。Eclipseインストールを開始し、「Help/Install new Software ...」を選択します。表示されるページで、アーカイブ・ファイルから新しいリポジトリを作成し、インストールするオプションを選択します。
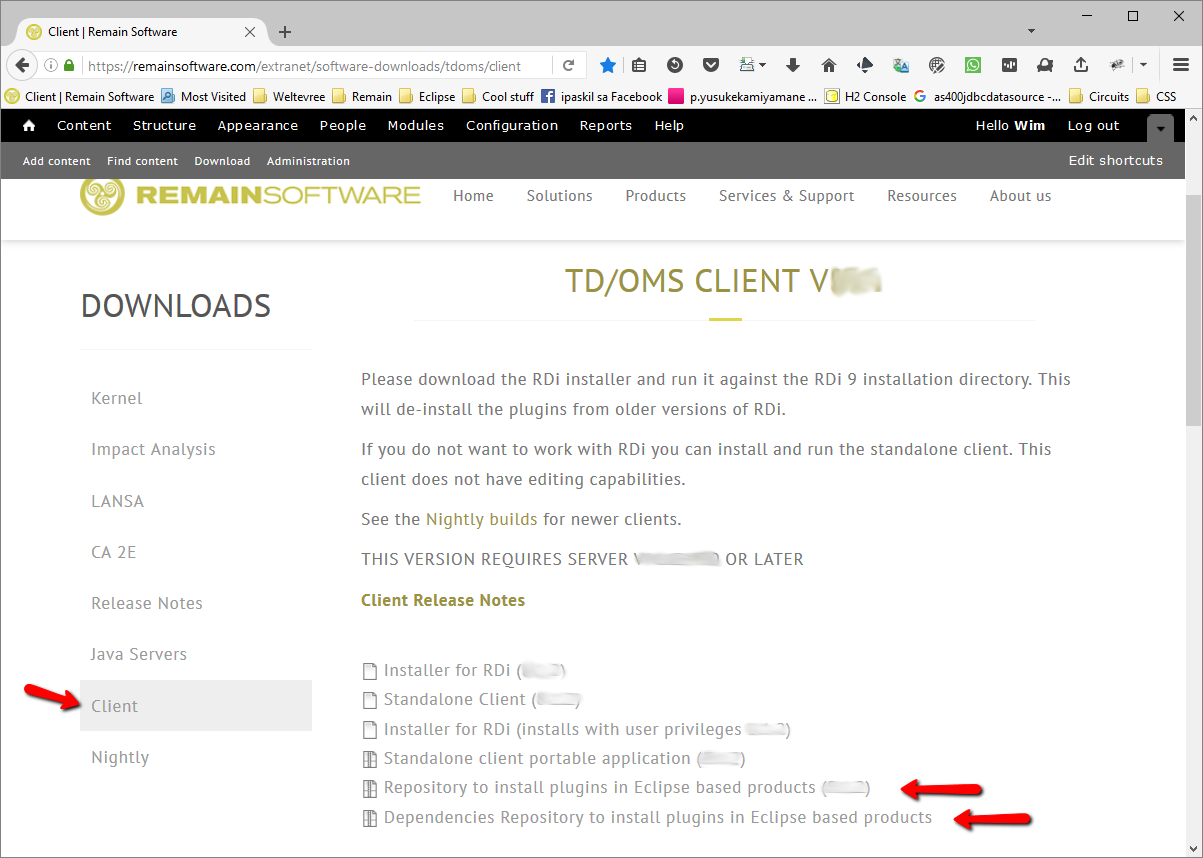
リポジトリのダウンロード
Remainダウンロード・サイトから次の二つのリポジトリをダウンロードします。
- tdoms-plugins-repo-X.X.X-YYYYMMDD-xxxx.zip
- このファイルにはTD/OMSプラグインが含まれており、これはインストール元です。
- tdoms-dependencies-repo-X.X.X-YYYYMMDD-xxxx.zip
- このファイルには、プラグインに必要な追加の依存関係が含まれます。例えば、レポート・プラグインにはBIRTフレームワークが必要です。標準的なEclipseやRDiインストールでは利用できません。
依存関係リポジトリをEclipseに追加
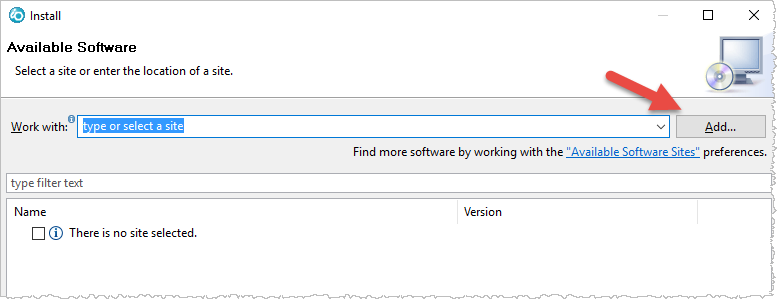
EclipseまたはRDiを起動し、HelpメニューからInstall New Software...を選択します。
次に、Add...ボタンを押して最初のzipされたリポジトリを追加します。
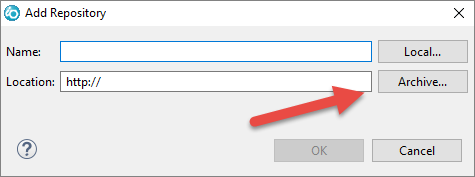
Archive...ボタンを押し、保存されたdependenciesリポジトリに移動します。
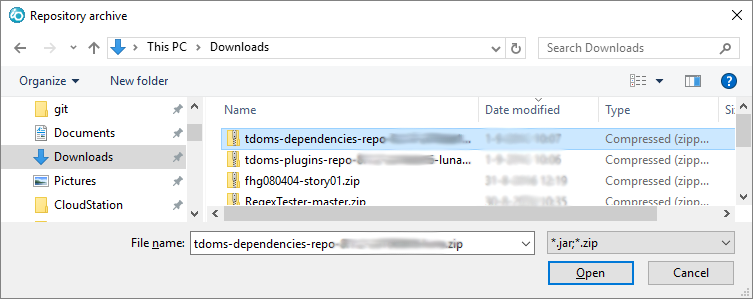
ダウンロードした依存関係のzipファイルを選択します。
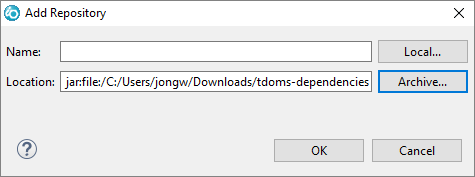
Okを押してください。
Eclipseにプラグイン・リポジトリを追加
次に、Add...ボタンをもう一度押して、ソフトウェアが入っている次のzipされたリポジトリを追加します。
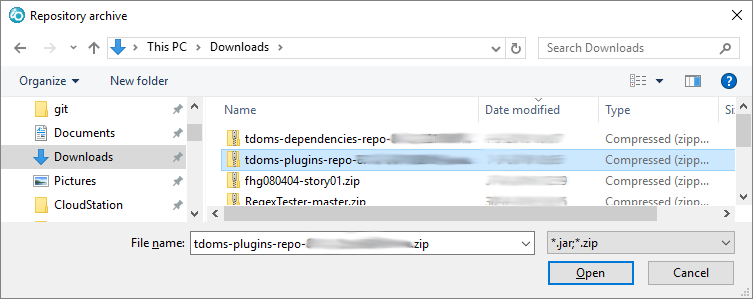
Archive...ボタンを押し、保存されたpluginsリポジトリに移動します。
ファイルに移動します。
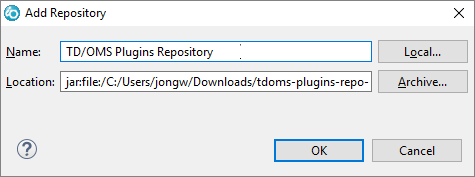
必要に応じて名前を入力し、Okを押してください。
ソフトウェアのインストール
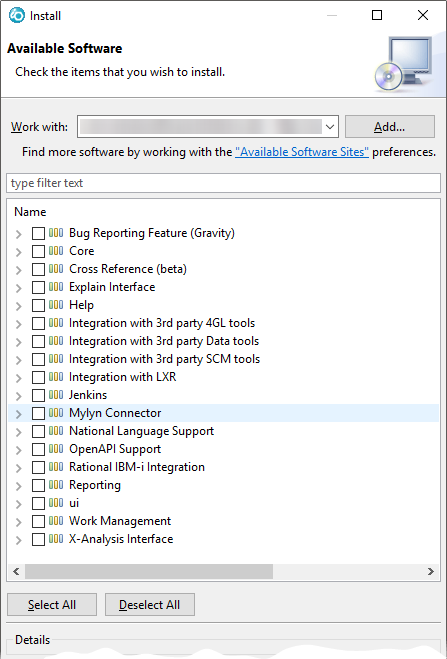
Available Softwareページで、ドロップダウン・ボックスからプラグイン・リポジトリを選択します。リストには、インストール可能なユニットが表示されます。リストから必要なコンポーネントを選択し、Next >を押します。
- バグ報告機能(Gravity)
- ヘルプデスクに問題を報告することを有効にします。この機能をインストールしない場合、http://helpdesk.remainsoftware.com のwebインタフェースから問題を提出できます。
- Core
- Contains the TD/OMS Core bundles. This may always be checked.
- Explain
- Contains the integration with PKS eXplain
- Help
- Expand this item to select the help in your favorite language.
- Integration with 4GL tools
- Expand this item to select the 4GL integration you want.
- Integration with 3rd Party data tools
- Expand this item to select the data tool integration you want.
- Integration with 3rd Party SCM tools
- Expand this item to select the SCM tool integration you want.
- Integration with Rest Generator
- Expand this item to select the level of REST Integration. Warning, do not install RestGen RSE into the RDi.
- Jenkins
- Expand this to install Jenkins support.
- Mylynコネクタ
- Mylynタスク・リストにリクエストとタスクのインポートを有効にします。このインタフェースは、Javaや他のEclipseベースの開発をgitやSubversionのようなソース・リポジトリと統合するために使用されます。
- National Language Support
- Expand this to select the installation language (English is default)
- OpenAPI Support
- Select this to install the OpenAPI V3 (Swagger/OAS3) Editor support.
- Rational IBM i統合
- RDiならびにRSEとのインタフェースを有効にします。これはRDi内にのみインストールできます。IBMのリモート・システム・エクスプローターとのTD/OMS統合。RSE拡張として基本的なTD/OMS作業管理機能をサポートします。
- UI (Modeled User Interface)
- Contains the modeled UI (will be included automatically when needed)
- 作業管理
- 必須。これはメインのTD/OMSナビゲーションGUIです。
- X-Analysisインタフェース
- TD/OMSとX-Analysis間のインタフェースを提供します。X-Analysisバージョン11以上が最初にインストールされた必要があります。
必要なモジュールを選択したら、ウィザードの指示に従います。プラグインは、クライアントを再起動した後で使用できます。
ソフトウェアの更新
新しいソフトウェアが利用可能になると、ここで説明するプロセスを繰り返すことができます。前のイメージの「Available Software Sites」リンクをクリックすると、古いリポジトリを削除できるダイアログが表示されます。
既存製品でのヘッドレス・インストール
ヘッドレスまたはサイレント・インストールは、ユーザー・インタフェースなしで実行できるインストールです。これはdevopまたはシステム管理者にとって理想的なツールになります。
次の場合にヘッドレス・インストールを使用します。
- TD/OMS GUIコンポーネントのインストールをスクリプト化したい。
- 一度に多くのクライアントを管理する必要があります。
- インストールと更新プロセスを自動化したい。
前提条件
ヘッドレス・インストールでは、ターゲット製品を既に用意しておく必要があります。このターゲット製品は、Eclipse IDEまたはIBM Rational Developer for iのようなEclipseベースのインストールであればどれでも構いません。
In some situations it may be required to have 3rd party bundles already installed in the target environment. This is the case for example with our X-Analysis integration. This integration requires the availability of the Fresche X-Analysis product already installed in the target Eclipse installation.
We have 2 types of unattended installation procedures. An unattended install can be done by using the Eclipse P2 director or by using the silent install option available in our RDi installers.
Note that the RDi installers can also be used for any non RDi Eclipse installation. The only limitation here is that you cannot install the RSE (Remote Systems Explorer) integration in a standard or SDK Eclipse installation. Depending on the target Eclipse installation, use either the RDi 9.6 or RDi 9.8 unattended install procedure. The RDi 9.6 installer supports Eclipse installations requiring Java 8 runtime (for example Eclipse Neon), the RDi 9.8 installer expects the Eclipse installation to be supported by at least the Java 11 runtime (as of Eclipse 4.19).
Using the silent option available in the RDi installer is the most straight forward option to use and the most easily applied. Using the Eclipse P2 director will be covered here but should be reserved for installation requirements not covered by the silent installer option. Also note that P2 director does not automatically uninstall previously installed TD/OMS client features. This is something that will have to be taken care of before installing a new set of TD/OMS client features.
Unattended install with the silent option
The following TD/OMS client installers support the silent option:
tdoms_for_rdi96_installer_user_?version-date?.exe
tdoms_for_rdi98_installer_user_?version-date?.exe
Note that the installers are specific for there intended target environment, for example you cannot use the tdoms_for_rdi98_installer_user_?version-date?.exe to install the TD/OMS client in an RDi 9.6 installation, so make sure you select the correct installer for your situation. The latest installers can be found on our web site
The installers also take care of uninstalling a previously installed version of the TD/OMS client. An automatic uninstall will only take place if the installer software directory is put in the same location of a previously installed TD/OMS client installer (the installer must be able to find the uninstall executable).
Except where documented the installers utilize the same silent mechanism and options. An unattended install can be run by executing the installer executable with at least the /S parameter followed by the /ECLIPSE parameter and 1 or more optional parameters. Aside the parameters used for the choice of integrations there are parameters used to override installer/installation locations and the runtime TD/OMS client configuration directory:
/ECLIPSE - Mandatory parameter to set the directory of the target Eclipse/RDi installation.
/D - Optional parameter to set the directory to be used for the installer software.
/USERDIR - Optional parameter to set an overriding location of the TD/OMS client runtime configuration directory.
For example to run an unintended install of the TD/OMS client for an RDi 9.6 installation the following can be executed:
tdoms_for_rdi96_installer_user_?version_date?.exe /S /ECLIPSE="c:\Program Files\IBM\SDP" /USERDIR="x:\users\tom\tdoms" /D=c:\apps\remain\tdoms_client_installer"
This will install a default TD/OMS client and if applicable will have de-installed the previously installed TD/OMS client. As per /D directive, the installer software will be installed in the directory "c:\apps\remain\tdoms_client_installer" and optionally replacing any existing software in that directory.
List of available parameters
By enabling any of the available installer options the corresponding integration or TD/OMS functionality will be installed. Except for the HELP an option is enabled by setting it to YES, for example 'RSE=YES'. Note that the YES value is expected to be all capitol letters.
- /S - Mandatory parameter required to enable the installers silent mode.
- /ECLIPSE - Mandatory parameter to set the directory of the target Eclipse installation.
- /D - Optional parameter to set the directory to be used for the TD/OMS client installer software.
- /USERDIR - Overriding location for the TD/OMS client configuration, by default this is the user's home directory as determined by the operating system.
- /HELP=JA - Apply Japanese help to replace the default installed English help.
- /AZUREDEV=YES - Azure integration, only to be used on RDi 9.8.
- /BITBUCKET=YES - Bitbucket Cloud integration.
- /BITBUCKETSERVER=YES - Bitbucket Server integration (Bitbucket on premise).
- /CONNECTWISE=YES - ConnectWise integration.
- /DATASTAGE=YES - DataStage integration.
- /GIT=YES - Git integration.
- /GITHUB=YES - Github integration.
- /GITLAB=YES - GitLab integration.
- /GRAVITY=YES - Gravity integration.
- /JENKINS=YES - Jenkins integration, default for RDi 9.6, available for RDi 9.8.
- /JIRA=YES - Jira integration.
- /LANSA=YES - LANSA integration.
- /MYLYN=YES - Mylyn integration.
- /NLS=YES - Add National Language.
- /OAS3=YES - Add Remain API Studio, requires a license.
- /OTRS=YES - OTRS integration.
- /REPORTER=YES - Add TD/OMS Issue Reporter.
- /RESTGEN=YES - Add the TD/OMS Rest Generator.
- /RMTDISTR=YES - Add Remote Distribution support.
- /RSE=YES - Integration with the IBM Remote Systems Explorer, only to be used on RDi installations.
- /SERVICEDESK=YES - ServiceDesk integration.
- /SERVICENOW=YES - ServiceNow integration.
- /SONARQUBE=YES - SonarQube integration.
- /XA=YES - X-Analysis integration.
- /XREF=YES - Xref integration.
- /ZENDESK=YES - ZenDesk integration.
The following example will install the TD/OMS client in an RDi 9.6 installation located in the directory "C:\Program Files\IBM\SDP". As only integration the RSE will be installed and the TD/OMS client installer will be installed in the default location "C:\Apps\Remain\tdoms_for_rdi_installer".
tdoms_for_rdi96_installer_user_?version-date?.exe /S /ECLIPSE="C:\Program Files\IBM\SDP" /JIRA=YES /XREF=YES
The following example will install the TD/OMS client in an RDi 9.8 installation located in the directory "C:\Apps\IBM Rational Developer for i". The TD/OMS client installer will be installed in the default location "C:\Apps\Remain\tdoms_for_rdi98_installer" and RSE will be the only installed TD/OMS client integration.
tdoms_for_rdi98_installer_user_?version-date?.exe /S /ECLIPSE="C:\Apps\IBM Rational Developer for i" /JIRA=YES /XREF=YES
To start an unattended installation so that it will run as a background process you can do the following from a Windows batch file (for example):
start "" /WAIT tdoms_for_rdi96_installer_user_?version-date?.exe /S /ECLIPSE="c:\Program Files\IBM\SDP" /RSE=YES /SERVICENOW=YES /XA=YES
Installation results
In the case of an installation failure, the result of an unattended (or attended) install will have been logged in the tdoms.log and eclipse.log. Both files are located in the root of the installer directory. The tdoms.log contains the specific RDi/Eclipse install actions and results. The eclipse.log contains the output of the RDi/Eclipse application for the time the unattended install is running.
シナリオ1:基本プラグインをRDiにインストール
このシナリオでは、以下のことを仮定します。
- C:\Program Files\IBM\SDP_95にRDiをインストールしました。
- c:\apps\plugins.zipにプラグイン・リポジトリをダウンロードしました。
- c:\apps\deps_luna.zipの依存関係をダウンロードしました。
以下のコマンドを実行します。
"C:\Program Files\IBM\SDP_95\eclipsec.exe"
    -application org.eclipse.equinox.p2.director
    -noSplash
    -repository jar:file:/c:/apps/deps_luna.zip!/,jar:file:/c:/apps/plugins.zip!/
    -installIU com.remainsoftware.core.feature.feature.group
    -installIU nl.remain.td.workmanagement.feature.feature.group
    -installIU com.remainsoftware.help.feature.feature.group
    -installIU com.remainsoftware.net.dialog.feature.feature.group
    -installIU com.remainsoftware.td.distribution.remotelocation.feature.feature.group
    -installIU com.remainsoftware.planning.feature.feature.group
    -installIU com.remainsoftware.impactanalysis.feature.feature.group
    -installIU com.remainsoftware.reporting.feature.feature.group
    -installIU nl.remain.td.team.feature.feature.group
    >> c:\apps\tdoms.log 2>&1
コマンドの結果は、さらに検討するためにログ・ファイルにパイプされます。ここでは、windowsシェル・スクリプトの完全な例を参照してください。
上記のサンプル・スクリプトは、行継続文字(DOSバッチではキャレット^を使用できる)無しで表示されるように変更する必要があることに注意してください。
インストールする前にまず機能をアンインストールするには、-uninstallIUを使用できます。
A minimal TD/OMS client installation should contain the following installation units: nl.remain.td.workmanagement.feature.feature.group, com.remainsoftware.core.feature.feature.group, com.remainsoftware.help.feature.feature.group and nl.remain.td.team.feature.feature.group
追加機能
オプションのインタフェースの追加機能コードは次のとおりです。これらのオプションは、機能するために追加のライセンスが必要です。
- CA/Plex
- com.remainsoftware.plex.feature.feature.group
- DataStage
- com.remainsoftware.datastage.command.feature.feature.group
- Gravity Issue Reporter
- com.remainsoftware.td.reporter.feature.feature.group
- Jira
- com.remainsoftware.jira.connector.feature.feature.group
- LANSA
- com.remainsoftware.lansa.feature.feature.group
- Maven
- com.remainsoftware.td.maven.feature.feature.group
- Mylyn
- com.remainsoftware.mylyn.connector.feature.feature.group
- RDi Remote System Explorer
- nl.remain.td.RSESubsystem.feature.feature.group
- Rational Team Concert
- com.remainsoftware.td.rtc.workitem.feature.feature.group
- X-Analysis
- com.remainsoftware.td.xa.feature.feature.group
Optional TD/OMS features
- AiChat
- com.remainsoftware.chat.feature.feature.group
- AzureDevops
- com.remainsoftware.td.tracker.azuredevops.feature.feature.group, only to be installed in RDi 9.8 or Eclipse equivalent
- ConnectWise
- com.remainsoftware.td.tracker.connectwise.feature.feature.group
- Bitbucket-Cloud
- com.remainsoftware.td.tracker.bitbucket.feature.feature.group
- Bitbucket-On-Premise
- com.remainsoftware.td.tracker.bitbucket.server.feature.feature.group,
- BIRT-Reporting
- com.remainsoftware.reporting.feature.feature.group, only to be installed in RDi 9.6 or Eclipse equivalent
- DataStage
- com.remainsoftware.datastage.command.feature.feature.group
- Git
- com.remainsoftware.td.git.feature.feature.group
- Github
- com.remainsoftware.td.tracker.github.feature.feature.group
- GitLab
- com.remainsoftware.td.tracker.gitlab.feature.feature.group
- Gravity
- com.remainsoftware.td.tracker.gravity.feature.feature.group
- Help-Japanese
- com.remainsoftware.help.ja.feature.feature.group
- Impact-Analysis
- com.remainsoftware.impactanalysis.feature.feature.group
- Issue-Reporter
- com.remainsoftware.td.reporter.feature.feature.group
- Jira
- com.remainsoftware.td.tracker.jira.feature.feature.group
- Jenkins
- com.remainsoftware.jenkins.feature.feature.group
- LANSA
- com.remainsoftware.lansa.feature.feature.group
- Mylyn
- com.remainsoftware.mylyn.connector.feature.feature.group
- Maven
- com.remainsoftware.td.maven.feature.feature.group
- Mylyn
- com.remainsoftware.mylyn.connector.feature.feature.group
- Net-Dialog
- com.remainsoftware.net.dialog.feature.feature.group
- NLS-French
- com.remainsoftware.tdoms.nls.fr.feature.feature.group,
- NLS-German
- com.remainsoftware.tdoms.nls.de.feature.feature.group
- OTRS
- com.remainsoftware.td.tracker.otrs.feature.feature.group
- Planning
- com.remainsoftware.planning.feature.feature.group
- Remain API Studio
- com.remainsoftware.oas3.feature.feature.group
- Remote-Location-Distribution
- com.remainsoftware.td.distribution.remotelocation.feature.feature.group
- Remote System Explorer-for-RDi
- nl.remain.td.RSESubsystem.feature.feature.group, only to be installed in RDi
- Restgen-for-RDi
- com.remainsoftware.restgen.rdi.feature.feature.group
- ServiceDesk-Plus
- com.remainsoftware.td.tracker.servicedeskplus.feature.feature.group
- ServiceNow
- com.remainsoftware.td.tracker.servicenow.feature.feature.group
- SonarQube
- com.remainsoftware.td.tracker.sonarqube.feature.feature.group
- Xref
- com.remainsoftware.tdoms.xref.feature.feature.group
- Xref-for-RDI
- com.remainsoftware.tdoms.xref.rdi.feature.feature.group, only to be installed in RDi
- X-Analysis
- com.remainsoftware.td.xa.feature.feature.group
- Zendesk
- com.remainsoftware.td.tracker.zendesk.feature.feature.group
TD/OMSスタンドアロン・クライアントのヘッドレス・インストール
TD/OMSスタンドアロン・クライアントはzipファイルとしてダウンロードできます。ポータブル・アプリケーションなので、ファイルを解凍するだけでどこにもインストールできます。
探しているファイルの構文は次のとおりです。
tdoms-rcp-x86-V.R.M-YYYYMMDD-eclipsename.zip
例えば:
tdoms-rcp-x86-8.0.3-20160509-luna.zip

