Translations:PRINT:XA:X-Analysis Interface/5/en
How do I setup the X-Analysis interface
Install the X-Analysis interface
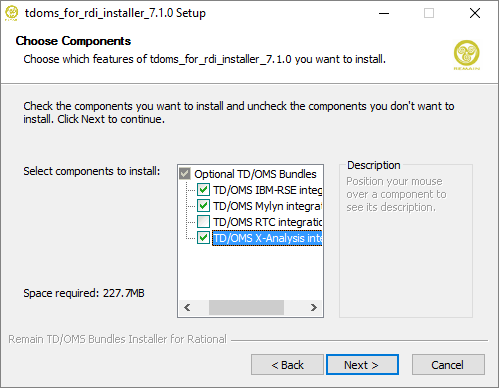
The interface is installed with the TD/OMS for RDi installer. In the installer there is a check-box that enables you to also install the interface. Please make sure to install X-Analysis first because the interface can only be installed if it can find an installation of X-Analysis.
Mapping X-Analysis to TD/OMS
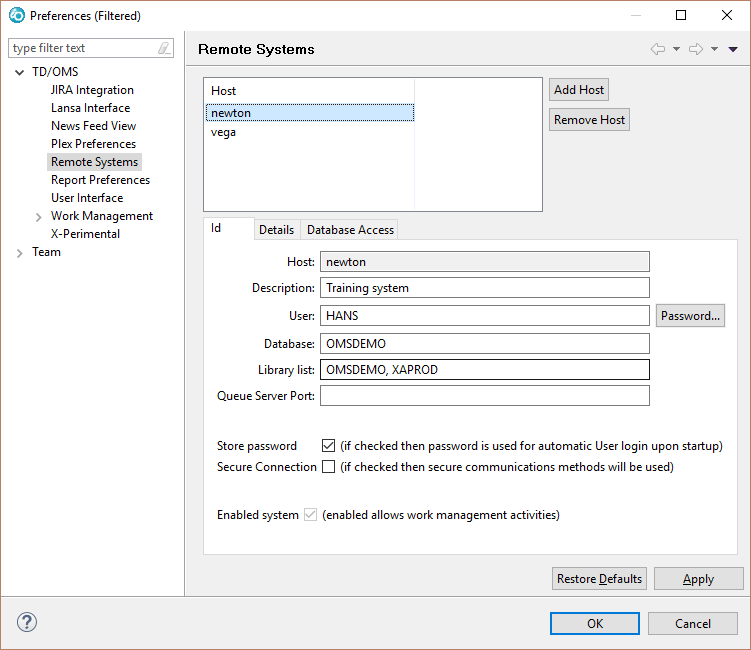
The first thing you must do is to ensure that TD/OMS knows where to find the X-Analysis commands. The main X-Analysis command is XACMD this command will ensure that the library list is correctly set before it executes the command. The XACMD command can be found in library XAPROD
This library must be part of your TD/OMS library list to ensure that your actions can be properly executed during a transfer.
Your components must both be known by TD/OMS and by X-Analysis to effectively create a bridge between the two systems. In TD/OMS your libraries reside in environments in an application. In X-Analysis all libraries are grouped into the application. The best practice is to create one X-Analysis application per TD/OMS environment.
For example if you have an application DEMO with three environments,
DEV, TST and PRD you may create three X-Analysis applications DEMODEV,
DEMOTST and DEMOPRD.

Alternatively you can create one X-Analysis application for all
environments or add these three XA applications to one overall XA application.

Consultants from Fresche and Remain software can help you determine which
setup is best for your situation.
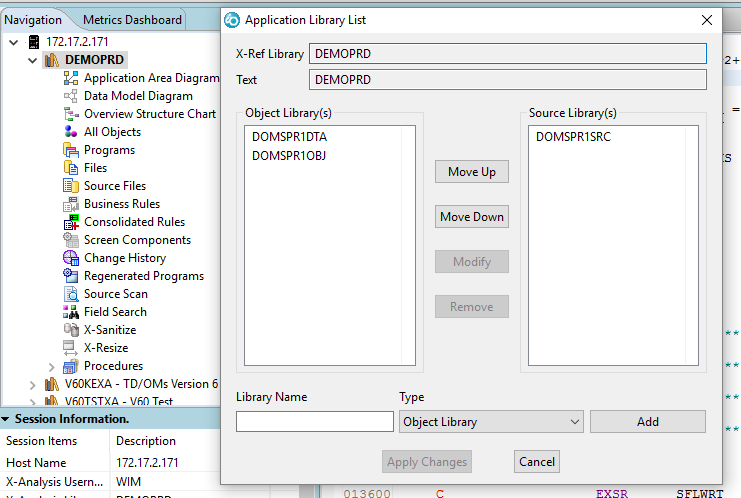
After the TD/OMS and X-Analysis applications are created you have to do an initial load for both applications. In the picture below you see an example of an X-Analysis application that maps to TD/OMS environment PRD in the DEMO application.
Creating User Defined Variables that point to the X-Analysis Application
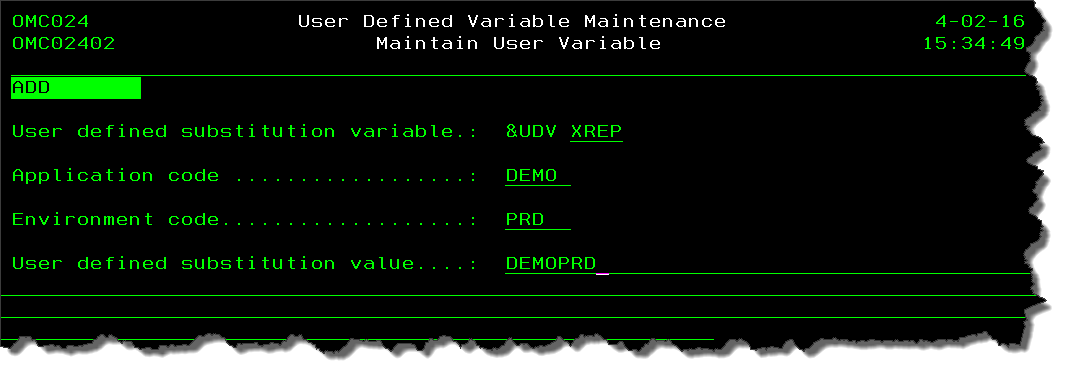
After you have created the X-Analysis application it is wise to map a user defined variable (UDV) to this X-Analysis application. To do this, start the function STRUVM on the green screen.
&UDVXREP - Map to Repository
Create a mapping from the Application and Environment to the TD/OMS application.
Make sure you use the same name throughout, for example at Remain we use the variable &UDVXREP.
&UDVXPRP - Map to Previous Repository
Create a mapping from the previous TD/OMS Application and Environment to the X-Analysis application. For example, if you have the environments DEV, TST and PRD then variable &UDVPRP maps to X-Analysis library DEMODEV for environment TST. It points to the previous environment so that also from objects can be updated after transfer.
Make sure you use the same name throughout, for example at Remain we use the variable &UDVXPRP.
Obviously TD/OMS gives you complete freedom in defining a variable naming strategy.
Install X-Analysis in the TD/OMS Rich Client
If you are not using RDi or any of the other Rational tools then you have the possibility to install X-Analysis in the TD/OMS Rich Client. For this we need the X-Analysis plugins location.
If you run the X-Analysis installer it will try to install X-Analysis in the X-Analysis runtime or in the Rational tooling (in that order). If you have none of these installed then the installer will prompt for a location. In this case specify the location of the TD/OMS installation.
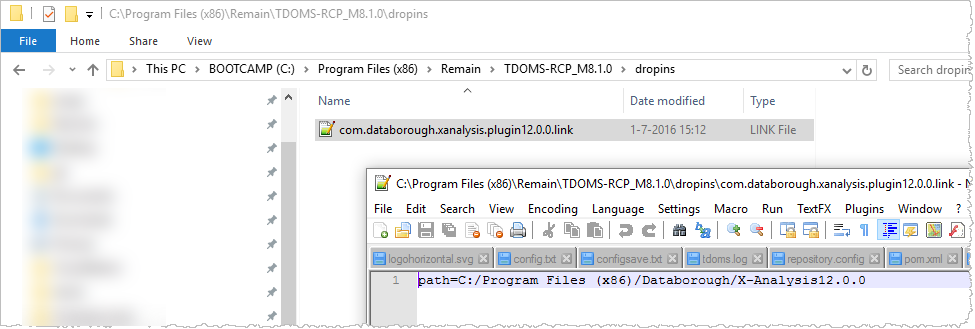
If you do have the XA Runtime or Rational tooling installed, then you need to find the link file that is in the dropins directory of these installations and copy that link file to the dropins location of the TD/OMS Client. If you can not find a link file in the dropinsdirectory than you are working with a version of X-Analysis that does not support this approach (anymore).
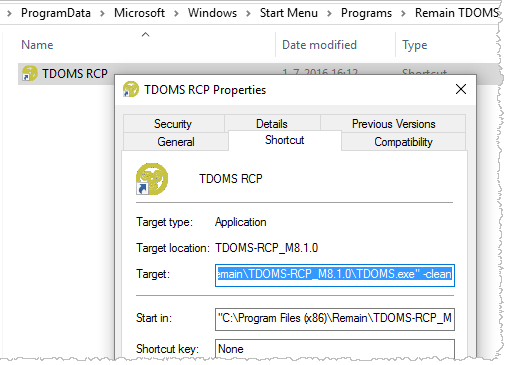
After copying the link file, make sure to run the TD/OMS client with the -clean option so that it will be picked up.
In some cases it requires that you "Run as Administrator".
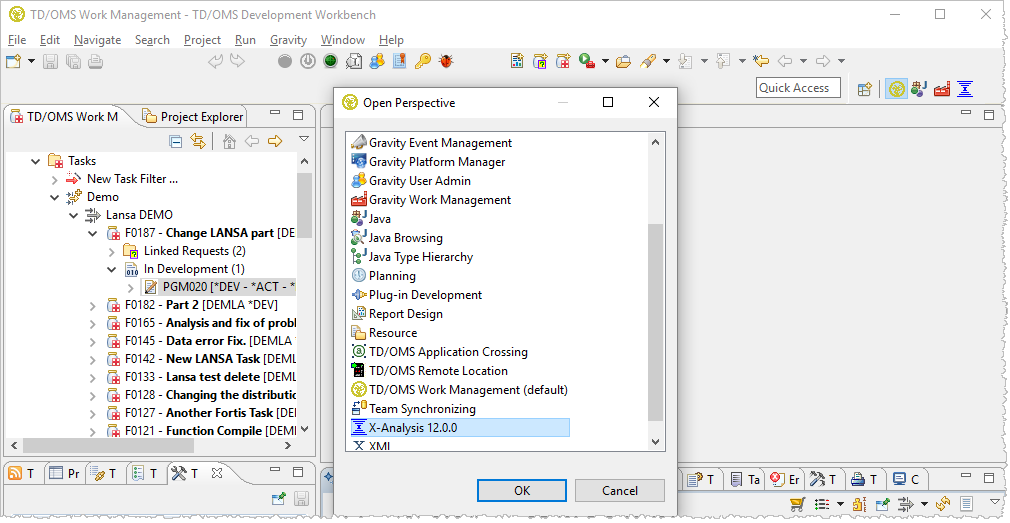
After restarting look for the X-Analysis perspective
Installing the X-Analysis interface
Now that XA and TD/OMS are installed side-by-side we still need to install the TD/OMS X-Analysis interface to glue the two together. In order for this to work you have to download the TD/OMS repositories and install the X-Analysis interface from there.
For V8.1.2 and lower, see the instructions below and only select X-Analysis Interface.
Please note that from V8.1.3 the XA interface is included in the Standalone Client.
Install the Plugins in an Existing Eclipse Installation
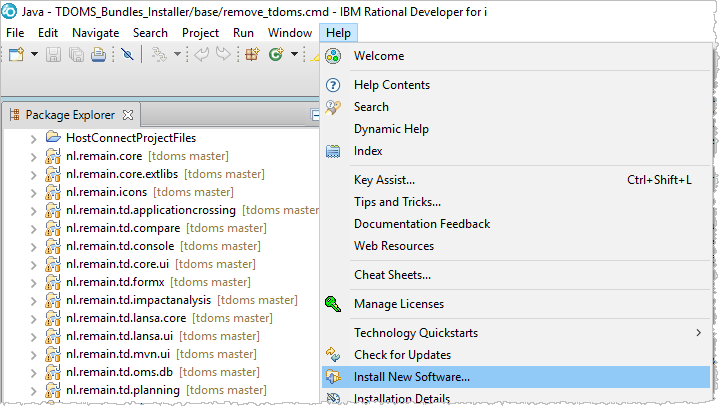
If you already have an existing Eclipse installation or if you want to install the plugins manually into RDi or any other Rational tool then download the plugins repository from the download site. Then start your Eclipse installation and select "Help/Install new Software ...". On the page that appears, create a new repository from an archive file and then select the options you want to install.
Downloading the Repositories
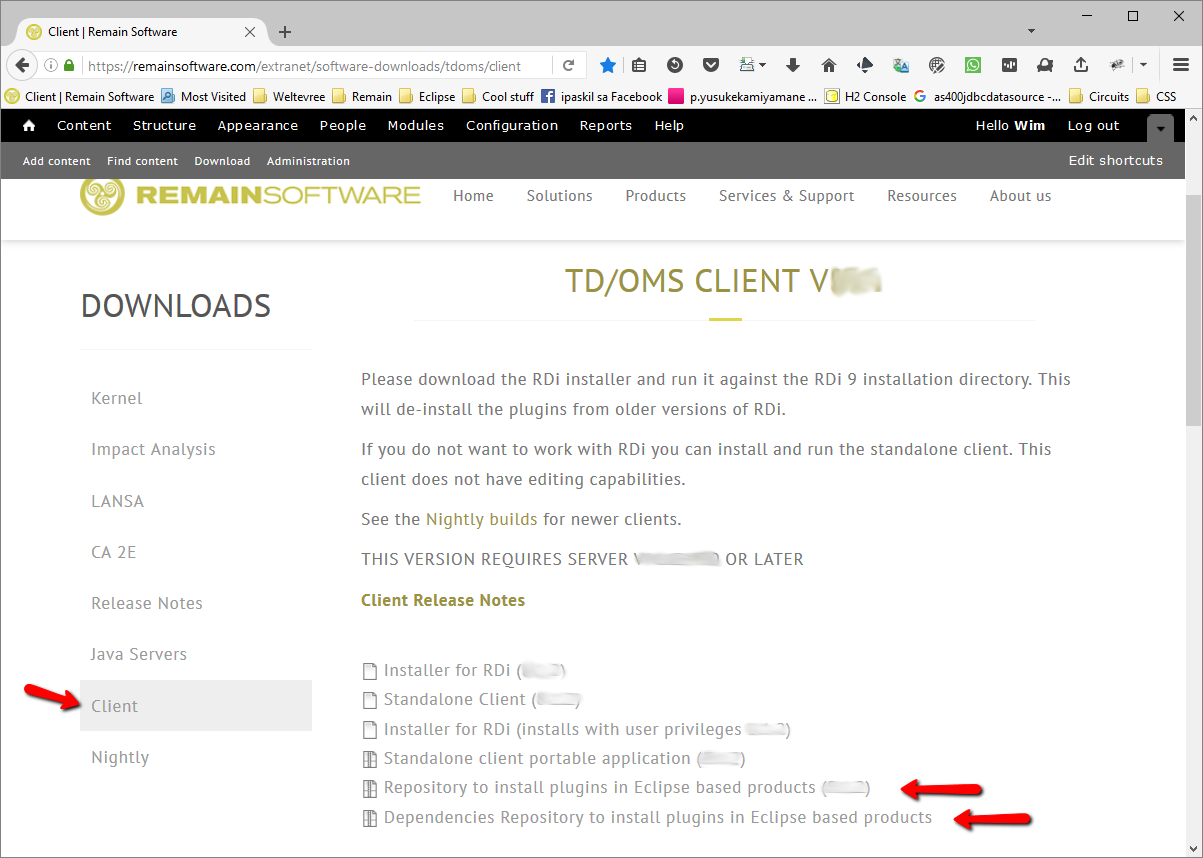
Download the following two repositories from the Remain download site:
- tdoms-plugins-repo-X.X.X-YYYYMMDD-xxxx.zip
- This file contains the TD/OMS plugins and this is where you install from.
- tdoms-dependencies-repo-X.X.X-YYYYMMDD-xxxx.zip
- This file contains additional dependencies needed by our plugins. For example, our reporting plugins require the BIRT framework which is typically not available in a standard Eclipse or RDi installation.
Adding the dependencies repository to Eclipse
Start Eclipse or RDi and choose Install New Software... from the the Help menu.
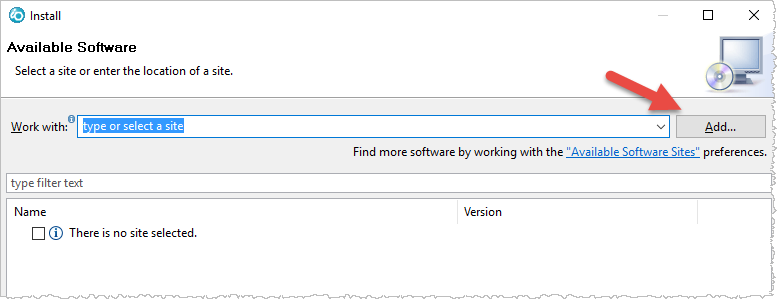
Then press the Add... button to add the first zipped repository.
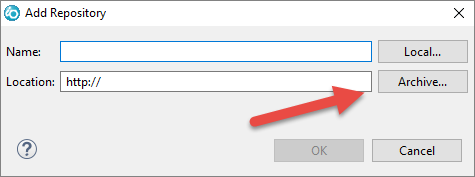
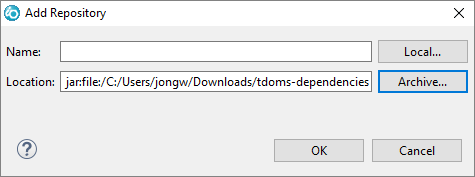
Press the Archive... button and navigate to the saved dependencies repository.
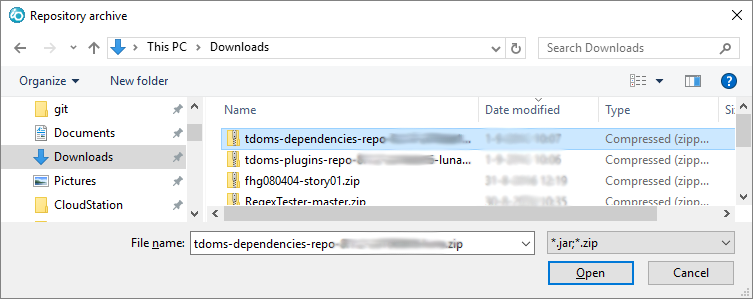
Select the downloaded dependencies zip file.
Press Ok.
Adding the plugins repository to Eclipse
Then press the Add... button again to add the next zipped repository which contains our software.
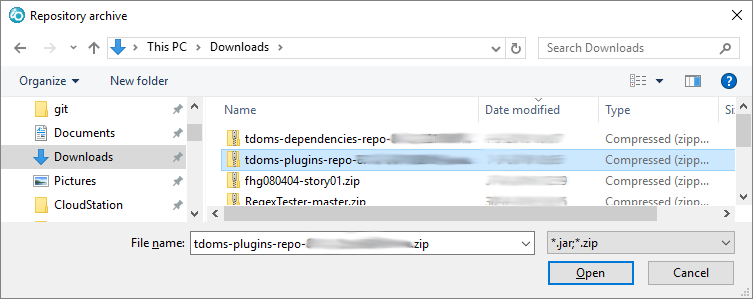
Press the Archive... button and navigate to the saved plugins repository.
Navigate to the file
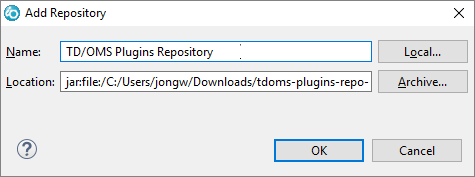
Optionally enter a name and press Ok.
Installing Software
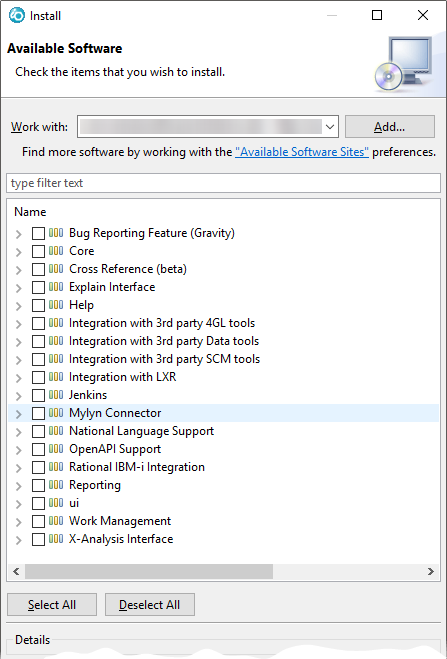
From the Available Software page, select the plugins repository from the dropdown box. The list will populate with the installable units. Select the required components from the list and press Next >.
- Bug Reporting Feature (Gravity)
- Enables you to report issues to our helpdesk. If you do not install this you can still file issues through the web interface at http://helpdesk.remainsoftware.com
- Core
- Contains the TD/OMS Core bundles. This may always be checked.
- Explain
- Contains the integration with PKS eXplain
- Help
- Expand this item to select the help in your favorite language.
- Integration with 4GL tools
- Expand this item to select the 4GL integration you want.
- Integration with 3rd Party data tools
- Expand this item to select the data tool integration you want.
- Integration with 3rd Party SCM tools
- Expand this item to select the SCM tool integration you want.
- Integration with Rest Generator
- Expand this item to select the level of REST Integration. Warning, do not install RestGen RSE into the RDi.
- Jenkins
- Expand this to install Jenkins support.
- Mylyn Connector
- Enables import of Request and Tasks into the Mylyn task list. The interface is used to integrate Java and other Eclipse based development with source repositories like git and Subversion.
- National Language Support
- Expand this to select the installation language (English is default)
- OpenAPI Support
- Select this to install the OpenAPI V3 (Swagger/OAS3) Editor support.
- Rational IBM i Integration
- Enables interfacing with RDi and RSE. This can only be installed inside RDi. TD/OMS integration with IBM's Remote System Explorer. Supports basic TD/OMS Work Management features as an RSE extension.
- Reporting
- TD/OMS Reporting function enables you to run canned reports and to create (ad-hoc) reports.
- UI (Modeled User Interface)
- Contains the modeled UI (will be included automatically when needed)
- Work Management
- REQUIRED. This is the main TD/OMS navigation GUI.
- X-Analysis Interface
- Provides the interface between TD/OMS and X-Analysis. It requires X-Analysis version 11 or higher to be installed first.
After selecting the required modules you follow the instructions of the wizard. Your plugins are available after you have restarted the client.
Updating the Software
When new software is available you can repeat the process described here. The "Available Software Sites" link in the previous image will bring you to a dialog where you can remove old repositories.

